Azure File Restore
Datto Backup for Microsoft Azure: Azure Files allows for the restoration of a protected asset directly from the dashboard.
Environment 
- Datto Backup for Microsoft Azure: Azure Files
Description
If a full asset restoration is needed because of an issue on the protected resource, follow the process outlined below.
Starting the restore 
Restore process initiation will be limited to assets that share an organization with the user account.
-
Log into the UniView platform.
-
From the left-hand menu, select Dashboard under Datto Backup Portal.
-
Navigate to the asset that needs to be restored, either by searching for the name, filtering by organization, or scrolling to it.
-
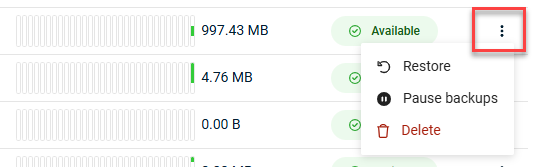
Take note of the Last 30 Days Backup column to determine the recent options to restore from.
-
Select the three-dot menu on the right hand side, then select Restore from the menu.
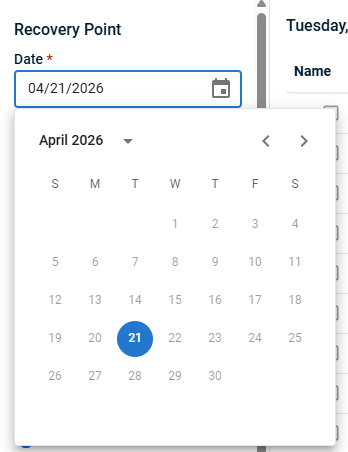
The restore window will open. If there are no recovery points available for the asset to restore from, you will receive a message stating such. Click Cancel to return to the Dashboard.
-
Select the date from the calendar selection menu.
-
Select the backup from the Time drop down menu.
-
The Restore Destination is displayed with information provided. The snapshot contents will be restored to the original file share. Files and folders that exist in both the snapshot and the original Azure file share will be handled according to the Restore Path option. Select the Restore Path from the following options:
Restore as New Folder: Create a new folder in the original file share for the restored snapshot files. The path of the folder that will be created is provided in this window.
Overwrite in Place: This option restores the files directly to the original file share. Select the option for how to handle version conflicts (when a file is attempted to be written to a location where a file of the same name exists).
- Keep Both Versions: Save the restored file with a snapshot timestamp suffixed to its name.
- Skip: Only restore missing files and folders.
- Overwrite Existing: Replace the current file with the restored version. This is the most destructive option as it overwrites files in the existing share.
-
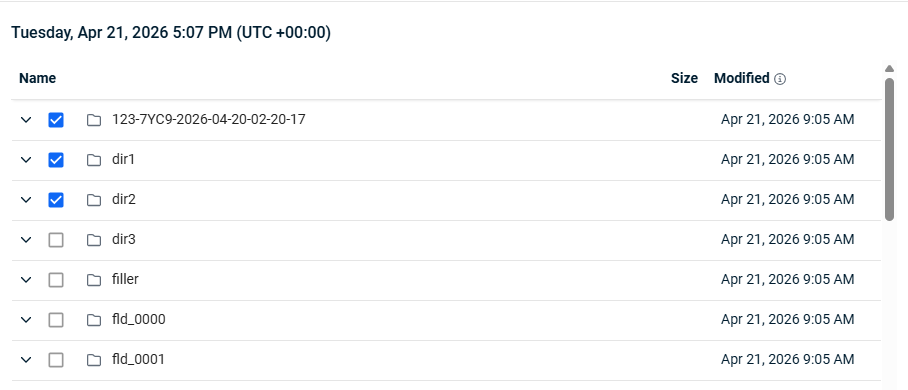
Select which files/folders to restore using the check boxes and the files tree.
-
Review the selections and click Restore to begin the restore operation.


