Instant Virtualization site-to-site VPN setup
This article discusses how to set up a site-to-site VPN on a Microsoft Azure instant virtualization.
Environment 
Datto Backup for Microsoft Azure
Description
Procedure 
Set up the VPN gateway
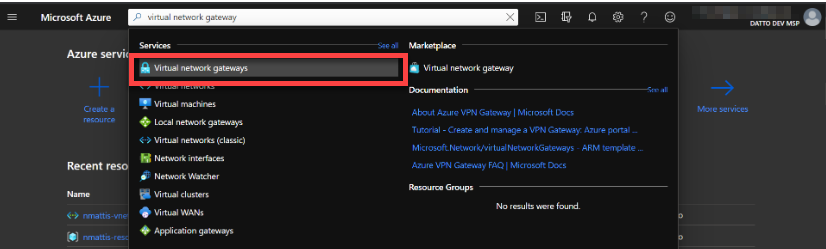
In the Azure portal, type "virtual network gateways" into the search bar and select the option when it appears in the list.
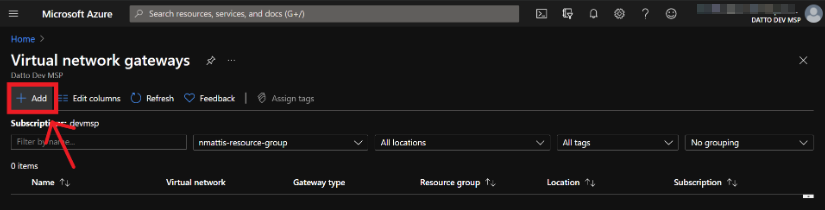
Click the Add button on the Virtual network gateways page.
You must configure the following settings as shown here:
- Gateway type: VPN
- VPN type: Route-based
- SKU: Configure according to the IPsec mode used. Basic SKU supports IKEv2 only. VpnGw1 and above SKUs support IKEv1 or IKEv2. See the 'Gateway SKUs' section of This Microsoft article for more information.
- Virtual Network: set to the VNET with which you want your Datto cloud virtualizations to communicate.
- Virtual Network Gateway: Assigned a public IP address.
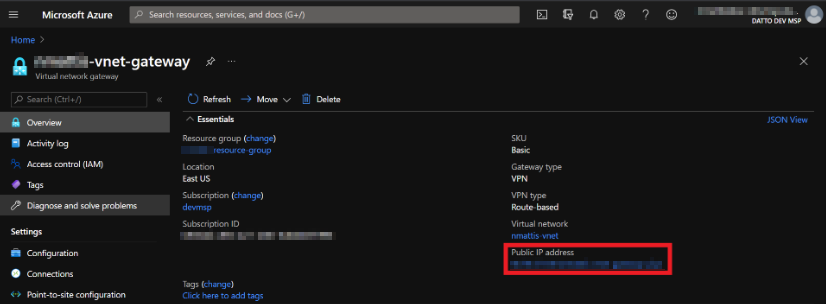
In the Azure portal, navigate to the newly-created VPN gateway's page and note its public IP address. You will need the address to configure the Datto Cloud network.
You can configure the remaining settings to best suit your environment. 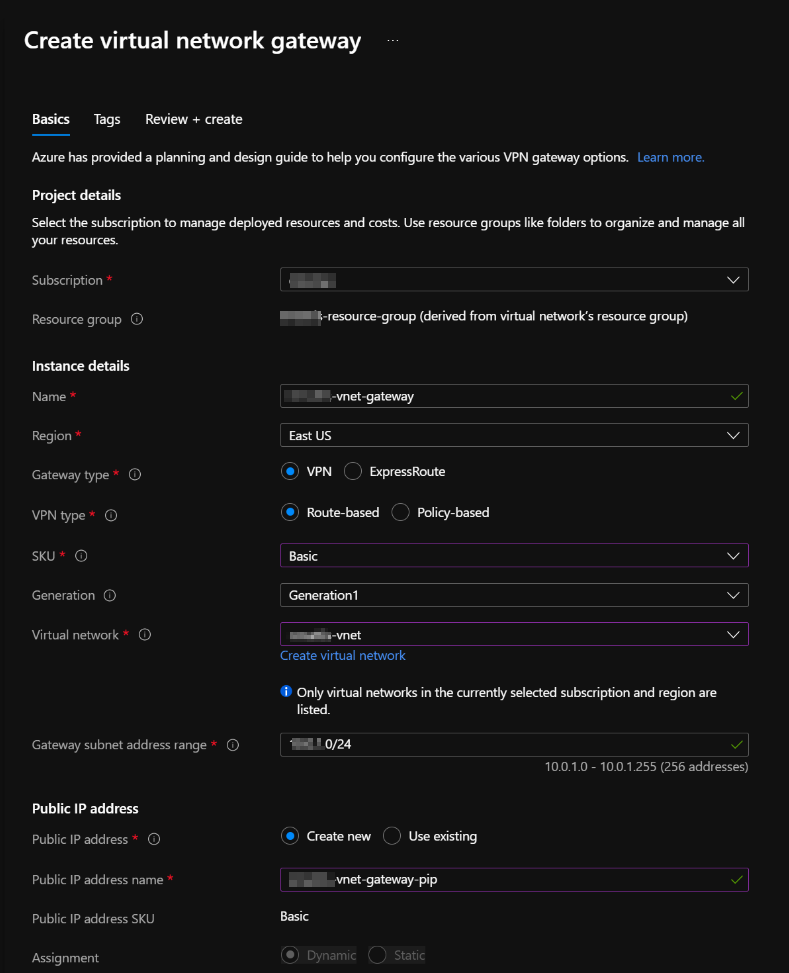
Create the new network
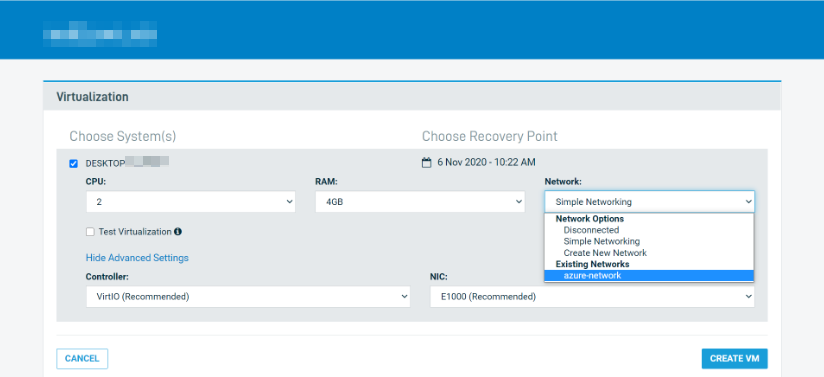
In the Datto Partner Portal, navigate to your Datto Cloud SIRIS' Recovery Launchpad page and click the MANAGE NETWORKS button on the Virtualizations card.

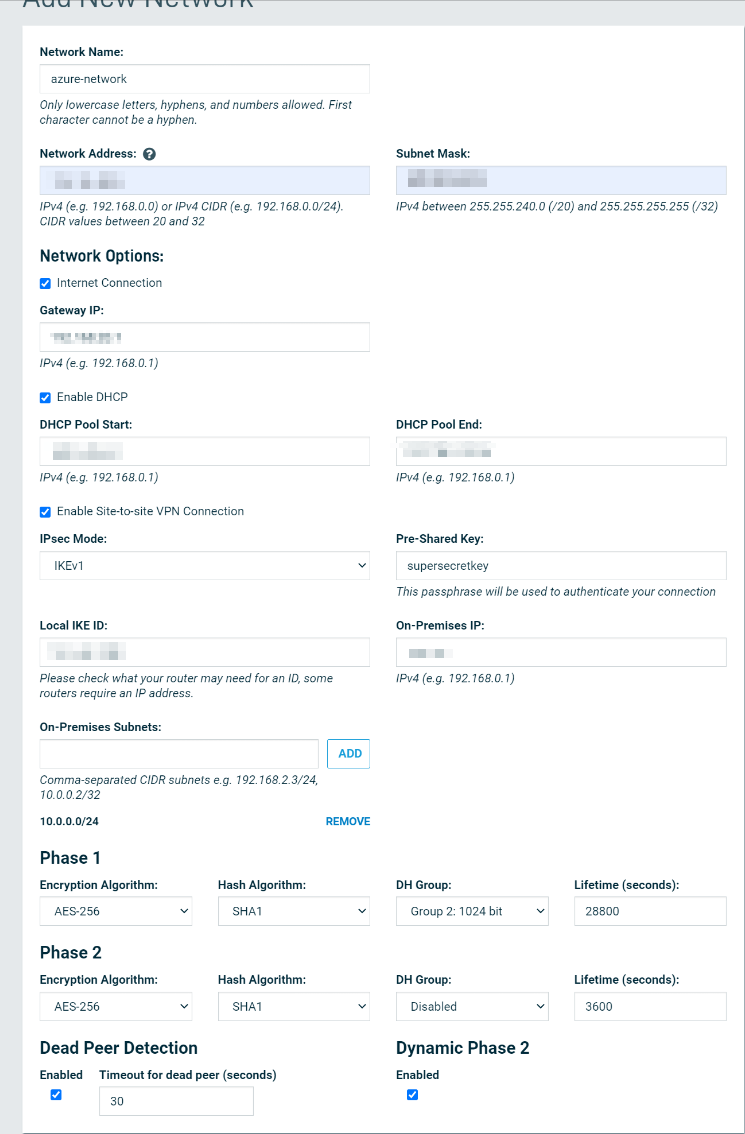
Click the Add a New Network button. Enter your desired network configuration and DHCP enablement status, then select Enable site-to-site VPN connection. Configure the settings as shown here:
- IPSec mode: Set the mode to match the SKU you chose when you created the VPN gateway.
- Shared Key: Choose a secure passphrase.
- Local IKE ID: Set this value to the public IP address of the VPN gateway that you noted down in step 4, above.
- On-Premises IP: Set this value to the gateway of your Azure VNET, then add any subnets of your Azure VNET.
- Phase 1: Set the following values:
- Encryption Algorithm: AES-256
- Hash Algorithm: SHA1
- DH Group: Group 2, 1024 bit
- Lifetime (seconds): 28800
- Phase 2: Set the following values:
- Encryption Algorithm: AES-256
- Hash Algorithm: SHA1
- DH Group: Disabled
- Lifetime (seconds): 3600
- Dead Peer Detection: Enabled is checked, Timeout for dead peer: 30 (these are the default values)
- Dynamic Phase 2: Enabled is checked. This is the default value.
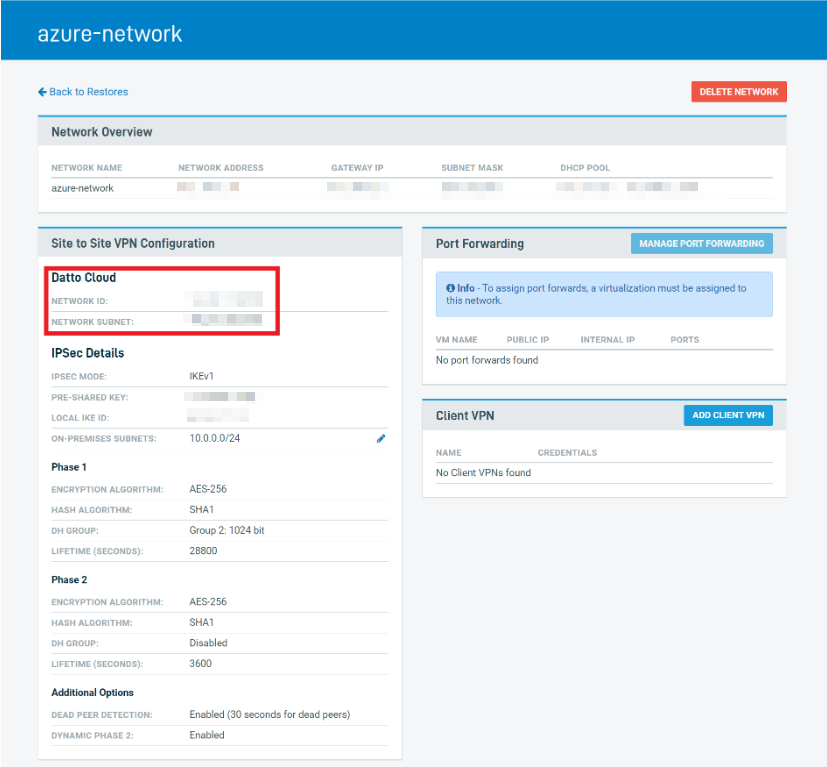
Select the newly created network to go to the Settings page, then note the network ID. You will need this to finish configuration in Microsoft Azure.
Add the network connection
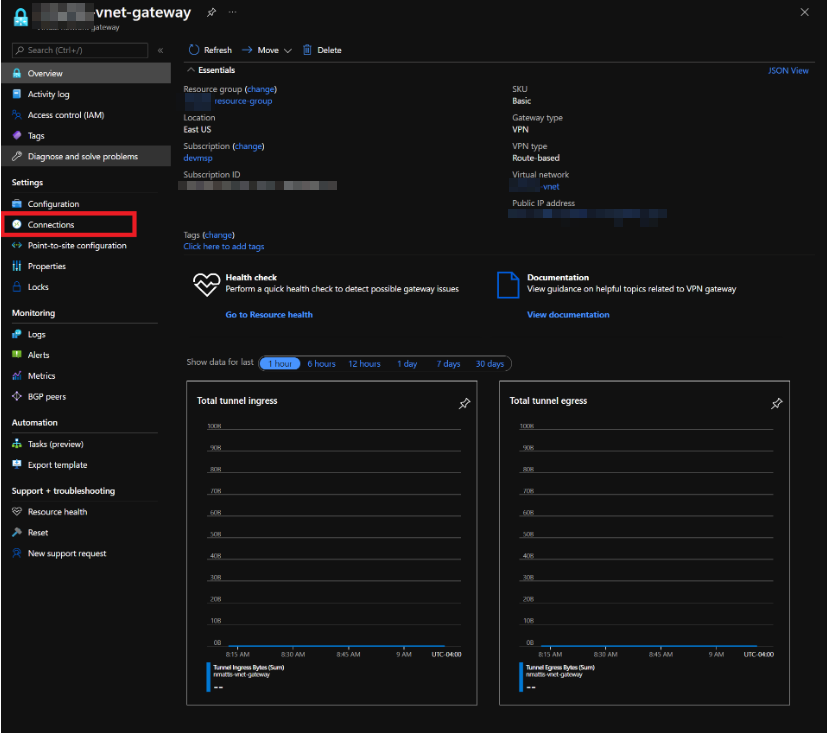
In the Azure Portal, return to the VPN gateway you created, then select Connections in the menu bar.
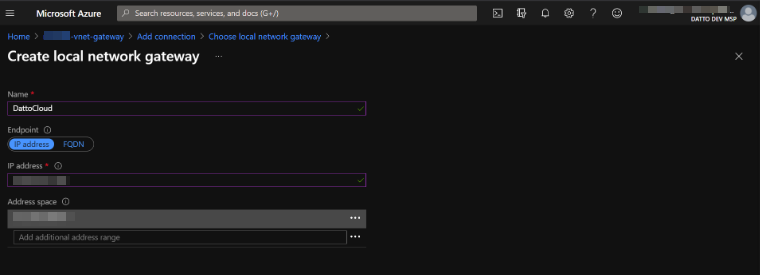
Click the Add button, then Configure the settings as shown here:
- Connection type: Site-to-site (IPsec)
- Local network: Add new, then name the network and enter the network ID you noted from step 3 above.
- Address space: Add the subnet for the Datto network.
When finished, click OK.
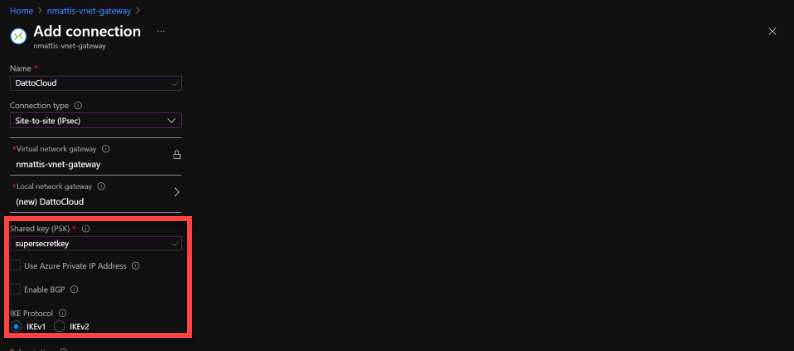
Complete the connection configuration:
In the Shared Key field, enter the shared key you used to create the Datto network.
Use the IKE Protocol radio buttons to select the protocol you chose when setting up the network.
Leave all remaining settings on their current defaults and click OK.
Connect any restores that you wish to communicate with the Azure setup that created the Datto network. You should now have full communication.