Restoring an Instant Virtualization to Microsoft Azure
This article explains how to restore an Instant virtualization in the Datto Cloud directly to Microsoft Azure.
Environment 
Datto Backup for Microsoft Azure
Description
The Restore Image to Microsoft Azure feature allows you to restore an Instant virtualization that you are running in the Datto Cloud directly back to a Microsoft Azure machine without the need to access a previously created backup.
NOTE Restoring via this method will shut down the virtualization and it will no longer be accessible via the portal. It will remain on the Datto Cloud until you remove it, but cannot be reactivated.
The steps to restore the virtualization to a Microsoft Azure machine are as follows:
From the Datto Partner Portal, navigate to Status > BCDR Status
From the Status page, scroll to the name of the Datto device and click on the name.
From the Device Details page, scroll down to the protected asset you want to restore and click the Recovery Launchpad button on the top right.
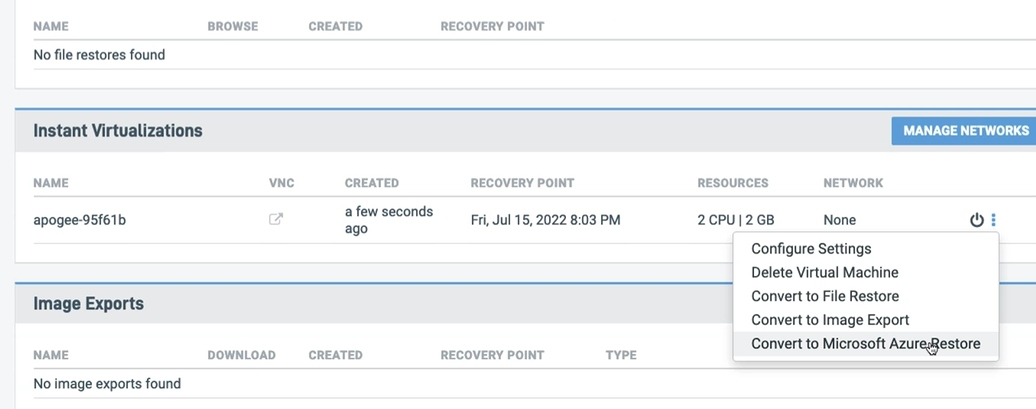
From the Recovery Launchpad, scroll down to the Instant Virtualization section and click the kebab menu at the far right of the listing for the virtualization you want to restore to Azure.
Choose Convert to Microsoft Azure Restore from the drop-down menu.
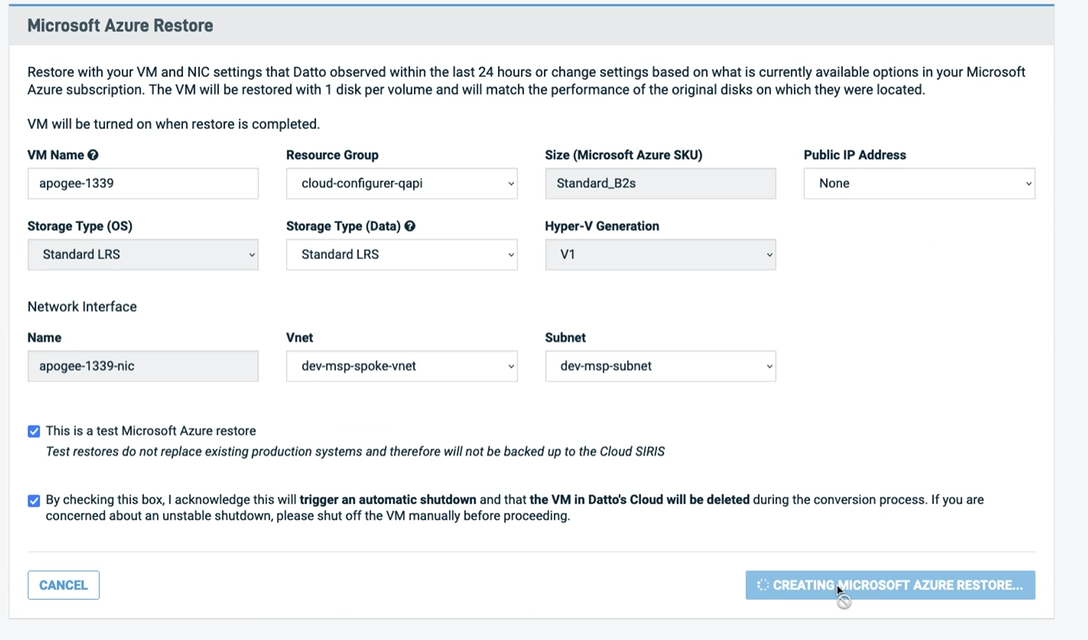
On the Microsoft Azure Restore page, fill in the requested information as follows:
- VM Name
- Resource Group
- Size (Microsoft Azure SKU)
- Public IP Address
- Storage Type (OS)
- Storage Type (Data)
- Hyper-V Generation
- Network Interface Name
- Vnet
- Subnet
If this is a test restore, check the box next to This is a test Microsoft Azure restore. This will prevent a new agent from being installed on your system
Check the box to acknowledge that you understand that your existing instant virtualization will be shut down and deleted as part of this restore process.
Click the Create Microsoft Azure Restore button.
NOTE The new virtual machine will need to meet all of Microsoft Azure's requirements, including having a unique name for each machine in the Resource Group.
Notes 
- The restore process can take some time and is dependent on multiple factors. The time to restore can vary widely from system to system. Be patient as times of 30 minutes or more are possible.
- In the event of a failure in the restore process, the Instant Virtualization will be restored to its original state when the restore to Azure process was initiated, but will be turned off. You'll need to manually turn the Instant virtualization back on in this scenario.
- Once the restore is complete, the original virtualization is turned off and is no longer accessible via the portal. Once you have confirmed your restore has completed successfully, you can click the Dismiss option in the kebab menu from the virtualization's listing in the portal to remove it permanently.

NOTE EFI system partitions are not included in the backup, but are recreated during the restore process. If this partition is non-standard, as in the case with the patches release by Microsoft of systems effected by the vulnerability CVE-2023-24932, the partition would be created standardly. In cases like these, please reach out to Microsoft on re-applying the patch if desired.
Additional Resources
- Valid VM names (external link)


