Perform a BMR in Amazon Web Services
This article describes the needed steps to perform a Bare Metal Restore from Datto Endpoint Backup with Disaster Recovery to Amazon Web Services.
Environment 
Datto Endpoint Backup with Disaster Recovery
Description
Some additional steps need to be completed to boot the Datto Utilities ISO in the Amazon Web Services environment.

The BMR will need to be completed to an instance that is already defined as a Windows virtual machine for it to be identified properly by Amazon Web Services. Before beginning the restore process below, create a new instance in AWS defined as a Windows system, with the same resources as the original protected machine. For the purposes of the restore, this newly created virtual machine will serve as the "Original VM" in the following steps.
Proceedure
Take a snapshot of the Original VM instance within AWS.
- Navigate to the EC2 Elastic Block Store > Volumes page
- Click the checkbox next to the original root volume of the original instance [e.g., vol-00000001000000000]
- Select Actions > Create snapshot
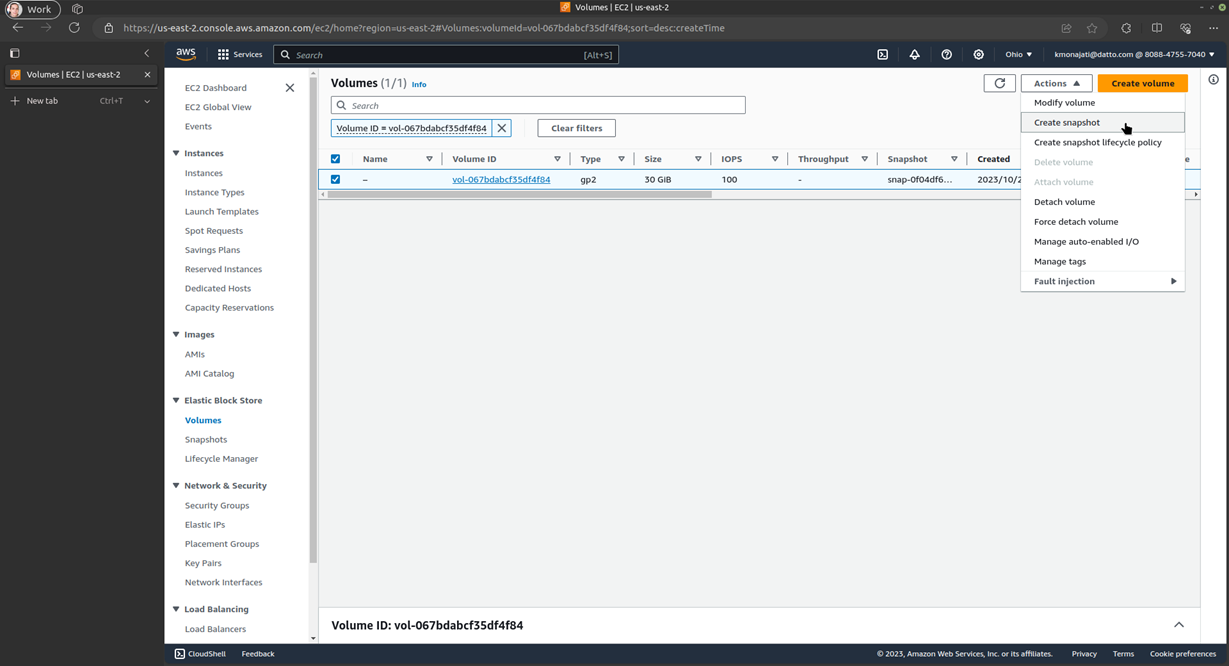
- Fill in the description (optional) > Create Snapshot.
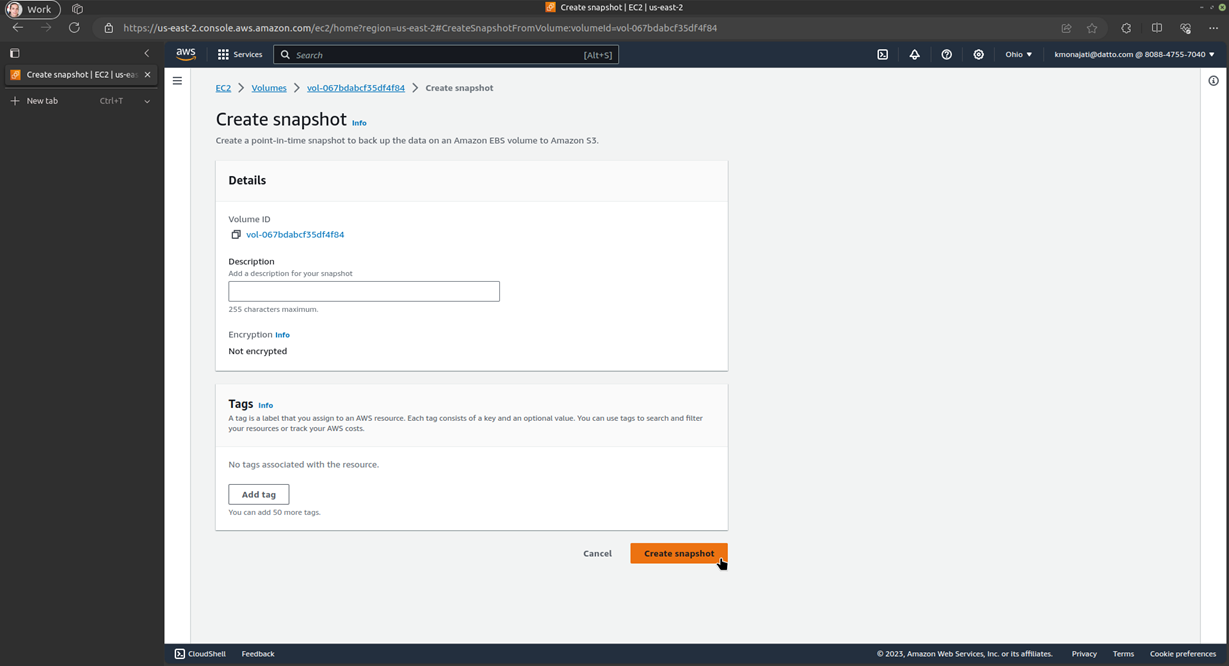
NOTE This step may take some time but will ensure the user has an accessible backup snapshot of their original instance.
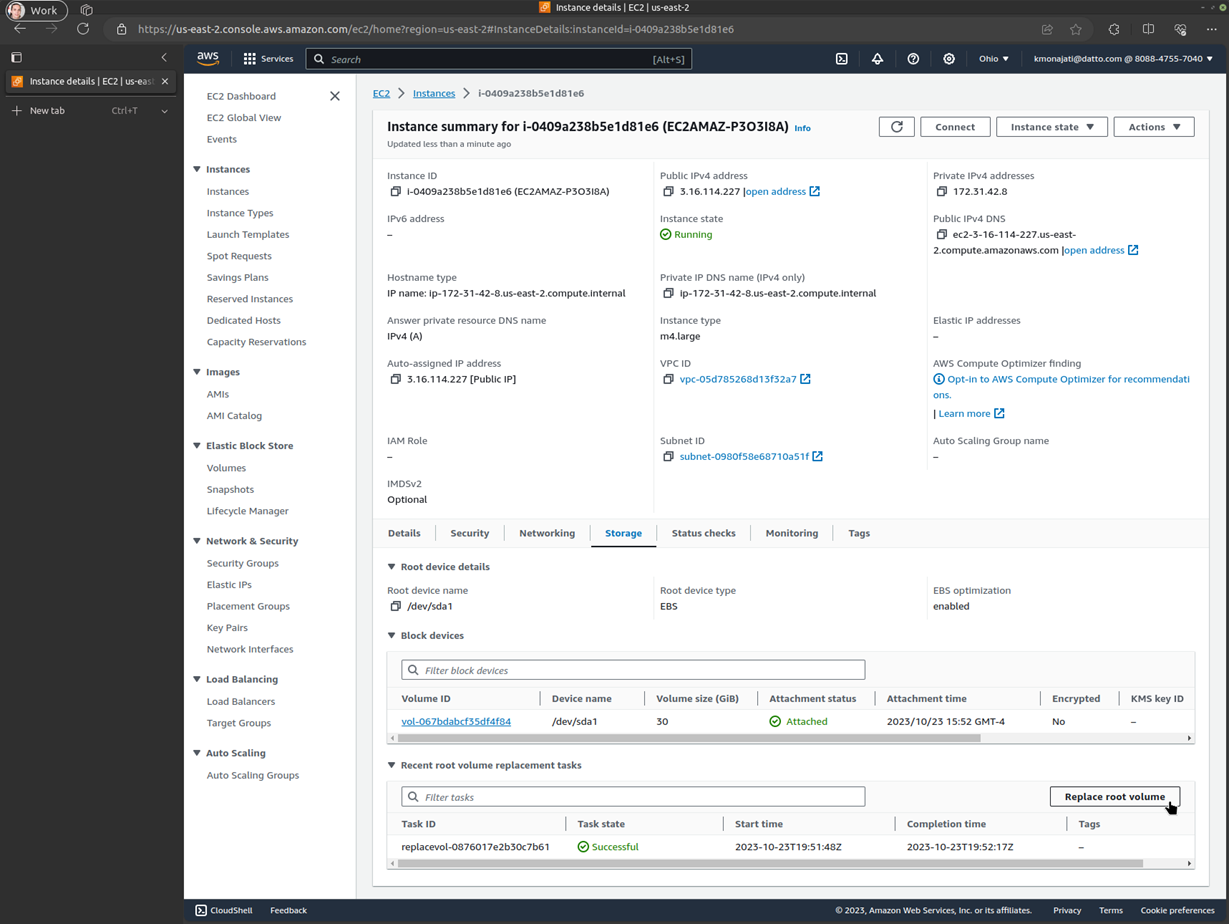
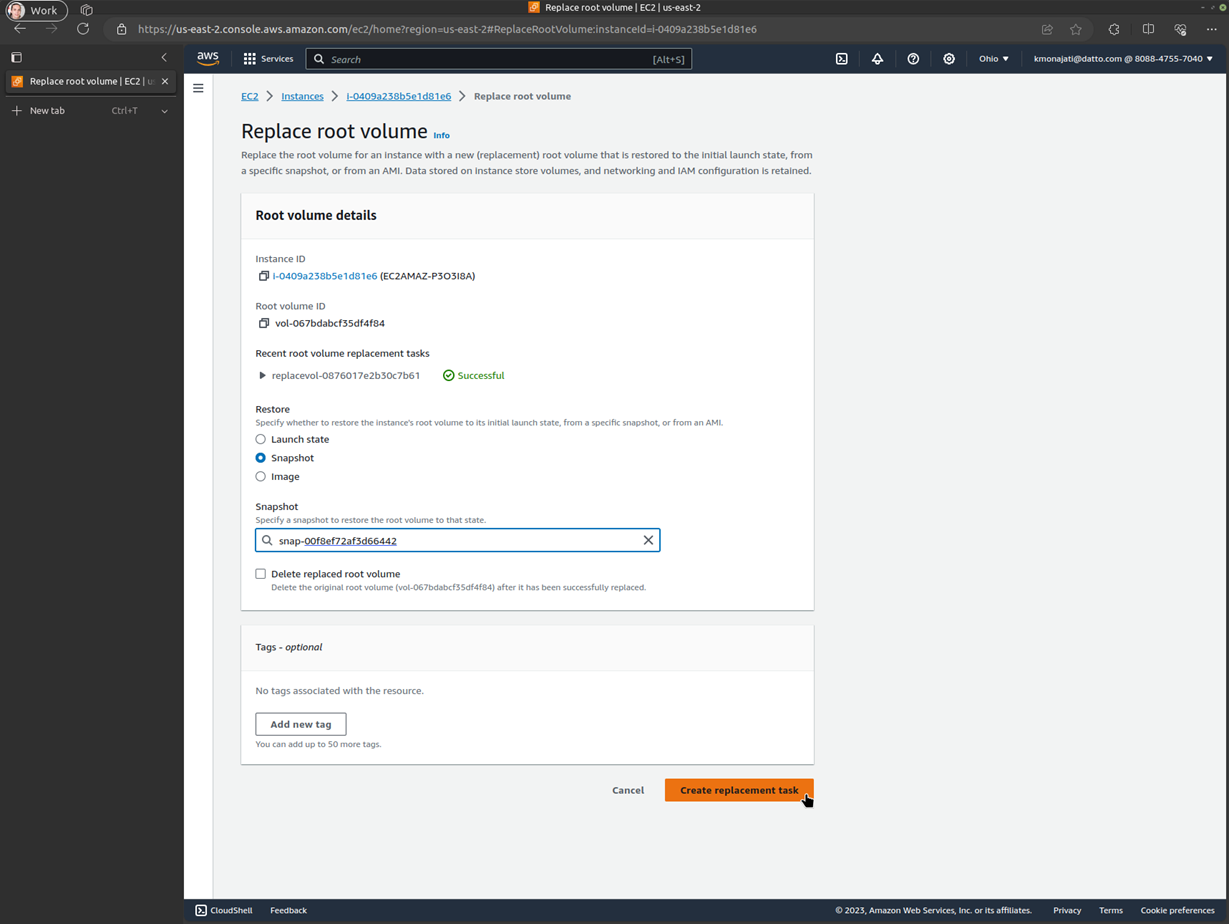
Launch the original instance [e.g., i-00000000000000010], then go to its summary page > Storage > Replace root volume, and Create replacement task:
- Under Restore, click Snapshot, and select the newly created snapshot [e.g., snap-00000000000000001]
- Do not select Delete replaced root volume; the goal here is to
- Preserve the state of the original volume as a new volume [e.g., vol 00000002000000000], and
- Create a new root volume that we can image to [e.g., vol-00000001000000000].
- The replace root volume task can only be run on running instances.
[Optional] To reduce costs, stop the original instance.
Upload the datto-utilities ISO to S3.
Take a snapshot of the ISO file in the S3 bucket to EC2.
aws ec2 import-snapshot --disk-container Format=raw,UserBucket="{S3Bucket=<bucketName>,S3Key=<folderName>/datto-utilities.iso}"
EXAMPLE
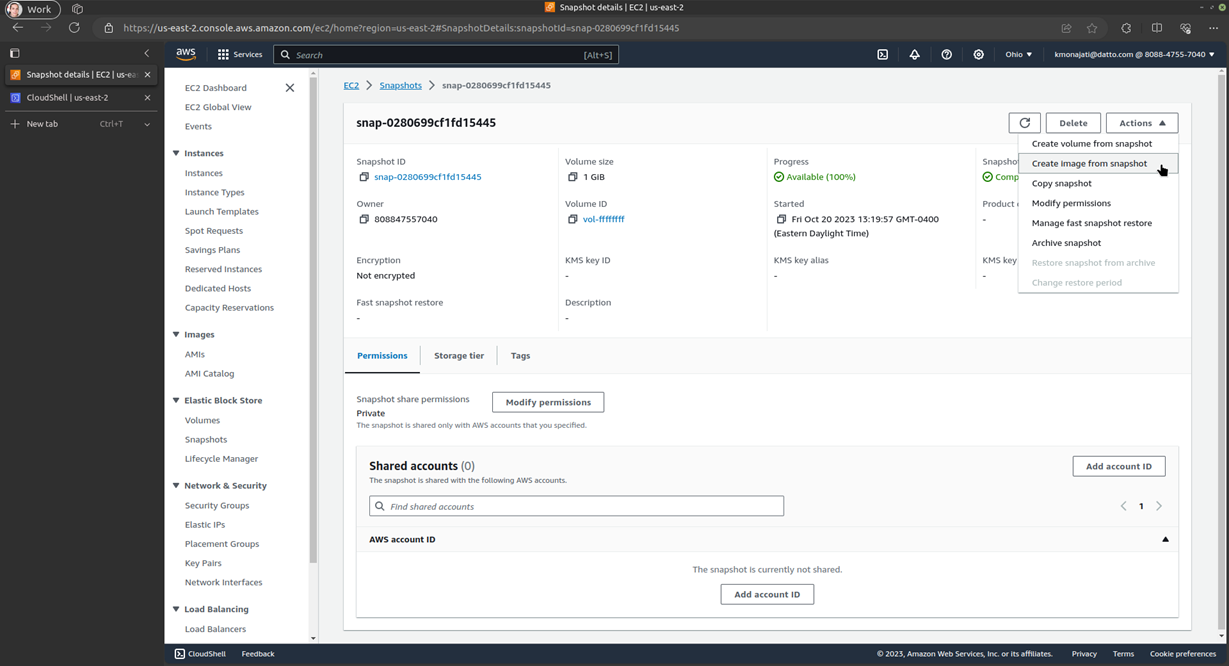
aws ec2 import-snapshot --disk-container Format=raw,UserBucket="{S3Bucket=my-bucket,S3Key=my-folder/datto-utilities.iso}"From the Snapshot summary page of the newly created snapshot [e.g., snap-00000000000000001], select Actions > Create image from snapshot and Create image.
From the EC2 Images > AMIs page, click on the newly created image [e.g, ami-00010000000000000], and select Launch instance from AMI and Launch instance.
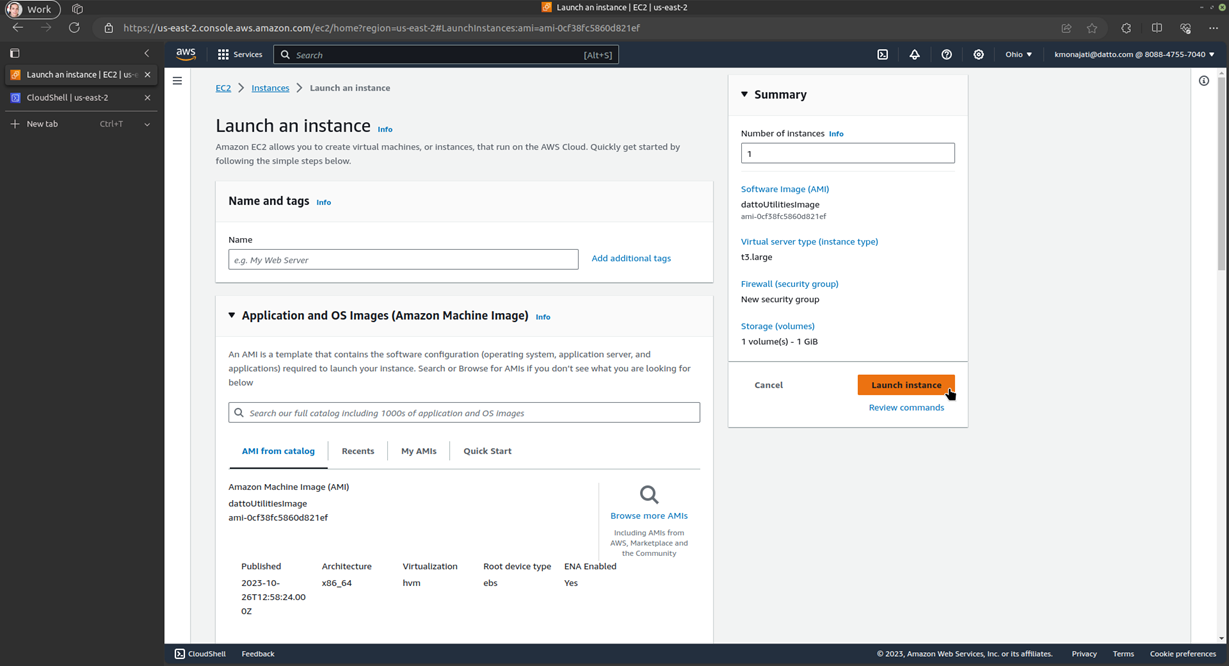
For Instance Type, chose the instance type that most closely resembles the original instance. If, for any reason, the image does not boot using this instance type, you will need to choose a different instance type.
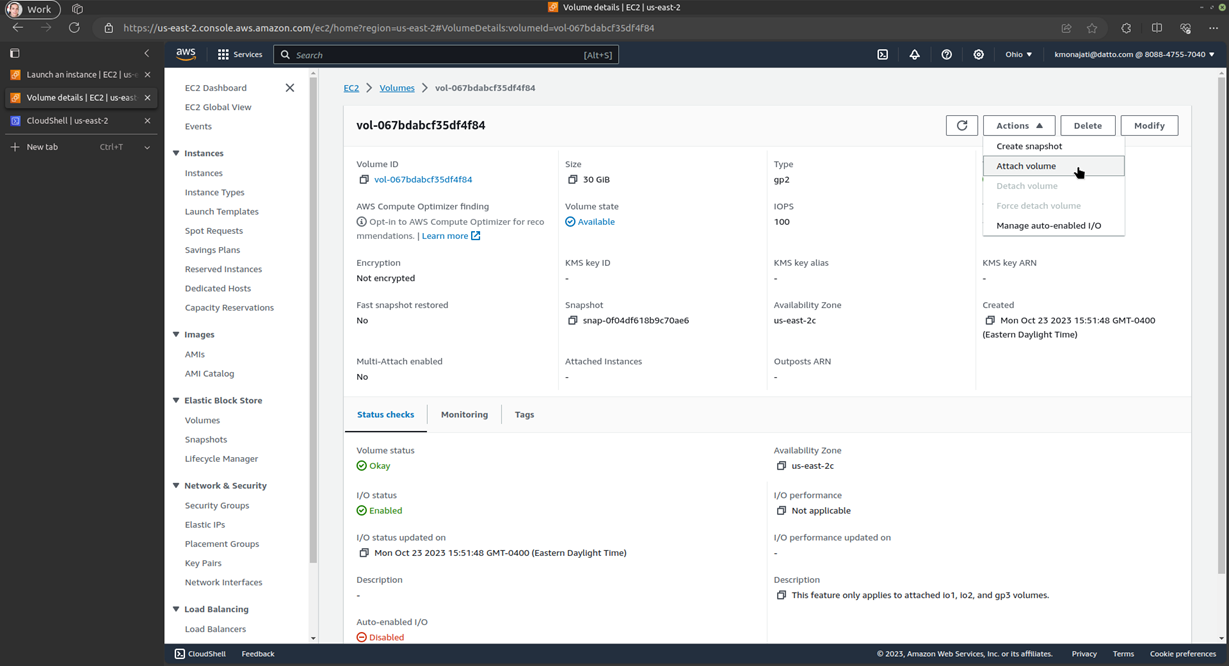
From the Volume summary page of the original root volume of the original instance (vol-00000001000000000), click Actions > Attach volume and Attach volume.
Datto Endpoint Backup with Disaster Recovery Bare Metal Restore: Performing the Restore using the newly created instance, including clicking Finish and Reboot.
From the volume summary page of the newly imaged volume (vol-00000001000000000), click Actions > Create snapshot and Create snapshot.
NOTE This step may take some time and is required to produce a snapshot that can be used for the subsequent replace root volume task below.
[Optional] If you stopped your original instance in Step 3, start it.
For the instance, navigate to its summary page > Storage > Replace root volume and Create replacement task:
- Under Restore, click Snapshot, and select the newly created snapshot [e.g., snap-00000000000000002]
- Select Delete replaced root volume.
- The replace root volume task can only be run on running instances.
Should the above steps not produce a successful BMR in AWS, the snapshot created in Step 1 (snap-00000000000000001) can be restored.
If the BMR is successful, then the instance created in Step 6 can be terminated.
Any additional images, volumes, or snapshots created during this process can be deleted or retained for future restore or backup needs.


