SQL restore with Ontrack PowerControls
This article explains the process to perform a granular SQL restore using Ontrack PowerControls.
Environment 
- Datto SIRIS
- Datto ALTO
- Ontrack PowerControls
Licensing Information
Ontrack PowerControls licenses expire after a set period. If the license on your device shows expired, you'll need to provision one from the same location. Datto provides this license on SIRIS devices at no additional charge.
IMPORTANT ALTO users not on per-agent pricing must purchase this service at an additional cost. Contact your Sales Executive, or navigate to the Purchasing & Billing > Service Billing category on the Datto Partner Portal, if you need to purchase a PowerControls license for an ALTO appliance.
NOTE Datto appliances use Ontrack PowerControls version 9.3.1 to perform restores. Other versions of this software are unsupported. For version information refer to: PowerControls Version Documentation (external link).
System Requirements

Supported Operating Systems:
- Windows Server 2008
- Windows Server 2008 R2
- Windows Server 2012
- Windows Server 2012 R2
- Windows Server 2016
- Windows Server 2019
IMPORTANT PowerControls supports 32-bit and 64-bit versions of the operating systems listed above. Operating systems must have the latest service packs installed.
Supported SQL Versions:
- SQL 2008
- SQL 2008 R2
- SQL 2012
- SQL 2012 R2
- SQL 2014
- SQL 2019
Ontrack PowerControls can read .mdf, .ndf, and .bak files.
- Intel Pentium-compatible processor
- 1024 MB RAM minimum
- 200 MB of free hard disk space for the installation of Ontrack PowerControls
- Monitor with 800 x 600 or higher screen resolution
Process
Download Ontrack PowerControls
You can download Ontrack PowerControls for Microsoft SQL Server directly from the Datto Remote Web, and install Ontrack PowerControls for Microsoft SQL Server on a Windows PC that can connect to the Microsoft SQL Server.
Log in to the web interface for your Datto appliance. Go to the Advanced menu and click Granular Restore. Under Ontrack PowerControls for Microsoft SQL Server, click the Executable and the License File links to download each file.

NOTE If you need to restore Microsoft SQL Server 2016, use the Ontrack PowerControls for Microsoft Exchange and SharePoint installer and license. Then, follow the steps described in this article to complete the restoration. To learn how to install Ontrack PowerControls for Microsoft Exchange and SharePoint, see our Exchange article.
Once you've downloaded the executable and the license file, locate the self-extracting archive you downloaded and install and activate the program. You do not need to install PowerControls on the MS SQL server, but you must be able to connect to the SQL server from the machine on which you install it.
Check the Microsoft SQL Server datastore
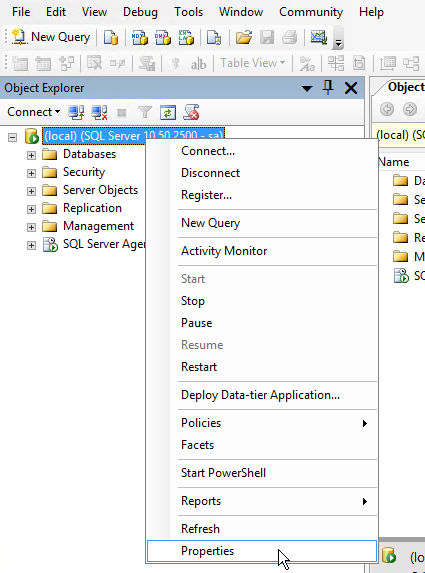
To navigate to the correct location to retrieve your data, you must know where your SQL server stores this data. To do so, go into the Microsoft SQL Server program. Right-click the top-level server, and choose Properties. This example shows SQL Server 2008. Other versions of SQL Server may differ.
In the Server Properties window, click the Database Settings option.
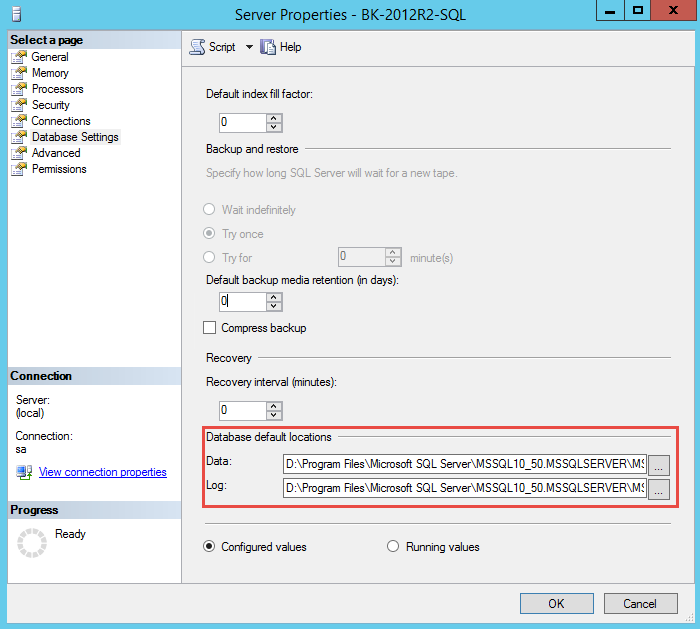
Note the location of the Data and Log files. This information will be needed later.
Mount a file restore
To start the file restore, click the Restore tab of the Datto appliance.
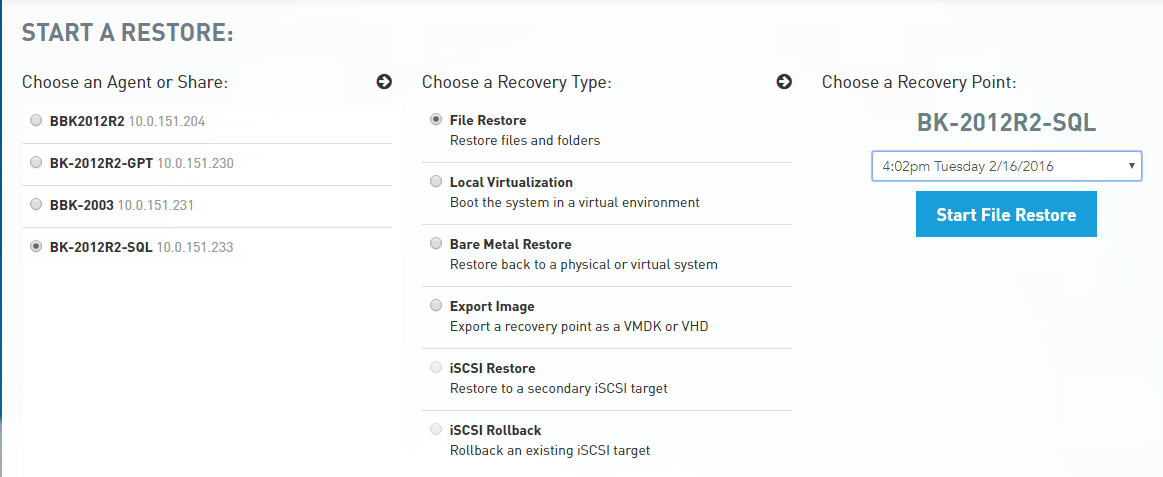
Choose the SQL server from which you want to restore data and select File Restore. Then, choose the recovery point that has the data that you need.
Click Start File Restore.
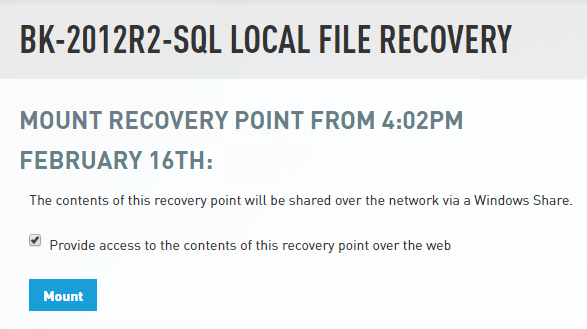
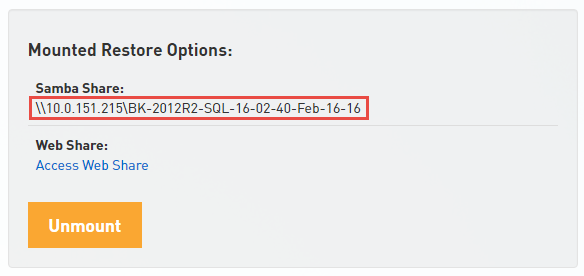
Click the Mount button, and make a note of the Samba Share information.
Use Ontrack PowerControls to connect the data source and SQL Target
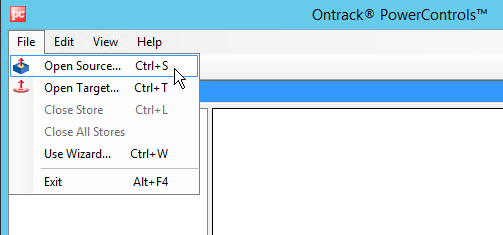
In the Ontrack program, go to the File menu and click Open Source.
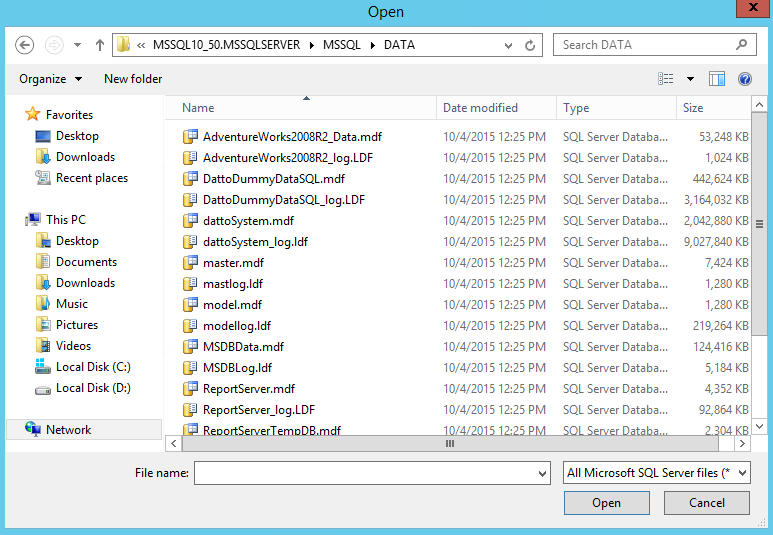
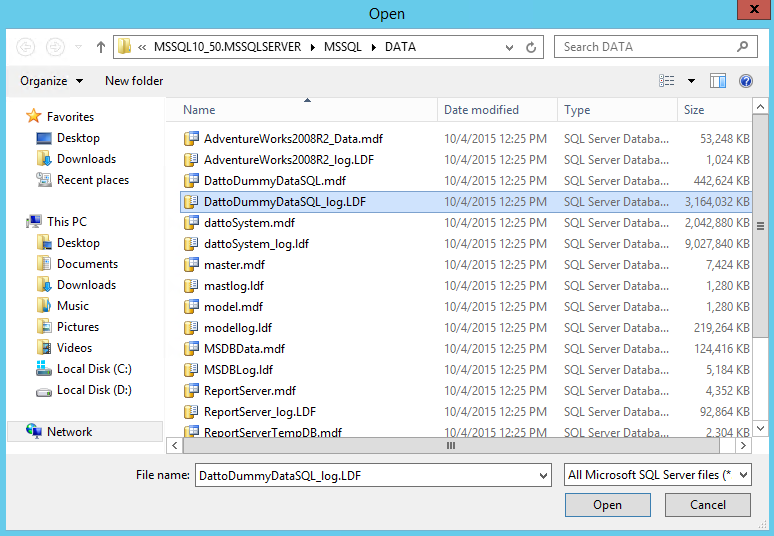
Navigate to the data source, choose the *.mdf file, and click Open.
In the Data Wizard window, click the Add... button.
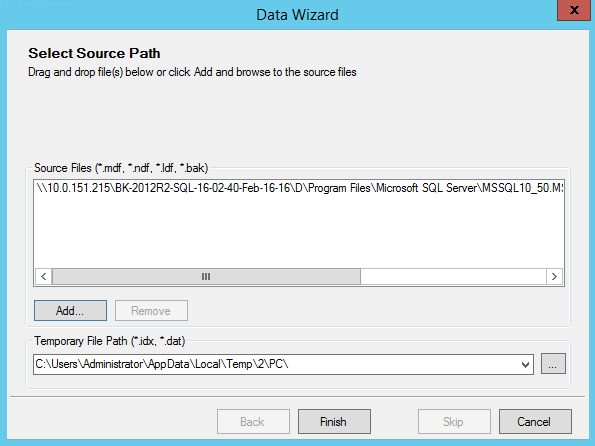
Add the log (*.ldf) file.
You will see the Data Wizard with both the *.MDF and *.LDF files listed.
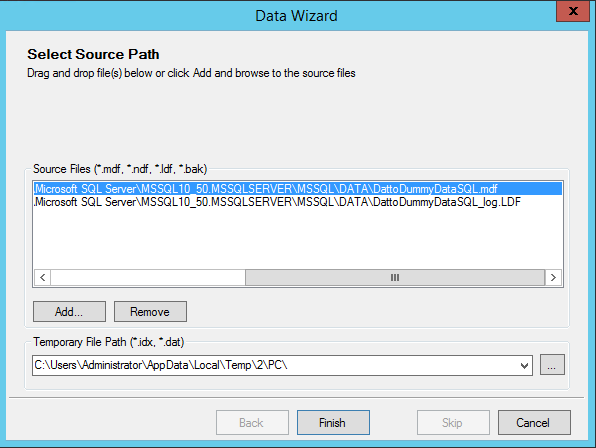
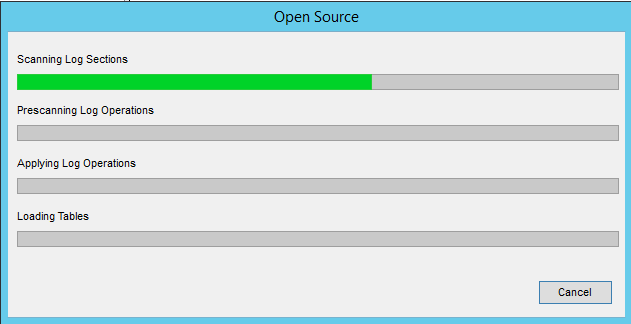
Click the Finish button. A green bar will display progress.
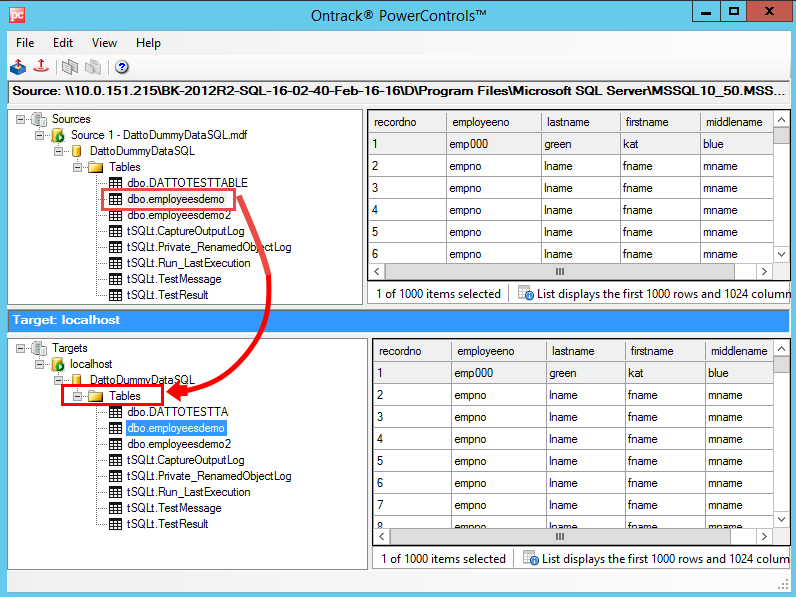
Copy source to target
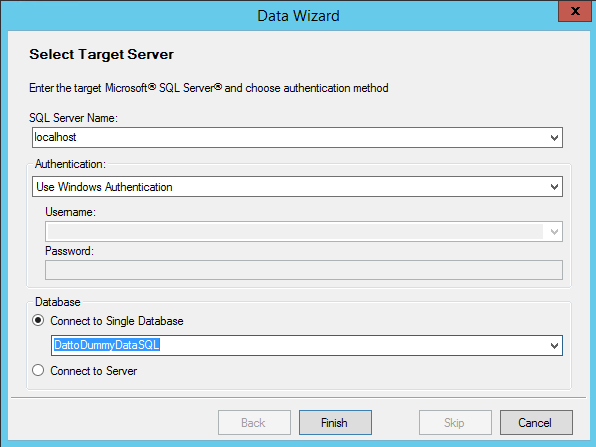
The Data Wizard prompts you to select your target server. Enter your credentials to connect to the Microsoft SQL Server. Then, choose the database you need to restore. In this example, it is connecting to the localhost for the SQL server and the DattoDummyDataSQL database.
Click Finish, a window with both the Source and Target will be visible. Drag and drop the table you wish to restore into the folder.
Once the file has been dropped into the target folder, a progress window will appear for the duration of the copy.
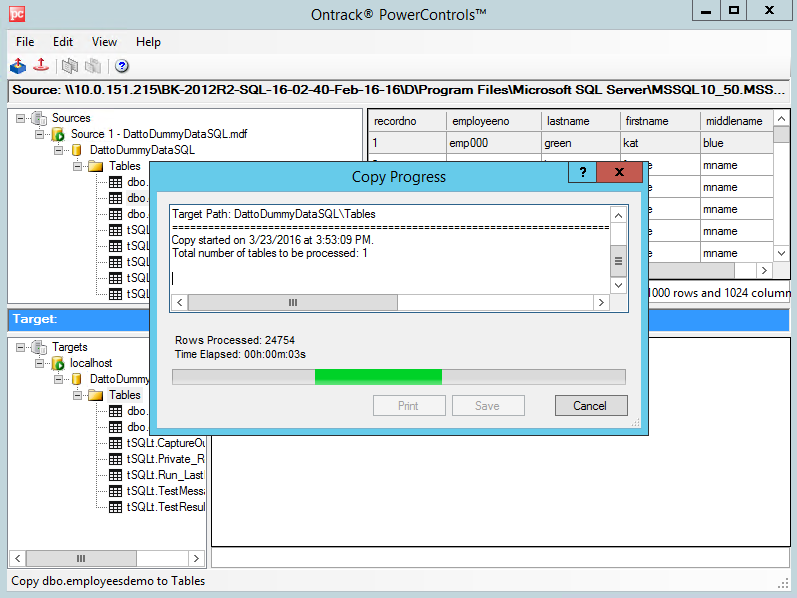
When the copy progress has finished, and all the needed data has been restored, click Close.


