Replacing the storage drive on an ALTO 5
This article covers the process of physically replacing the storage drive on the ALTO 5 devices.
NOTE Before removing the storage drive, contact Datto Technical Support. A Datto technician will need to run back end procedures to monitor and complete the process. Do not remove the storage drive if there is a disaster recovery scenario in progress.
Environment 
- Datto ALTO 5
Description
Power off and unplug the device.
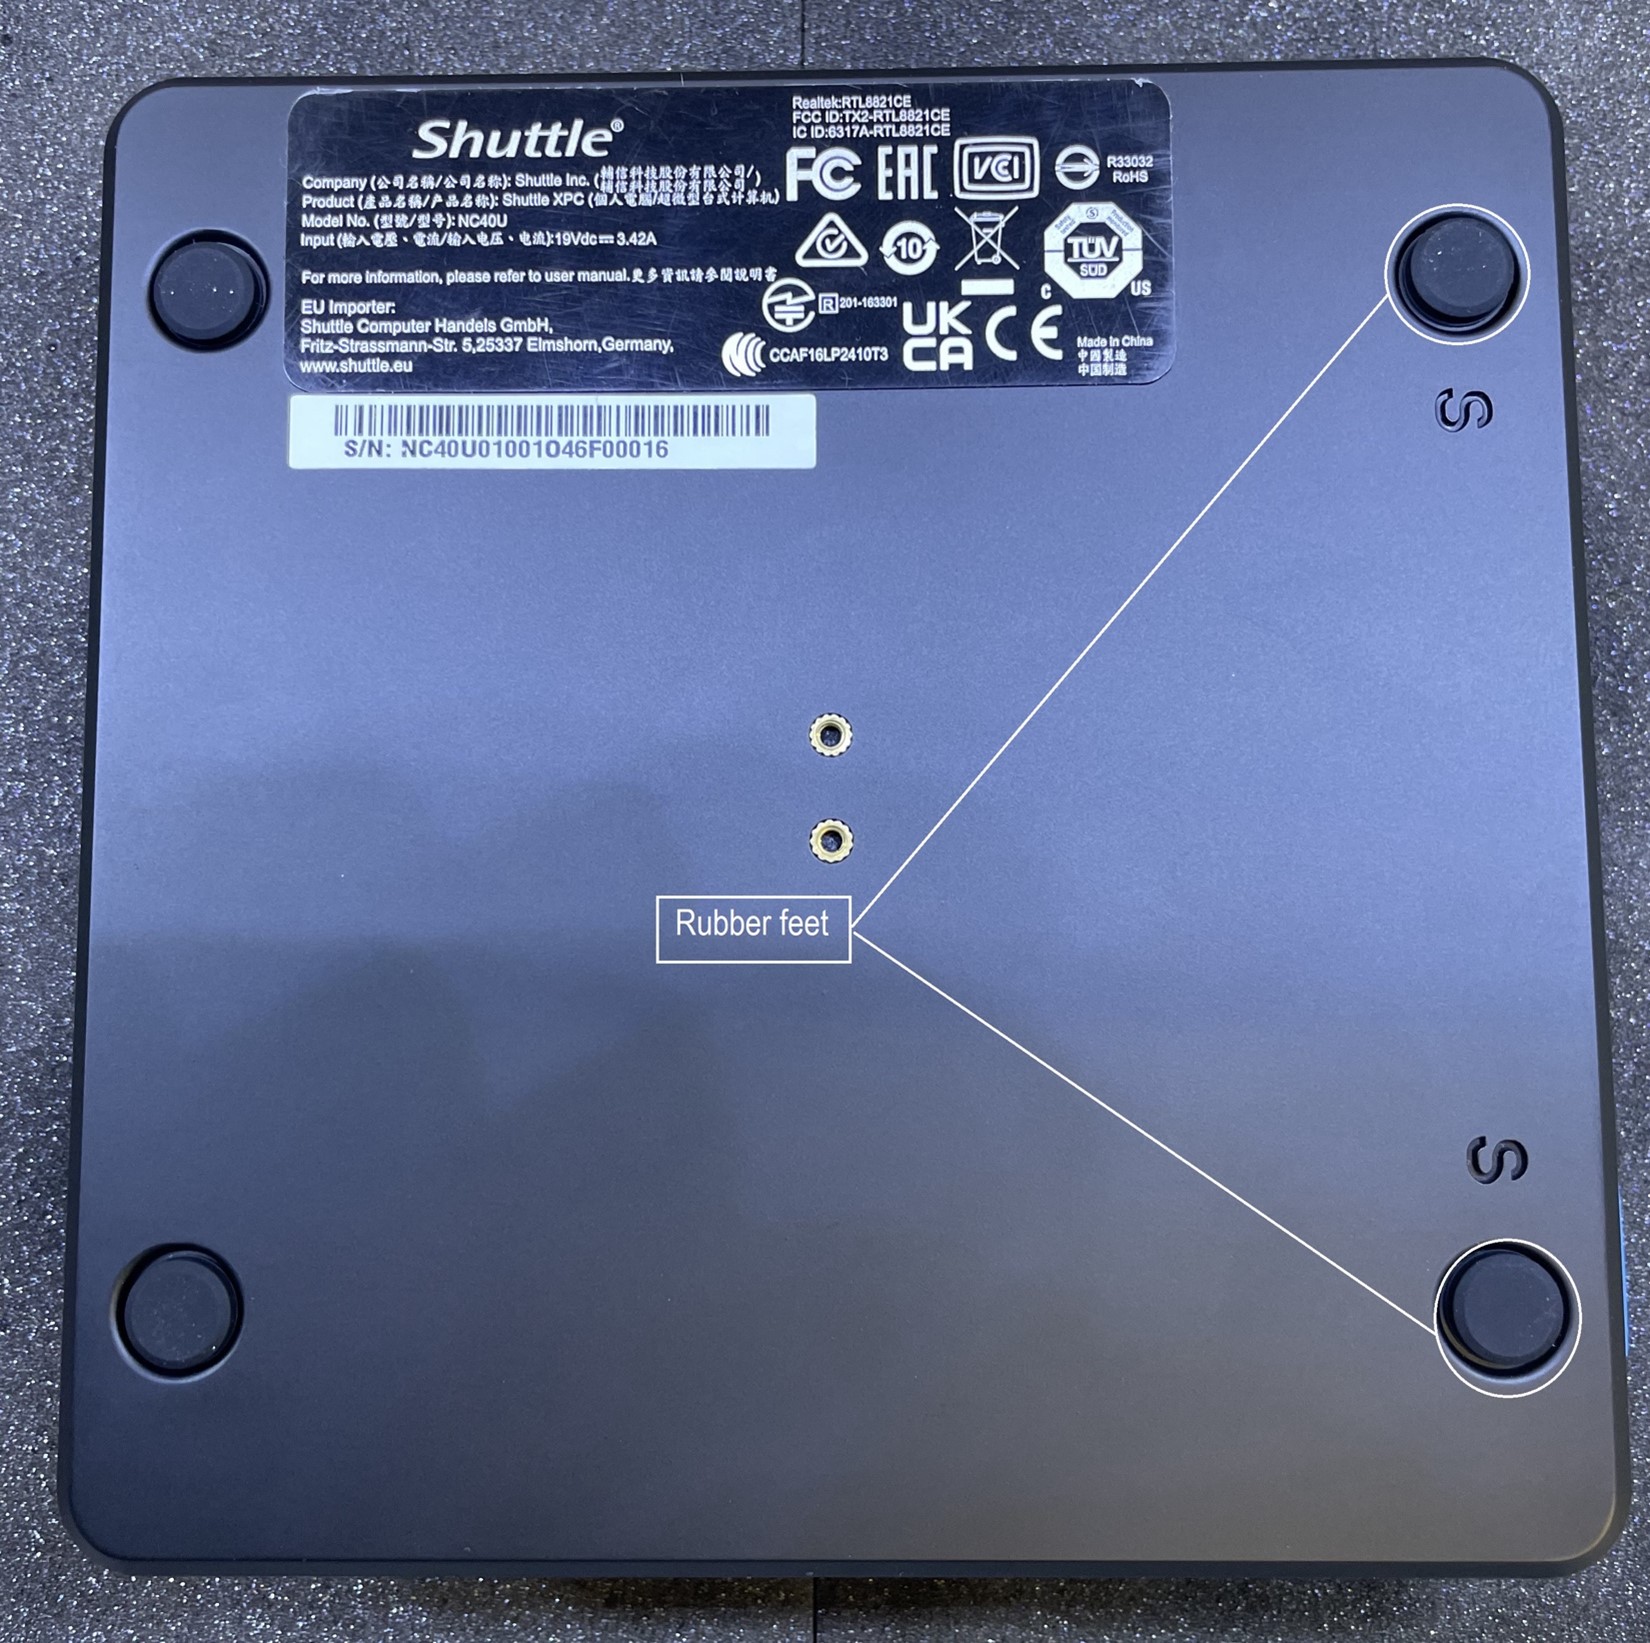
Remove the two screws covered by the two rubber feet on the bottom of the device. There is an 'S' engraved by the correct feet.
Flip the chassis over, then lift the top plate up from the left side to remove it (this will be the side the screws were located on).

Remove the array drive mounting screw.
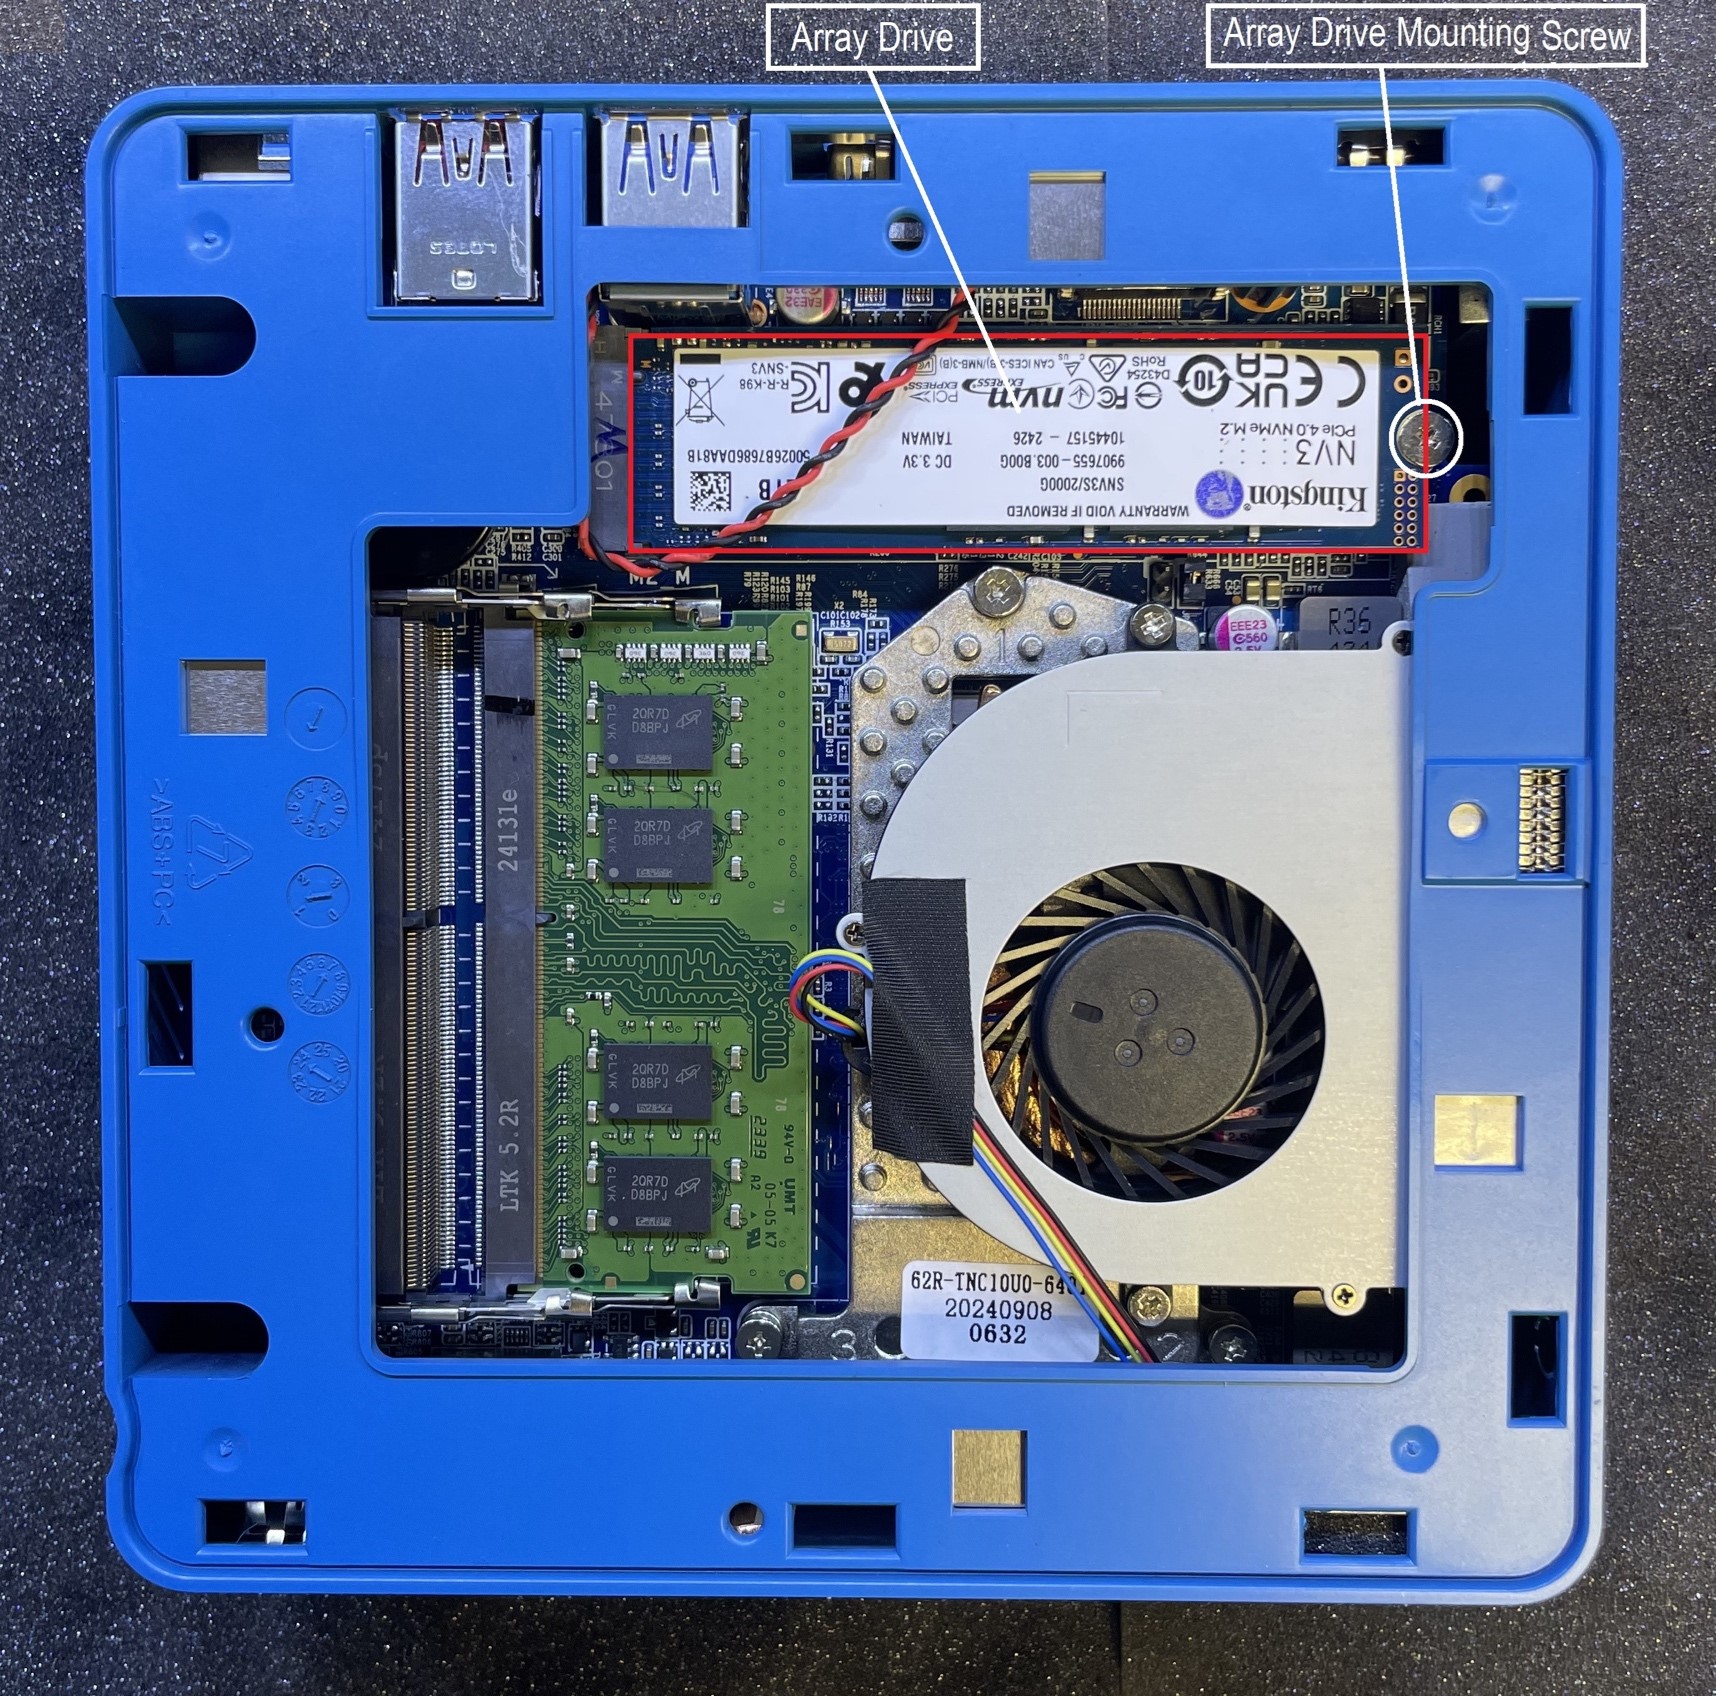
Lift the drive from the motherboard.
Insert the new drive and screw it into place with the same mounting screw.
Place the top plate, with proper orientation, back onto chassis.
Re-Install the bottom plate, back onto the chassis and secure it with the two screws.
Plug in and power on the device.
The remaining steps in the process will be completed by Datto Technical Support.


