Imaging a DELL Precision Workstation computer with the Datto SIRIS Imager
This article describes how to image the following DELL workstation computers with the Datto SIRIS Imager.
- DELL Precision 3930 8TB
- DELL Precision 3930-4TB
Instructions 
Set up 
On the device intended to become a SIRIS Imaged BCDR device:
- Connect a monitor, keyboard, mouse, and appropriate power cables.
- Plug your Datto Utilities USB device into any available USB 2.0 port on the device.
- Connect to a network with access to the internet.by plugging an RJ45 network cable into the highest bandwidth copper network interface on the device.

Figure 1: Network Interface connections
Although Datto recommends that the device is connected to a network that provides DHCP IP addresses for the imaging process, the Datto Utilities stick will load to a network configuration page if a DHCP address is not provided.
You should only have one NIC from your new hardware connected to your network for the initial setup. The installer will display an error banner if more than one NIC connection is detected.
Note that the NIC that the imager initially connects to on your new hardware will automatically be designated as eth0 on your new SIRIS device and must be 10GbE. Additional detected NICs will be designated in sequence as eth1, eth2 etc.
BOOTING DELL DESKTOP DEVICES INTO DATTO UTILITIES
- Once the setup of the device is complete, power on the device and access the UEFI utility
- Access the UEFI utility on the 2TB miniPC (OptiPlex 7080) and 4/8TB Towers (Precision 3640) by immediately pressing the F2 key until a loading message appears in the upper left corner of the screen or the utility loads.
- From the Settings menu, click the red plus sign next toGeneral to expand the list.
- Select Boot Sequenceâ€
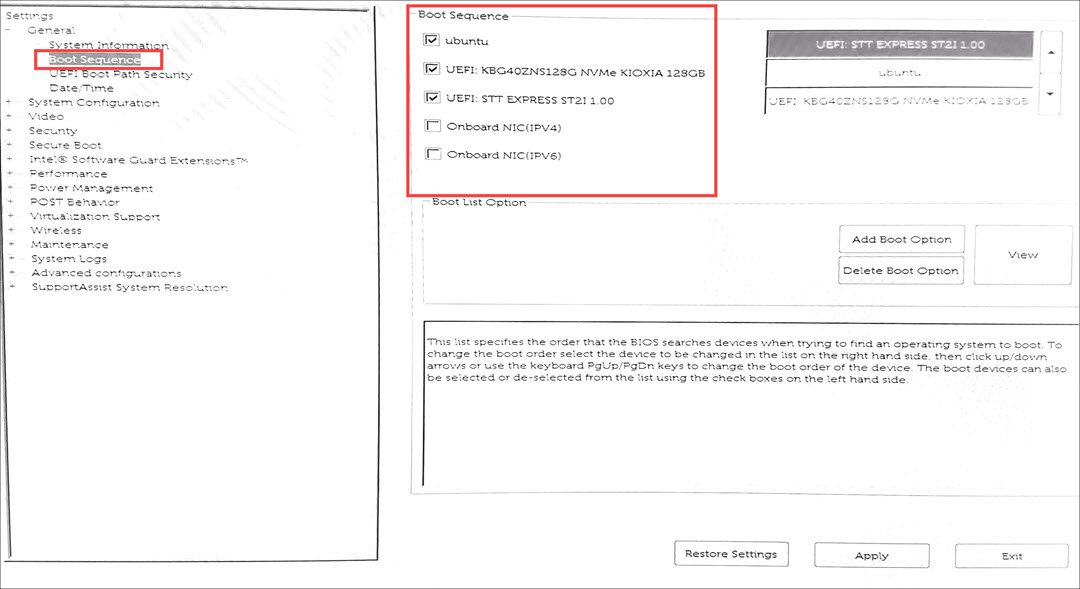
Figure 2: Boot Sequence
- Deselect both Onboard NIC options (IPV4 and IPV6).
- Select the storage media being used for Datto Utilities from the boot order list.
- Click the up-arrow button to the right of the boot order list until the storage media being used for Datto Utilities is at the top of the list.
- Click the red plus sign next to System Configuration to expand the list
- From the resulting options, select Integrated NIC.

Figure 3: Integrated NIC
- Deselect the checkbox marked Enable UEFI Network Stack.
- Click the radio button next to Enabled.
- Also in the System Configuration section, click Audio.
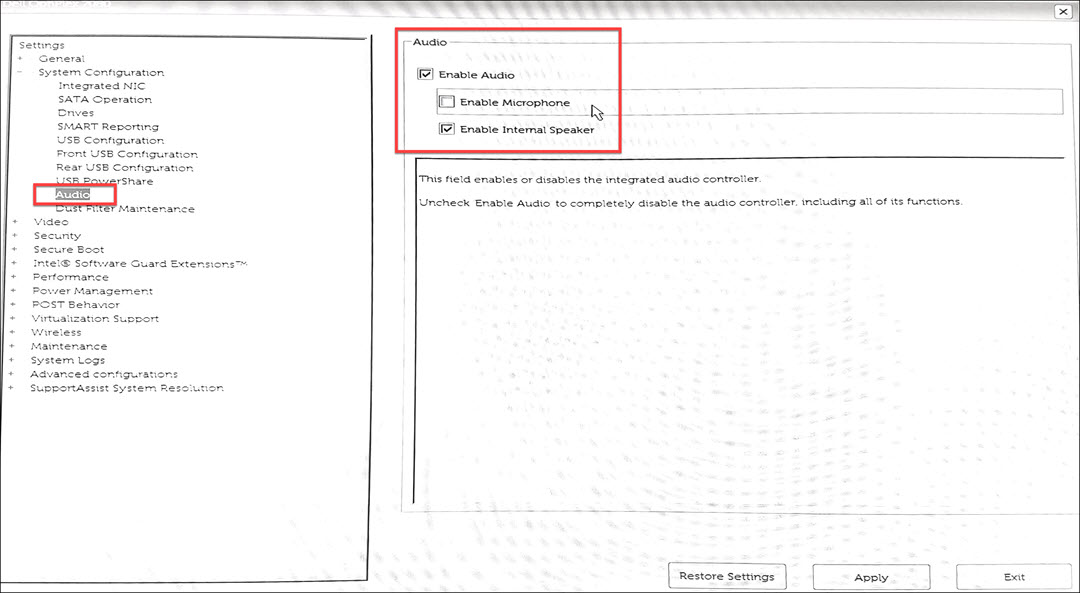
Figure 4: Audio
- Deselect Enable Microphone.
- Click the red plus sign next to Security to expand the list
- Select TPM 2.0 Securityâ€
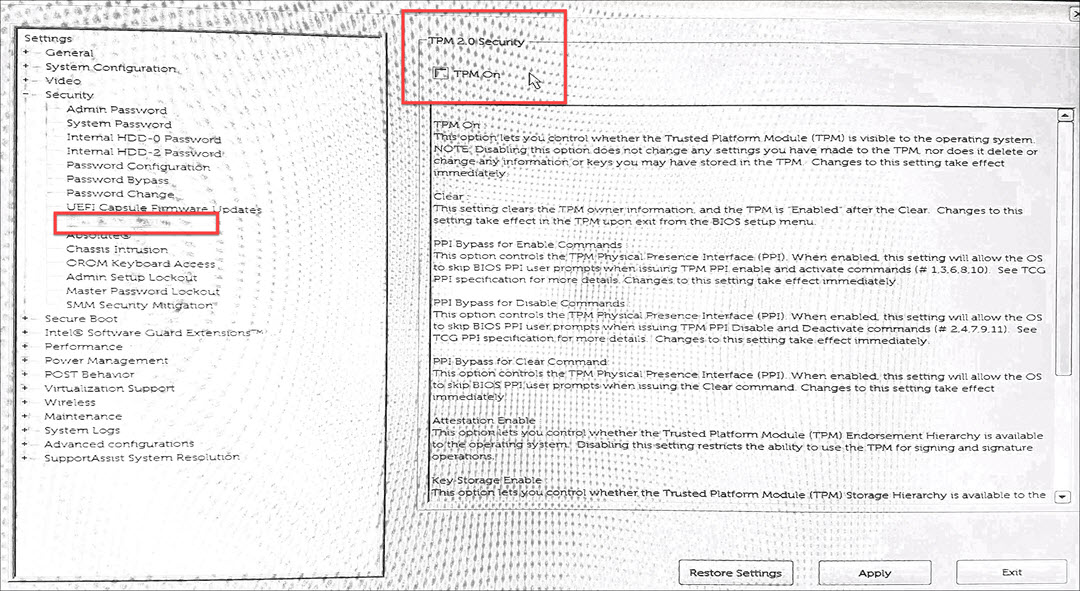
Figure 5: TPM 2.0 Security
- Deselect TPM on.
- Click the red plus sign next to Power Management to expand the list.
- Click on AC Recovery.
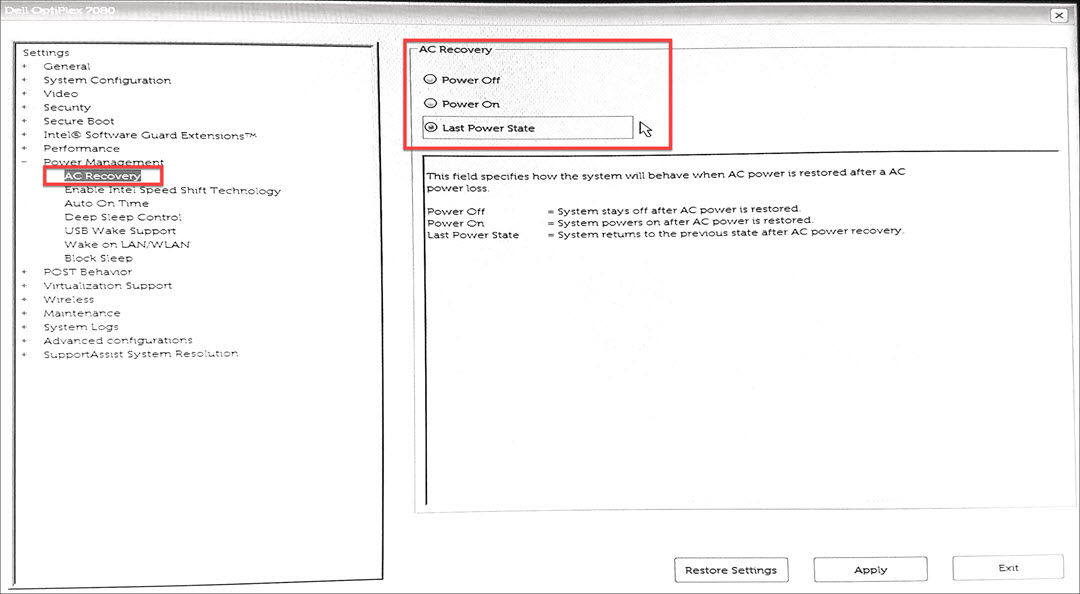
Figure 6: AC Recovery
- Select the radio button next to Last Power State.
- Also in the Power Management section, select Deep Sleep Control.
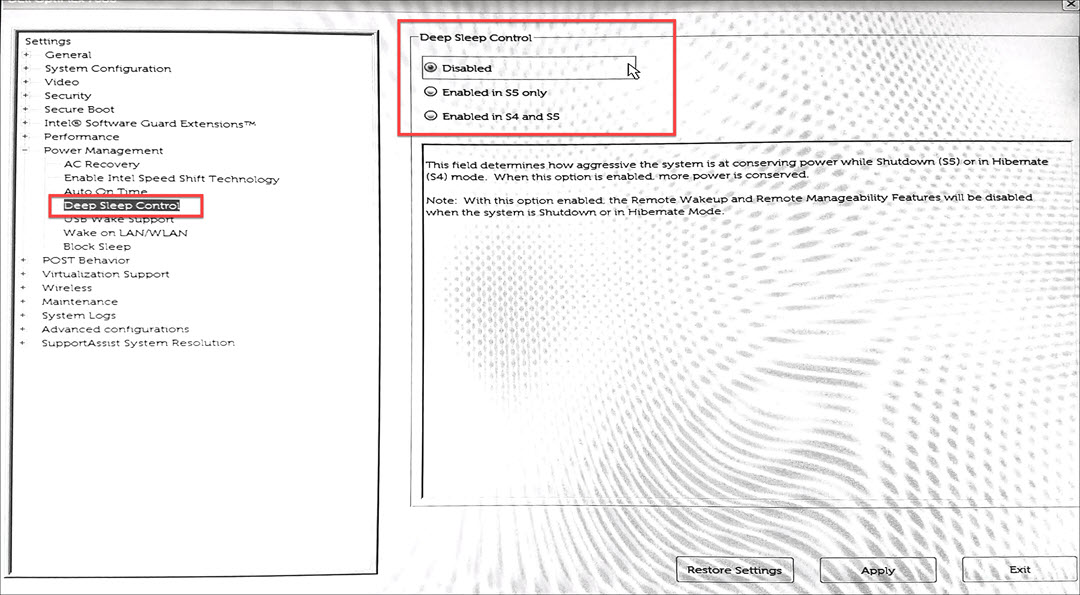
Figure 7: Deep Sleep Control
- Select the radio button next to Disabled.
- Click the red plus sign next to Wireless to expand the list.
- Select Wireless Device Enable.
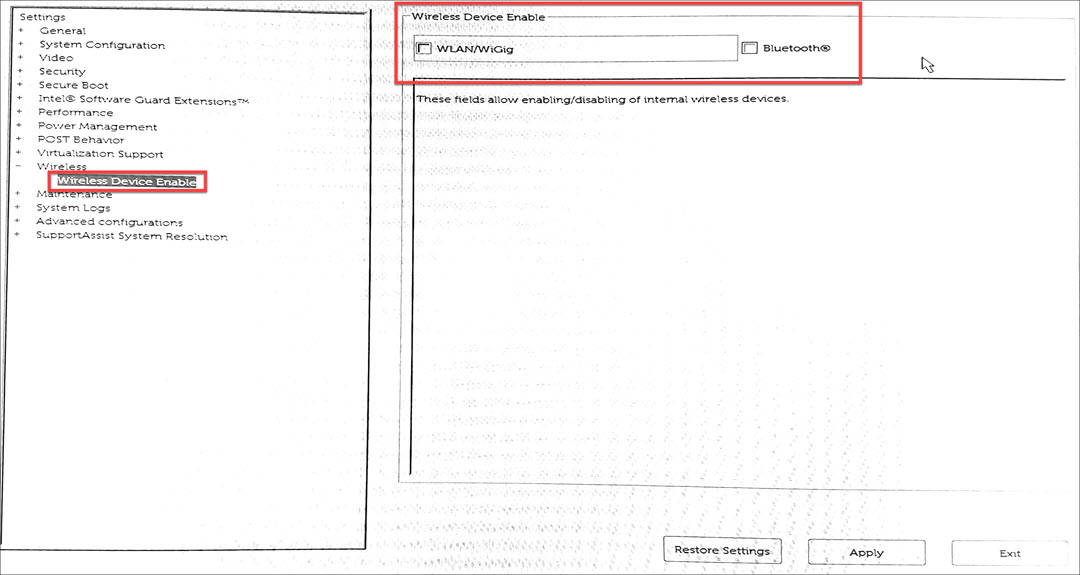
Figure 8: Wireless
- Deselect WLAN/WiGig.
- Deselect Bluetooth.
- Cick the red plus sign next to Advanced configurations.
- Select ASPM.
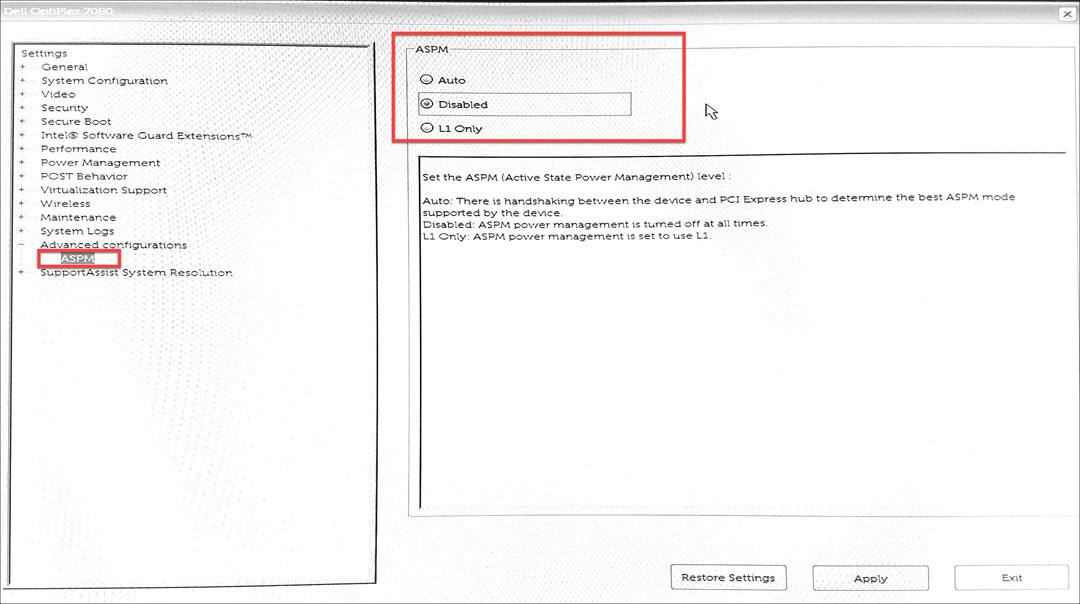
Figure 9: ASPM
- Click the radio button next to Disabled
- Save your changes by clickingApply.
A confirmation modal will appear asking if you want to apply your changes

Figure 10: Deselect Save as Custom User Settings
- Deselect Save as Custom User Settings?
- Click the “OK†button
- Click the Exit button
The device should now boot into Datto Utilities
IMAGING DELL DESKTOP TOWER DEVICES
When Datto Utilities main applications menu loads:
- Click SIRIS Imaged.

Figure 11: Welcome
- Either 238GB disk can be used as the OS drive for both desktop tower hardware profiles. Click the radio button next to this disk, then click Next.
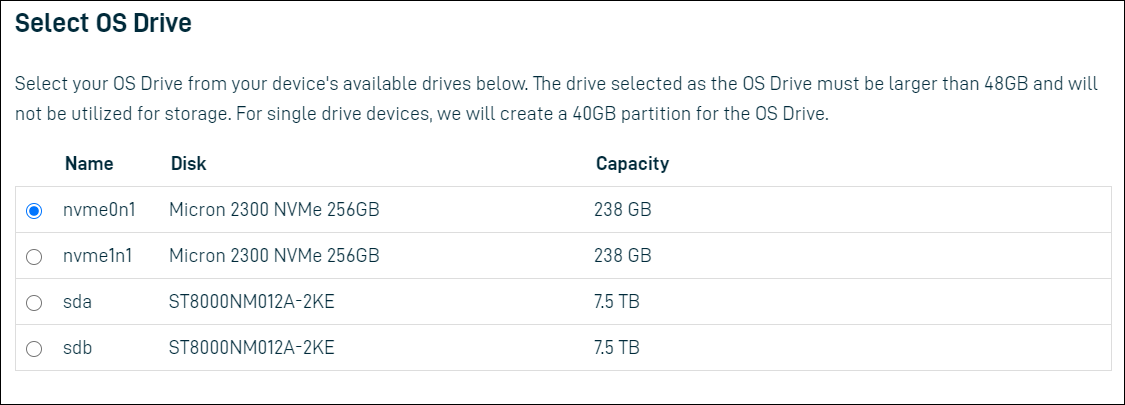
Figure 12: Select OS
- The remaining 238GB disk will be used as the SLOG drive for both desktop tower hardware profiles. Click the radio button for this disk, then click Next.
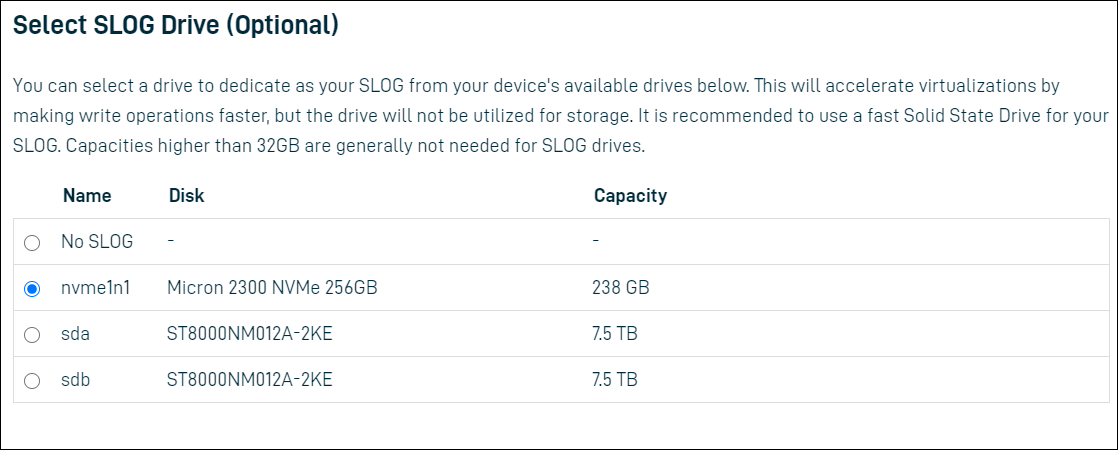
Figure 13: Select SLOG
- The 4TB and 8TB capacity devices will have their only RAID option pre-selected. Click Next.
- Review and confirm that each disk targeted use is set correctly, then click BEGIN IMAGING.
The progress of the imaging is displayed on the screen. If the process fails, an error message will provide a link to the Datto Knowledge Base.
- When the process completes, a FINISH & REBOOT button will appear in the upper right corner. Click .FINISH & REBOOT.
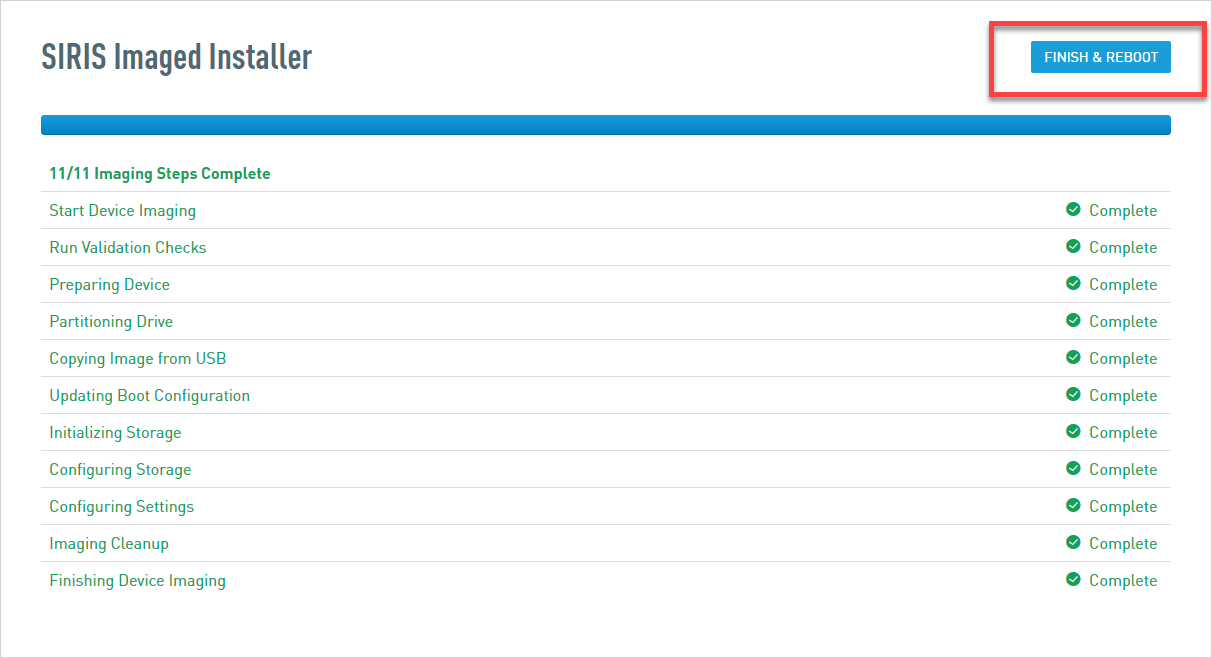
Figure 14: Finish & Reboot
- When the screen goes black, remove the Datto Utilities USB device.


