Replacing a drive on the SIRIS S5X
This article covers the process of physically replacing the storage drive or the OS drive on the SIRIS 5X model.
NOTE Before removing the storage drive, contact Datto Technical Support. A Datto technician will need to run back end procedures to start, monitor and complete the process. Do not remove the storage drive if there is a disaster recovery scenario in progress.
Environment 
- Datto SIRIS S5X
Description
Select the steps based on the device model of S5X. If you are not sure which model you have, compare the device port order to the devices shown in S5X specifications.

Power off and unplug the device.
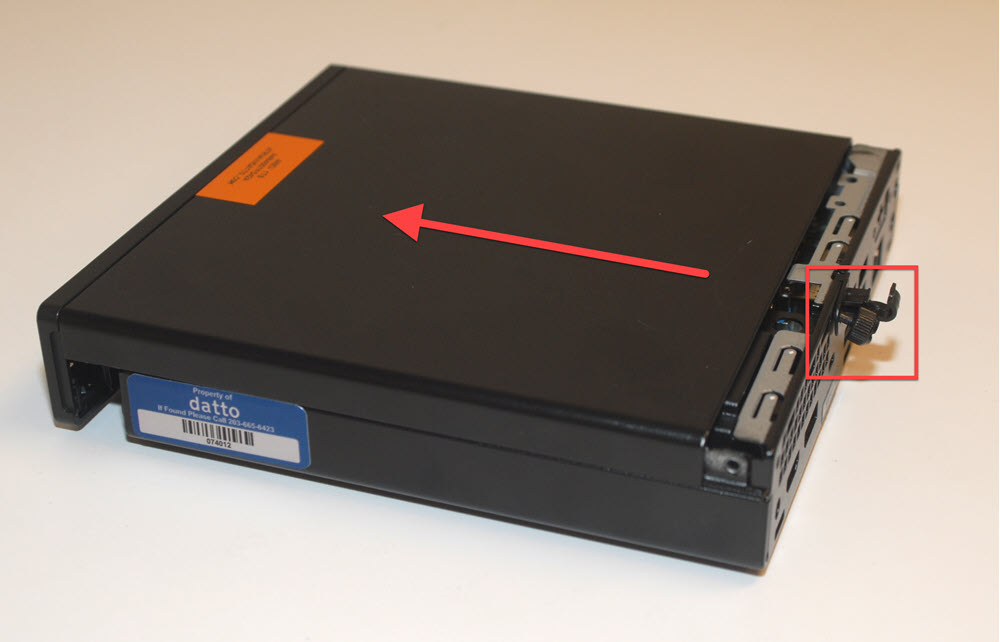
Remove the cover screw on the back of the device.
Slide the cover forward to remove it.
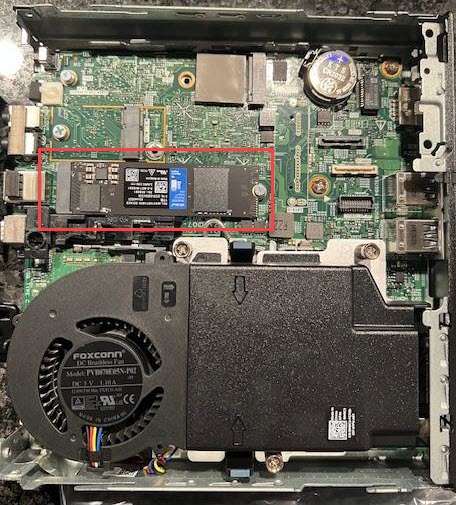
The storage drive is located near the center of the device. Remove the phillips head screw that holds the drive in place.

Remove the drive from the board and replace with the new drive.
Replace the phillips head screw to hold the new drive in place.
Slide the case cover back in place and replace the screw.
Plug in and power on the device.
The remaining steps in the process will be completed by Datto Technical Support.
Power off and unplug the device.
Remove the cover screw on the back of the device.
Slide the cover forward to remove it.
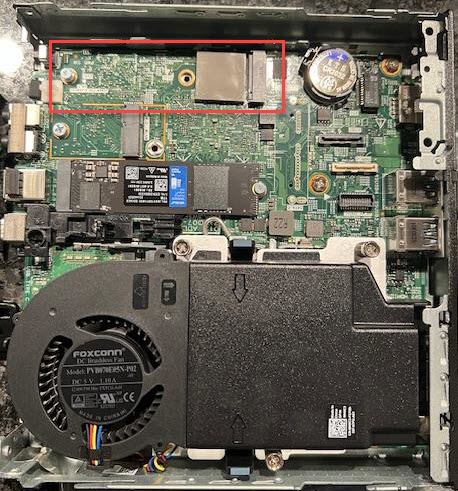
The OS drive is the M.2 NVMe drive towards the left /rear of the device. Remove the phillips head screw that holds the drive in place.

Remove the drive from the board and replace with the new drive.
Replace the phillips head screw to hold the new drive in place.
Slide the case cover back in place and replace the screw.
Plug in and power on the device.
The remaining steps in the process will be completed by Datto Technical Support.
Power off and unplug the device.
Remove the cover screw on the back of the device.
Slide the cover forward to remove it.
The storage drive is located near the rear of the device. Remove the phillips head screw that holds the drive in place.
Remove the drive from the board and replace with the new drive.
Replace the phillips head screw to hold the new drive in place.
Slide the case cover back in place and replace the screw.
Plug in and power on the device.
The remaining steps in the process will be completed by Datto Technical Support.
Power off and unplug the device.
Remove the cover screw on the back of the device.
Slide the cover forward to remove it.
The OS drive is the NVMe drive towards the center of the device. Remove the phillips head screw that holds the drive in place.
Remove the drive from the board and replace with the new drive.
Replace the phillips head screw to hold the new drive in place.
Slide the case cover back in place and replace the screw.
Plug in and power on the device.
The remaining steps in the process will be completed by Datto Technical Support.


