Restoring an image to Microsoft Azure
This article describes how to restore an image to a Microsoft Azure VM.
Environment
- Datto Backup for Microsoft Azure
Description
NOTE To restore an image to Azure, you must first create a VNET (external link), as part of your restore environments setup.
Do not run restores if your production system is online. Having a production system and a restore online at the same time will cause backups to fail.
The Restore Image to Microsoft Azure restore method unique to the Datto Cloud SIRIS creates a separate VM resource.
Overview
The Datto Cloud SIRIS verifies the tenant and subscription to which it will restore. This information is bound to the subscription selected during the initial registration.
The Datto Backup for Microsoft Azure system creates the VM and restore disks in your specified resource group.
The system transfers the restore data.
The system attaches the disks to the VM and boots the restore as a separate resource in your restore environment.
Restore procedure
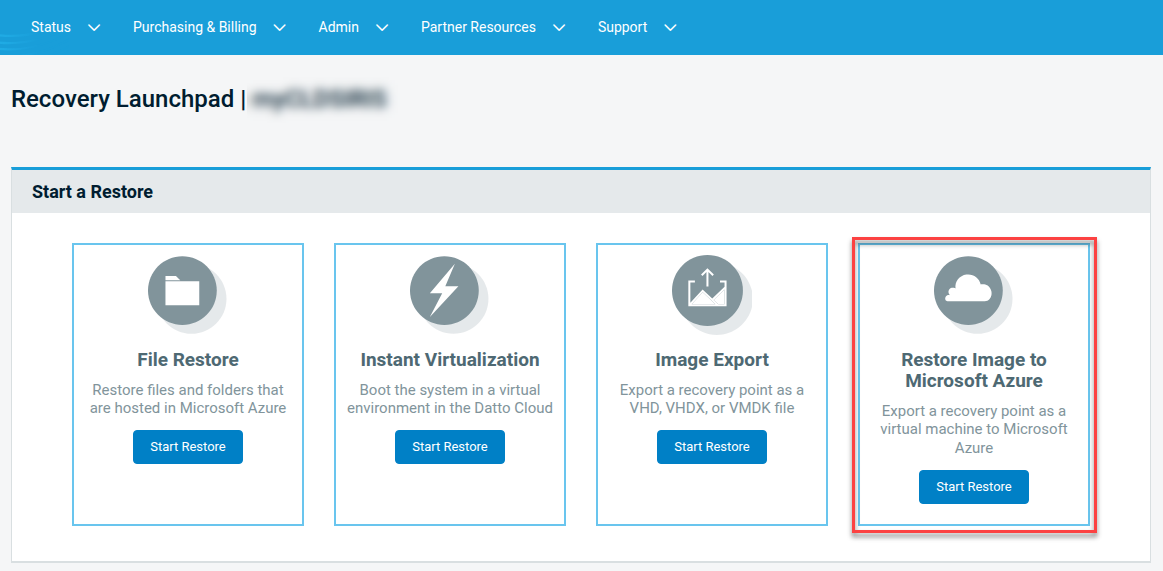
On the Recovery Launchpad page, click the Start Restore button in the Restore Image to Microsoft Azure section.
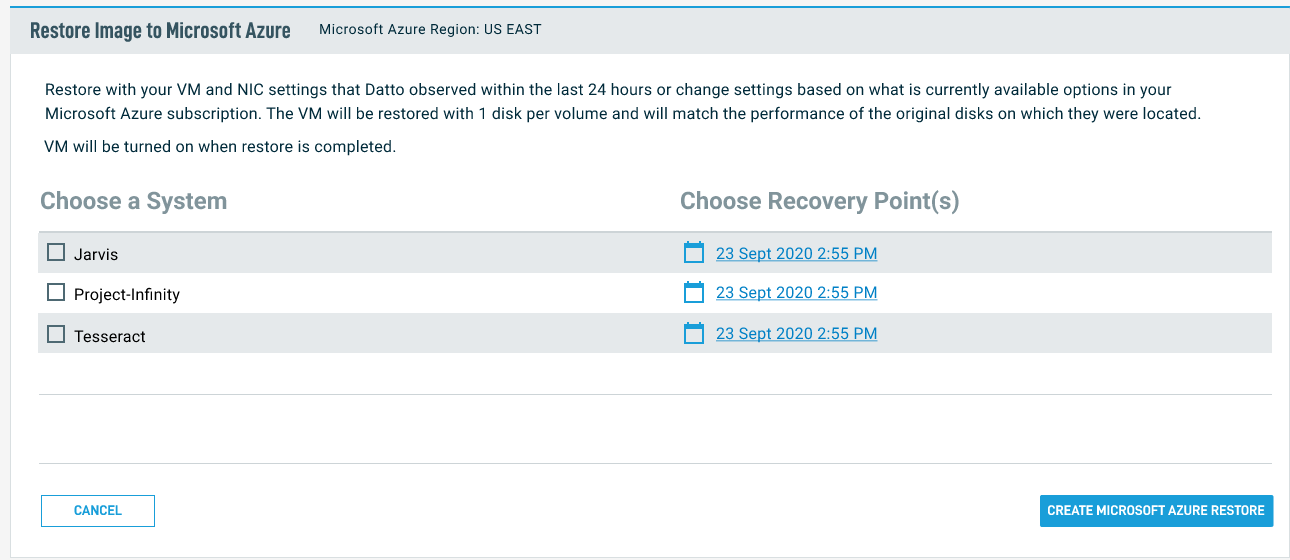
Select the system from which you would like to restore, then click the calendar icon to choose a restore date and time. After making your selection, click the Create Microsoft Azure Restore button.
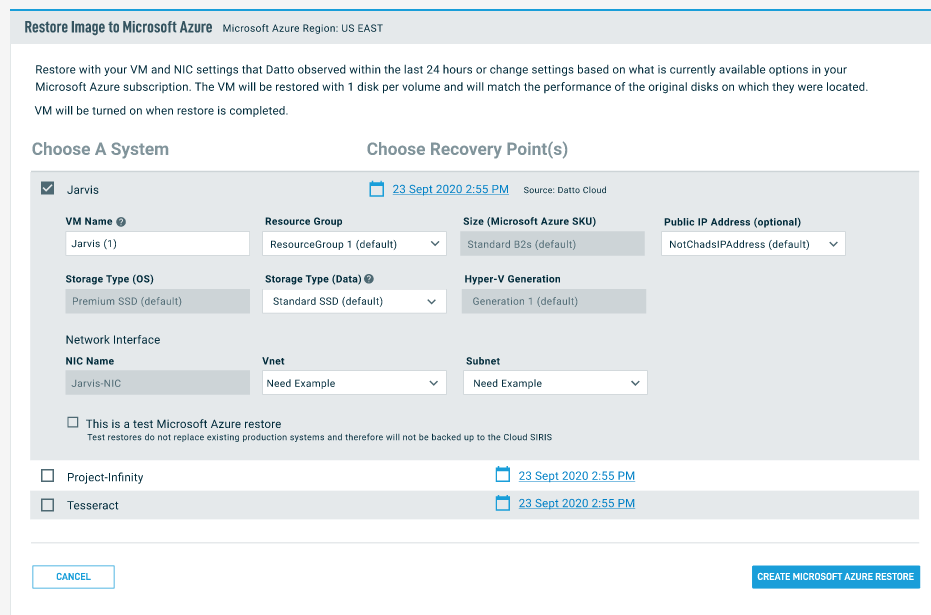
Choose your restore parameters.
By default, the system will select the latest recovery point. To restore from a different point, click the calendar icon, then select the date and time from the dialog box.
You can use the drop-down menus to specify various system and network parameters.
Check the This is a test Microsoft Azure Restore box to create a test restore that will not replace the existing production system.
A Test Restore will remove the agent executable from the file system to prevent backups from running on your test restore. This is expected behavior for tests.
If you accidentally ran a test restore that was supposed to be an actual system restore, you will need to re-run the agent installer on the restored system to replace the agent executable so backups can be run on your restored system.
Once you finish configuring the restore, click the Create Microsoft Azure Restore button.
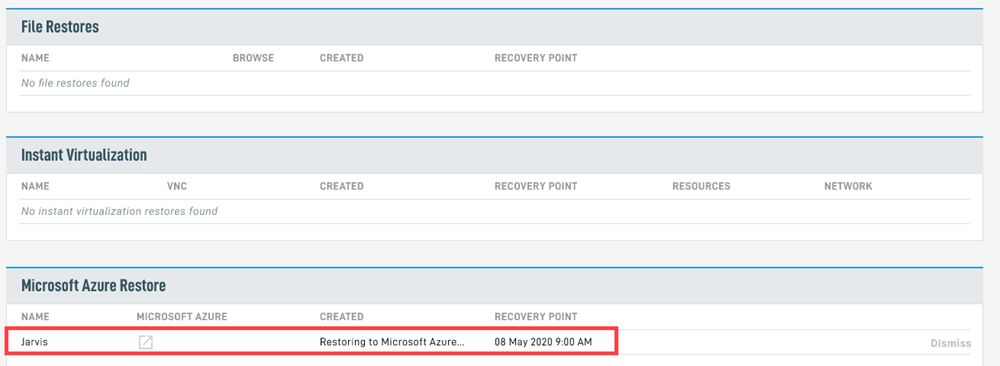
The system will return to the Recovery Launchpad. The selected restore will be in the Microsoft Azure Restore card. The entry will populate with a status of Restoring to Microsoft Azure until the restore process completes. Restore time can vary, based on the amount of used disk space.
The Running icon may be hovered to see the current stage of the restore. The completion percentage refers to the stage that is running and will not update as the current stage progresses.
Access the restore
Once the restore completes, click the link that appears in the MICROSOFT AZURE column of the Microsoft Azure Restore card, to access the restored image in your Microsoft Azure environment.

Click the datto-restore resource group you created as a prerequisite to this trial.
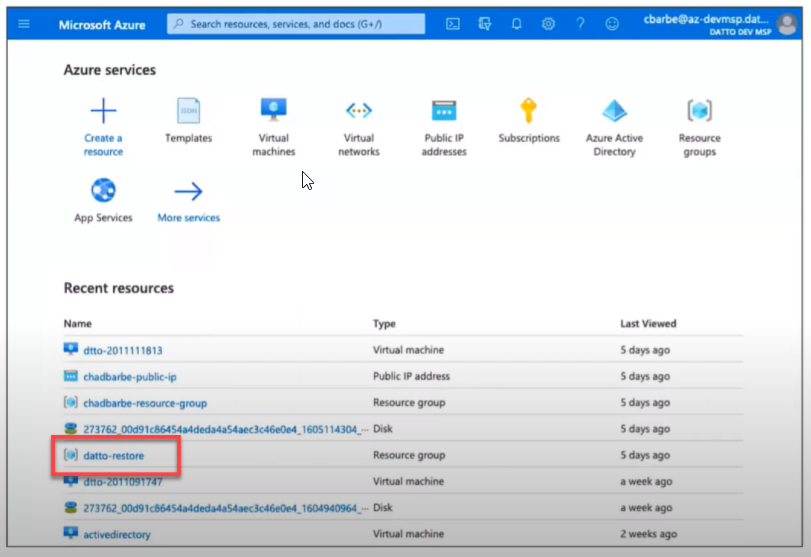
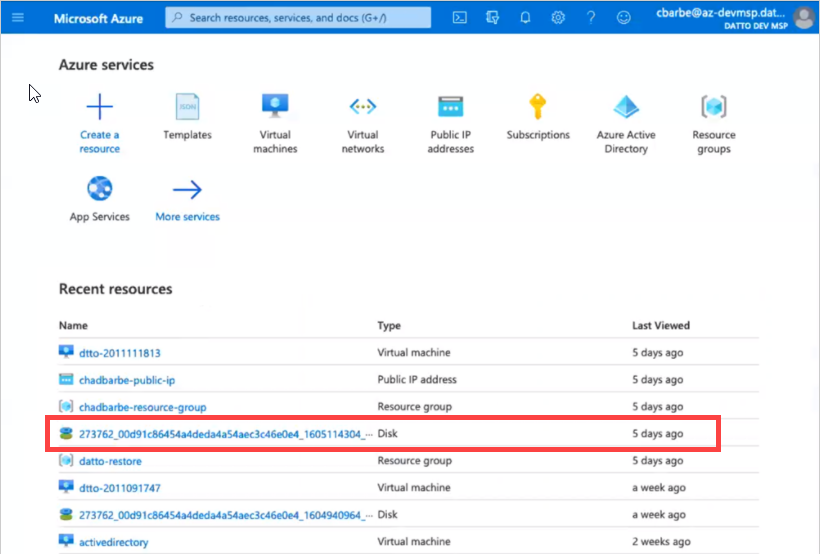
In the Overview section of the resource group, you will find the VM and disk that the system generated for the restore. Click the disk entry to go to the Disk Overview page.
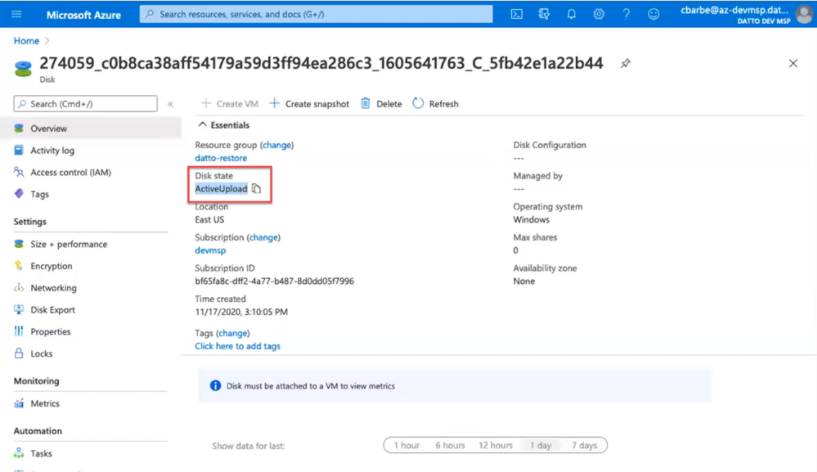
Under the Disk State heading, you can watch the disk status change as the restore processes. The status will show as ActiveUpload while the system transfers data. Once the restore is complete and ready for access, this status will show as Attached. Click the VM name will appear under the Managed By heading to access the VM.
Once the VM successfully boots, you can connect to it using any standard method, such as RDP.
NOTE By default, the restore VM will not have an associated public IP address. You must configure the public IP separately.
VM screenshot verification
To verify your VM's viability by seeing a screenshot:
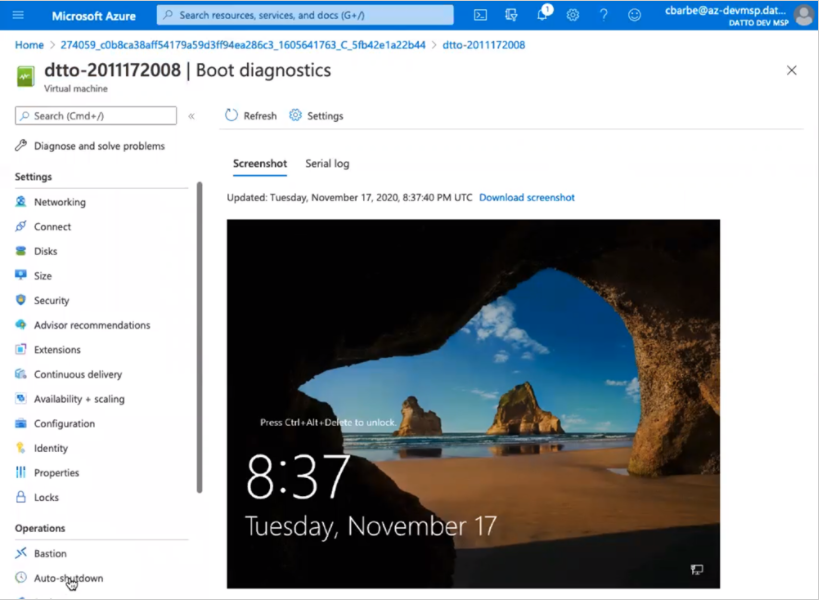
Enable boot diagnostics under Support + Troubleshooting in the Microsoft Azure environment's sidebar.
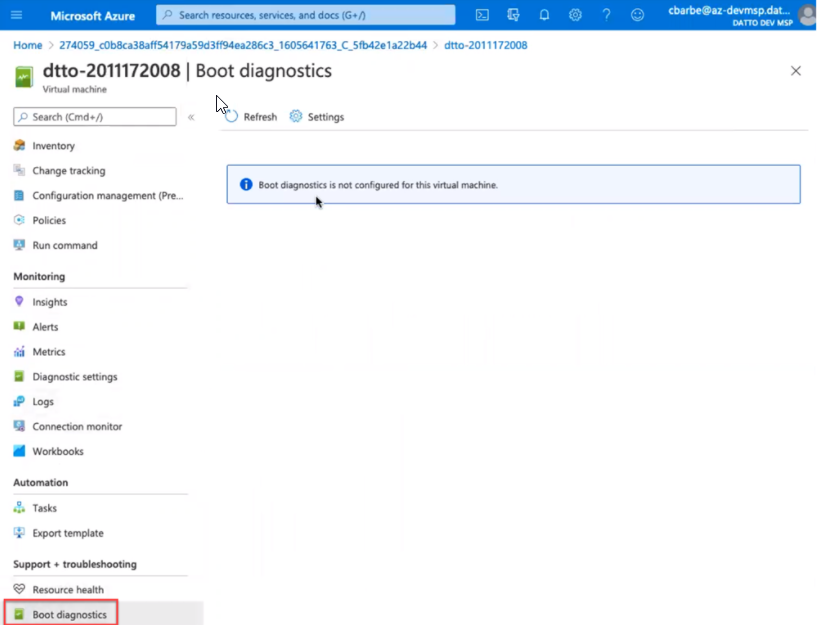
When the process completes, you will see a screenshot of the VM on the Boot Diagnostics page.
Removing the restore VM
In the Recovery Launchpad, click the Dismiss link. This action causes the Cloud SIRIS to destroy any referential data to the CLOUD SIRIS-protected system dataset; it does not destroy the restore VM in your Microsoft Azure environment.
NOTE Datto does not have delete access in your Microsoft Azure environment. You must remove all trial resources manually.
NOTE EFI system partitions are not included in the backup, but are recreated during the restore process. If this partition is non-standard, as in the case with the patches release by Microsoft of systems effected by the vulnerability CVE-2023-24932, the partition would be created standardly. In cases like these, please reach out to Microsoft on re-applying the patch if desired.


