Datto Endpoint Backup with Disaster Recovery Image Export
This article describes how to perform an image export for Datto Endpoint Backup for with Disaster Recovery in the Partner Portal.
Environment 
- Datto Endpoint Backup with Disaster Recovery
Description

Method 1
In the Datto Partner Portal, click the Status tab, then select BCDR Status from the drop-down menu.

In the section for the target device, click the ellipsis icon on the far right-hand side of the screen, then click Recovery Launchpad from the drop-down menu.

Method 2
Alternatively, from the BCDR Status page, click the name of the Datto device.

On the top right of the Device Details page, click Recovery Launchpad.

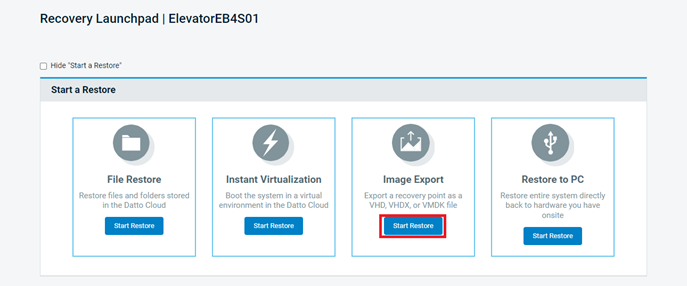
Select Start Restore under Image Export.
Choose the agent and then click on the date to choose which recovery point you want for the restore. You will then need to choose the file type, then select Export Image to start the restore.
VMDK: VMDK: Compacted complete VMDK image (supports resizing and other advanced VMFS features).
Disk Space Required: VMDK image exports require approximately 200 MB of free disk space on the destination hypervisor.Files produced: A single drive system results in 1 file: C.vmdk. A second file, configuration.vmx, will also be present if you are restoring an agentless VMware-based system. The boot volume will always be the first volume of the image export; when restoring a virtual machine, you must attach this as the first drive in the VM configuration.
VHD: Converted raw to VHD.
Files produced: A single drive system results in 2 files; boot.vhd and C.vhd.
VHDx: Compacted complete VHDx image
Files produced: A single drive system results in 1 file; C.vhdx.
RAW: Uncompressed RAW disk image
Files produced: A single drive system results in 1 file; C.raw
You will then be brought back to the Recovery Launchpad page. Select the cloud under Download to see the SFTP information to download the restored image.
Deleting the Restore
When you are done with the restore select the trash can icon on the right side of the restore on the Recovery Launchpad page to remove your File Restore/Image Export


