Restoring a Thin-Provisioned Image Export To VMware ESXi with Vmkfstools
This article describes the steps to restore a thin-provisioned VMDK image export to a VMware vSphere environment using vmkfstools (VMware command line).
Use the Restoring a Thick-Provisioned Image Export to VMware ESXi if you need to copy the image export as thick-provisioned.
If you have a licensed version of VMotion, see How to storage vMotion a Datto-managed ESX virtualization to see if you can restore directly via your hypervisor.
To learn more about virtual disk provisioning policies, see VMware's article on the subject (external link).
Environment
- Datto ALTO
- Datto SIRIS
- vmkfstools
Description
Choosing a file format
- Choose VMDK if you have enough free disk space on the destination hypervisor and if you would like to have the ability to expand the disk size of the virtualization's VMDK files in the future.
- Choose VMDK-linked if storage space on your hypervisor is a concern or if you have to perform a USB transfer of the image export to the datastore and you will not need to resize the disks in the future.
- Currently, exporting VMDK images larger than 2TB is not supported. If you need to export a larger volume, we recommend using the VMDK-linked format instead.
If you select VMDK-linked and need to expand the disk size of the system's VMDK file, resizing will need to be done manually via the ESX Command Line, using vmkfstools -X.
IMPORTANT VMDK-linked formatted files cannot be used by VMware when uploaded directly to the datastore. The hypervisor will recognize the virtual disk as a VMDK file, but once added to a VM, it will be inaccessible and will appear to have a size of 0 MB. You can resolve this issue by copying or moving the VMDK file from one folder to another in your datastore file browser.
Export a thin-provisioned disk image for use on VMware ESXi host
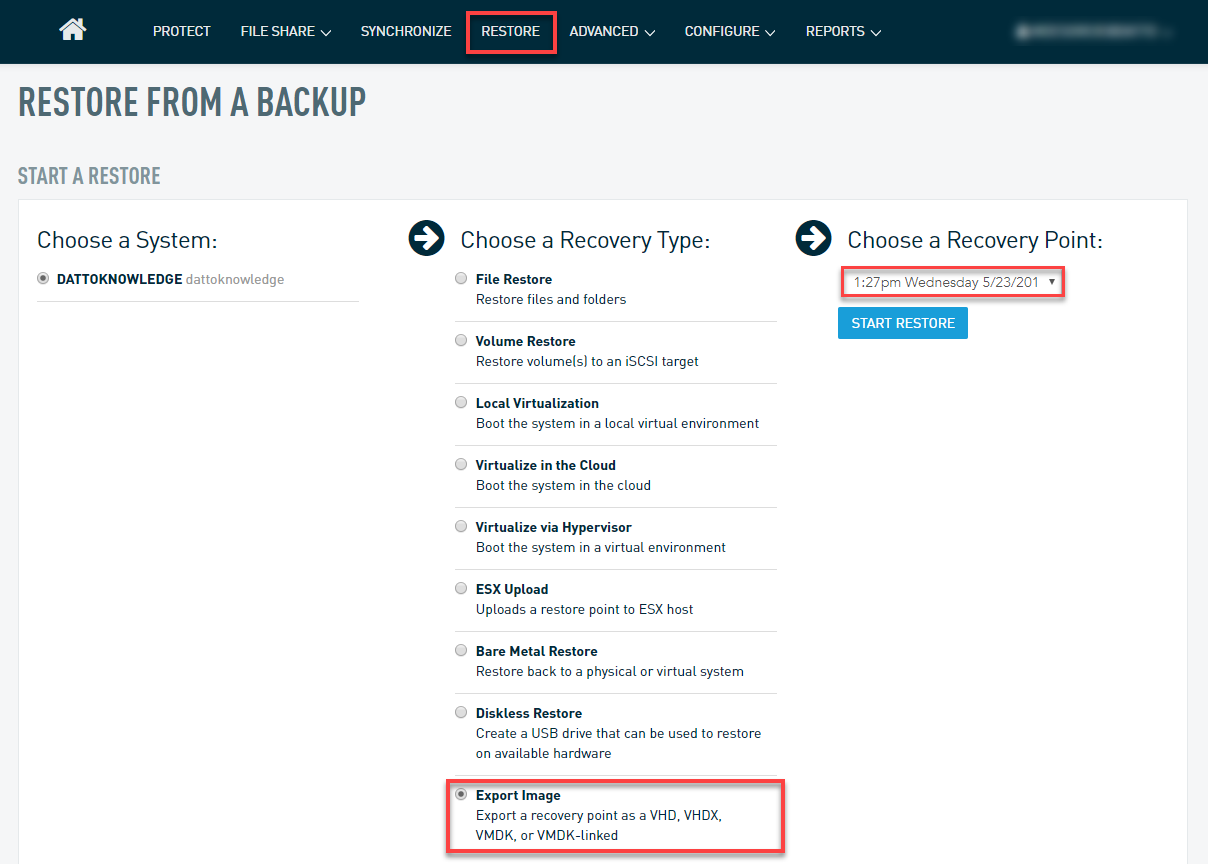
Access the Datto appliance GUI.
Click the Restore tab.
Select the system to restore, and then click Export Image.
Choose the recovery point that you want to use, and then click Start Restore.

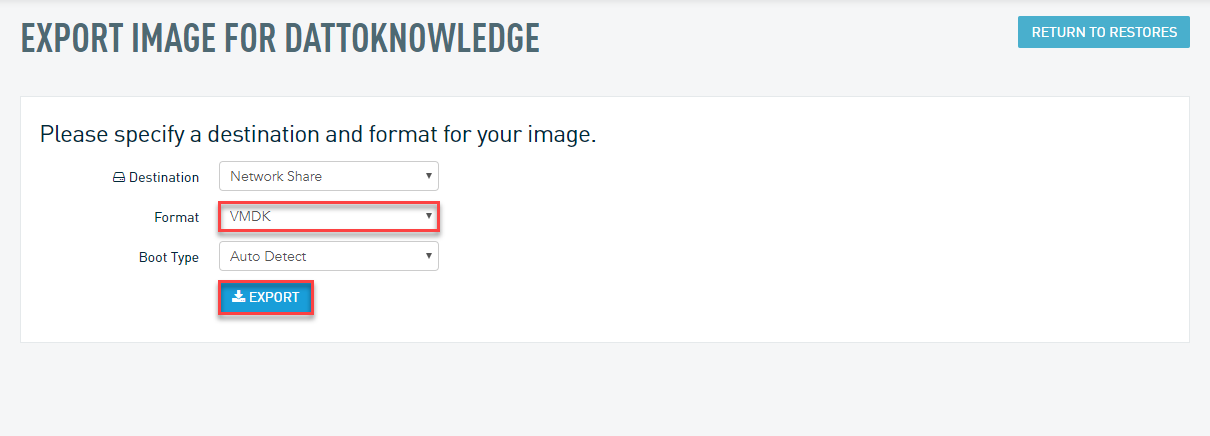
Choose the Destination. This will normally be: Network Share.
Select the Format from the dropdown.
Click Export. The Datto appliance will create a clone of the point you selected and share it on the local network.
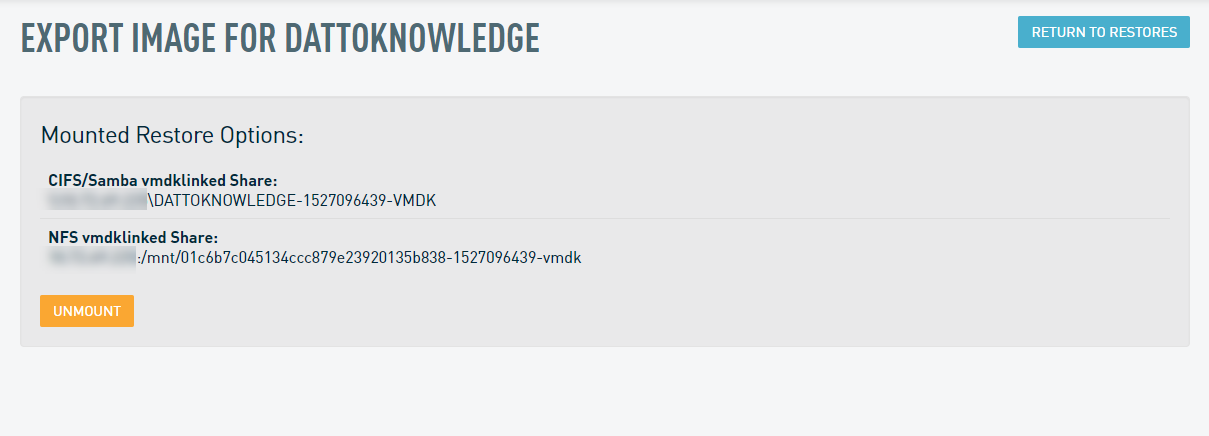
The GUI will refresh with new options. Copy either the Samba or NFS VMDK share path to your clipboard.

Add the NFS share from the Datto appliance to VMware as a datastore and create the VM if necessary.
Copying the Export to the Datastore via the VMware Command-Line
vmkfstools(external link) is an ESXi command-line tool that you can use to manage virtual disks.
To copy the image files from the Datto appliance to a permanent datastore on VMware with thin-provisioning, use the following command:
nohup vmkfstools -i /vmfs/volumes/<SourceDataStoreName>/<DriveLetter>.vmdk -d thin /vmfs/volumes/<DestinationDataStoreName>/<DriveLetter>.vmdk
- The SourceDataStoreName is the datastore you created, which references the NFS share on the Datto appliance.
- The DestinationDataStoreName is the datastore on your environment to which the disk images will be copied.
EXAMPLE nohup vmkfstools -i /vmfs/volumes/Datastore/C.vmdk -d thin /vmfs/volumes/HostStorage001/C.vmdk
While not strictly required, the nohup at the beginning of the string is a supplemental command that tells the system not to stop the command once it has started, so the command will keep running until it's done, even if the user that started it logs out. This avoids having to start the full vmkfstools command all over again for the volume if the user's SSH connection gets interrupted or accidentally closed.
Sometimes, the ESX console may return an "Enter a disk size which is larger than its original capacity" message after adding a thin-provisioned VMDK to a VM definition. This can be resolved by resizing the volume using vmkfstools from the ESX command line:
vmkfstools -X <size>g <vmdk>
NOTE The output of the vmkfstools command only ever displays 99% before returning to the command prompt, therefore the file nohup.out will never show 100%. Once the copy completes, the window the vmkfstools command was run in will be returned to the prompt.
Once the copy completes, proceed to the Cleanup section of this article to continue.
Cleanup
- When the transfer completes, access your vSphere environment. Create a new virtual machine or attach the transferred disks to an existing virtual machine as necessary.
- Make sure that the machine's settings match the needs of your environment. Make any adjustments needed.
- If your import process requires a VMX template, and the selected snapshot originated from a protected agentless system, you can find a copy of the virtual machine's configuration, as it existed at the time of the backup, in the Image Export files. The file is named configuration.vmx. Before using this file, Datto recommends reviewing and updating its contents to ensure that the naming convention it uses, match your current production environment.
- Attach the virtual machine's disks, starting with the boot volume (in Windows this would be C.vmdk). and then any other applicable drives.
- Boot the virtual machine. Make sure that it boots to the Windows login screen. If the virtualization fails after the first attempt, try again with a different storage controller. If the issue persists, contact Datto Technical Support.
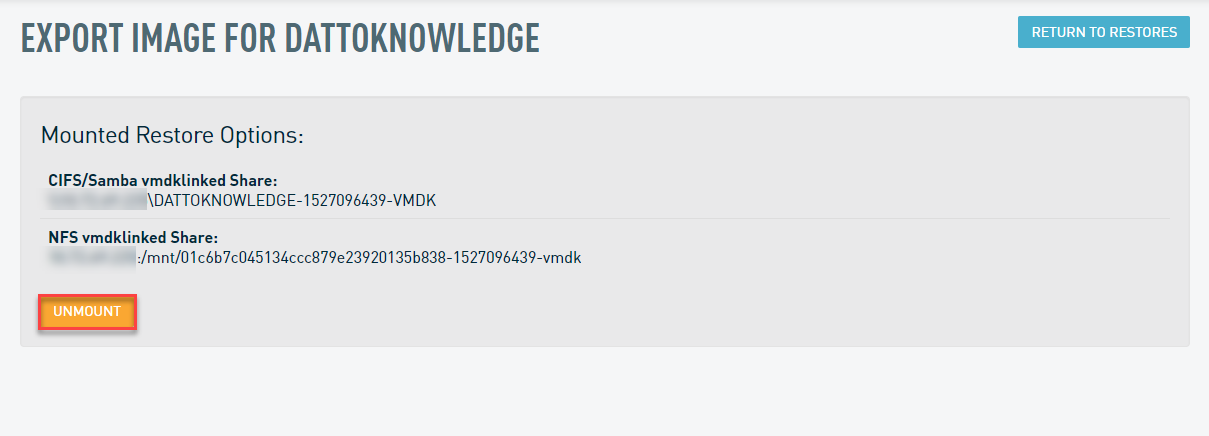
- After confirming that the virtual machine functions as expected, return to the Export Image screen in your Datto appliance's GUI, and click Unmount to remove the shared clone.


