Screenshots Fail to the "Getting Devices Ready" Windows Screen
Issue
When the Screenshot Verification process runs for a protected machine, it never progresses past the Getting Devices Ready screen, resulting in a failed screenshot.
Environment
- Datto ALTO
- Datto SIRIS
Cause
This error occurs when the Screenshot Verification process takes a screenshot before the login screen displays. Virtualizations can take longer to boot on a Datto appliance than they do in the production environment. This wait time occurs often because the virtualization has to run Sysprep on its Windows installation the first time it boots. Sysprep generalizes the Windows configuration for deployment onto new hardware.
Extended boot time can result in a screenshot capturing "Getting devices ready" instead of the Windows login screen. Datto appliances will mark this as a failed screenshot because the Windows environment has not fully booted.
Resolution
Using a Local Virtualization
The Screenshot Verification process virtualizes your protected system to ensure that the selected snapshot will boot in a disaster scenario. A failed screenshot can be caused by the boot process failing to complete or timing out. You can investigate the cause of the boot failure further by creating a local virtualization and observing the results.
If the virtualization eventually boots, note the boot time and select it in the Additional Wait Time setting. If the virtualization fails to boot or reboots during the Getting Devices Ready screen, contact Datto Technical Support.
See Starting A Local Virtualization On A Datto Appliance for more information.
Additional Wait Time for Screenshot Verification
Increase the screenshot's Additional Wait Time:
In the Datto device GUI, click the Protect tab.
Click Configure Agent Settings for that machine experiencing the error.
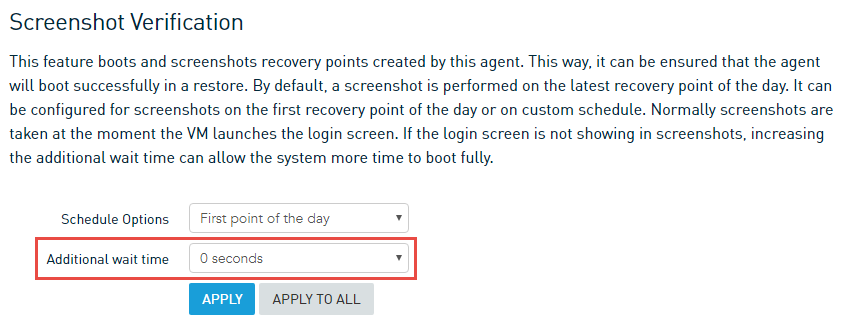
Scroll down to the Screenshot Verification section, then increase the Additional wait time setting.

Adjusting services startup type
Certain services may cause a delay in a machine startup. To solve this issue, delay the start of one or more services:
On the protected machine, open
services.msc.Right-click your service and select Properties. Change the startup type from Automatic to Automatic (Delayed Start).
Take a backup of the protected system.
Force a Screenshot Verification to see if the problem persists.
For Microsoft Exchange, perform these steps with the Exchange Transport and Information Store.
If you don't know which service is causing the problem, you can start a Local Virtualization, open Event Viewer, and review event logs for any errors that Event Viewer logged during startup. If you identify a service in any error messages, change its startup type to Automatic (Delayed Start).


