1-Click Disaster Recovery in the Datto Cloud
Topic

This article explains how to quickly recover in the Datto Cloud with 1-Click DR capabilities for cloud virtualizations and networks.
Environment
- Datto SIRIS
- Datto ALTO
- Recovery Launchpad
- Datto Endpoint Backup with Disaster Recovery
- Datto Backup for Microsoft Azure
Description
The Datto Recovery Launchpad lets you create virtual machines, VLANs, and entire DR Plans in the Datto Cloud with 1-click in most cases. This greatly improves recovery time objectives (RTO) for business continuity in times of production outages or disaster scenarios as well as when performing routine DR testing.
You can easily clone previous cloud virtualizations from a new panel in the Recovery Launchpad that displays all previous cloud virtualization history. With one click of the Clone button, the Recovery Launchpad will create a new instance of your selected virtualization using the previous configuration and the most recent cloud snapshot for the selected agent. As an option, you can also choose from the five (5) most recent cloud snapshots. Cloning will also attach the new virtualization to the same network as before if it still exists.
NOTE If the previous network no longer exists, the virtualization will be created using a simple networking configuration and you can edit the VM settings to associate it with a new network, if required. Previous Hybrid Virtualizations will also be cloned using simple networking but can be converted to Hybrid Virtualizations by checking the Bridge to Siris (Hybrid Virt) in Edit Settings view.
Similarly, you can quickly create cloud networks (i.e. VLANs) by cloning a configuration that you may have utilized in the Datto Cloud in the past. Note that VPN connections (i.e. OpenVPN, Site-to-Site) will need to be reconfigured once the network has been cloned. See New Recovery Launchpad Networking cloud virtualizations for more information
Cloud virtualizations and VLANs consume Datto cloud resources are intended for temporary use during a recovery event or related testing exercise and should be removed when no longer needed. Virtualizations that are not supporting a business continuity/recovery event or that have been running for more than 30 days may be powered off and subsequently deleted by Datto Technical Support.

Method 1
In the Datto Partner Portal, click the Status tab, then select BCDR Status from the drop-down menu.

In the section for the target device, click the ellipsis icon on the far right-hand side of the screen, then click Recovery Launchpad from the drop-down menu.

Method 2
Alternatively, from the BCDR Status page, click the name of the Datto device.

On the top right of the Device Details page, click Recovery Launchpad.

Cloning a cloud virtualization from history
Navigate to the new Virtualization History section in the Virtualization panel in Recovery Launchpad. This will display all of the past cloud virtualizations associated with this Siris device. If needed, use the Search bar and sort functions to find the restore that you would like to clone. 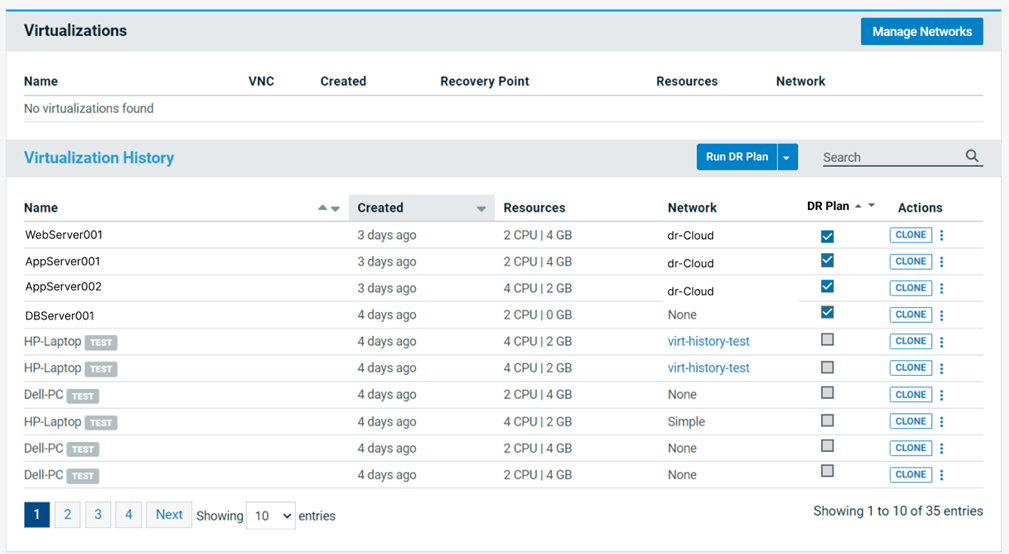
Select the Clone button under Actions to quickly redeploy a new virtualization using the settings that were previously utilized for the selected virtualization. This will use the most current, verified snapshot for the new restore. Once the cloning process is completed, you will see it display in the list of active Virtualizations. At this point, the virtualization can be powered on when you are ready.
If you would like to use a snapshot other than the last one, use the ellipsis to select from the list of recent (up to 5) cloud-resident snapshots to use for your clone request.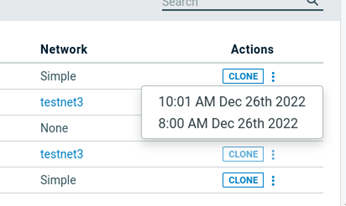
Important to note:
If you want to use an older snapshot for your restore, you will have to use the standard method of Performing a Cloud Virtualization.
If the network that was originally associated with this virtualization has been deleted by a user or removed by Datto for inactivity, the configuration will default to Simple when cloning a virtualization. The Network selection, along with other configuration parameters can all be edited once you have cloned the virtualization.
The Clone button will be grayed out if an active restore already exists for a particular agent or if the agent has since been removed.
For Hybrid Virtualizations, the associated “sirislite†network gets deleted with the original virtualization, so once cloned, you will need to go into the Configure Settings view and select the Bridge to Siris (Hybrid Virt) option.
Port Forwards are not recreated by default when cloning a virtualization from history. Those will need to be reconfigured using the standard process, if required.
Cloning a cloud VLAN network from history
Navigate to the new Network History section in the Manage Networks view in Recovery Launchpad.
This will display all of the past cloud networks associated with this Siris device. If needed, use the Search bar and sort functions to find the restore that you would like to clone.
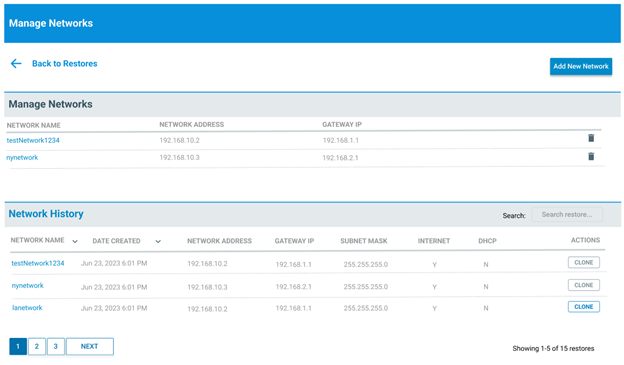
Select the Clone button under Actions to quickly redeploy a new cloud network using the settings that were previously utilized for the selected network. Once completed, you will see it display in the list of active networks and the network is ready to use for your DR or DR test.
Important to note:
The Recovery Launchpad will not allow you to clone a network if it will result in a conflict or overlap with existing IP address assignments on other active networks.
Cloning will not re-establish any VPN connections associated with the original network. Those will need to be recreated from the Network View, as described in Networking cloud virtualizations.
Running a DR Plan in the cloud
The Recovery Launchpad now gives you the option to clone an entire DR configuration (cloud virtualizations and VLANs) with 1-Click by selecting the new DR Plan button or the associated dropdown arrow to customize your recovery. Every Siris device with a cloud retention plan and offsite virtualization capabilities will now have this simplified way to recover all required systems and VLAN connections in the Datto cloud with a single click.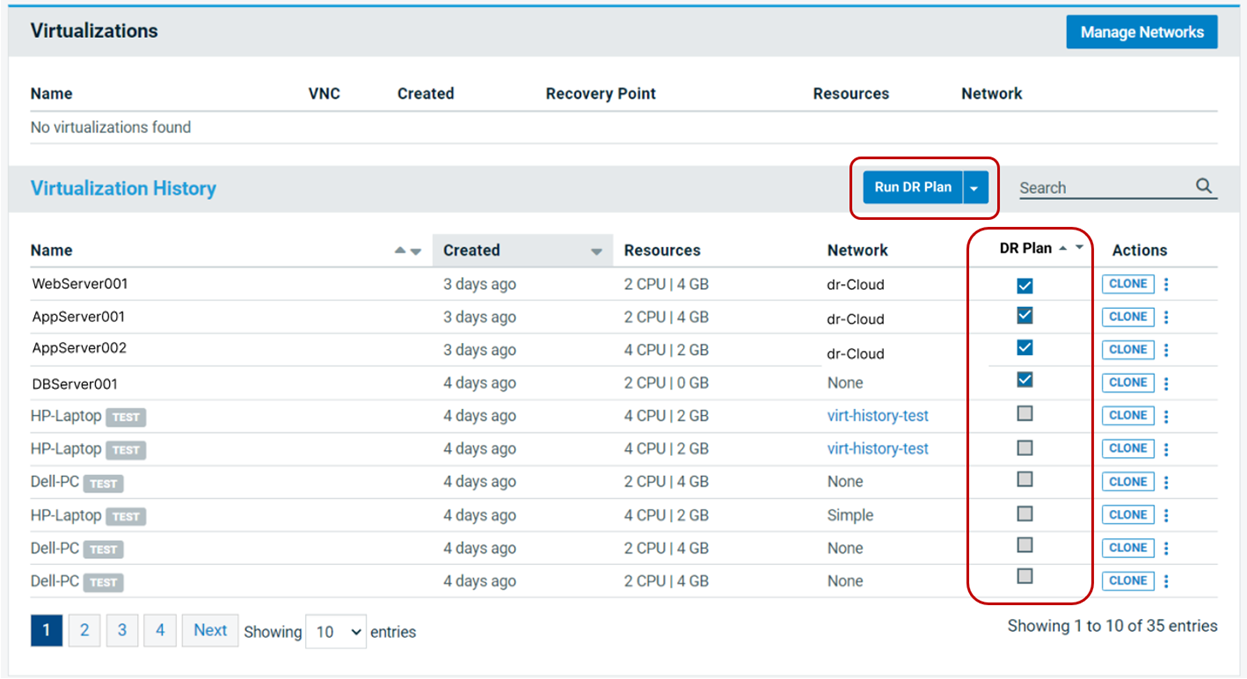
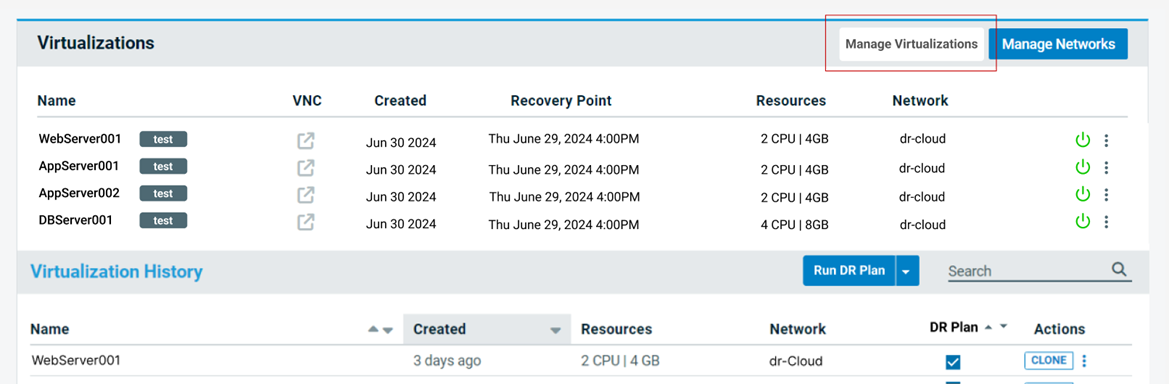
For each Siris device, you can select the virtualizations from its history that you would like included in the default DR Plan for that device. You do this by checking the box in the DR Plan selection column in the Virtualization History pane within Recovery Launchpad.
NOTE A virtualization will not be selectable if a current virtualization for that system is already checked elsewhere in the column OR if there is an active virtualization for that system already in the Virtualizations panel above.
Once you have selected all the required virtualization configurations from history, press the DR Button to clone the past configuration with 1 click. The dropdown gives you additional options to indicate that these assets are part of a DR Test and not being used for a real DR event or to Run DR Wizard to override one or more of the default plan settings, such as the Recovery Point being used for each system.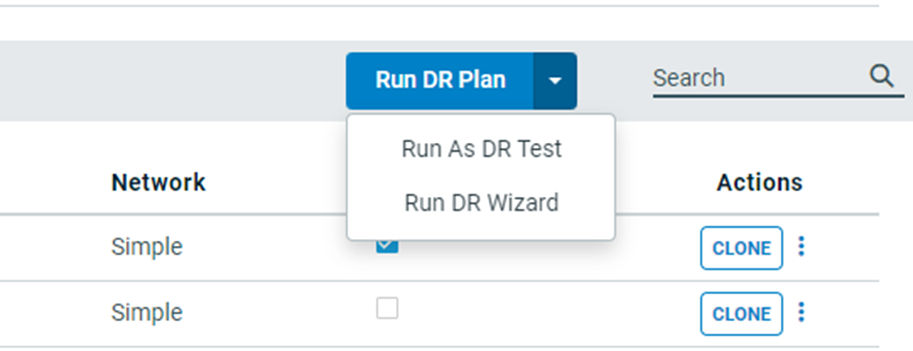
Using the DR Wizard allows you to modify the cloud backup recovery point that you want to utilize for each server in the DR plan, instead of defaulting to the most current cloud backup.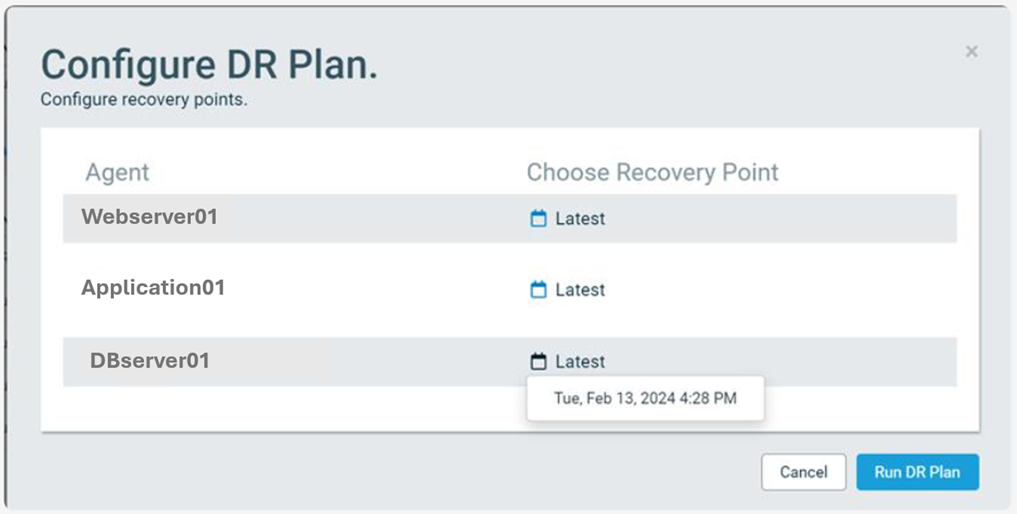
Once you have started the DR Plan, all of the selected virtualizations and networks will be cloned. If your DR Plan request includes agents that are already have active restores in the Datto Cloud, you will be given the choice to Skip these Agents or Delete Existing Restores, in order to continue setting up the DR Plan.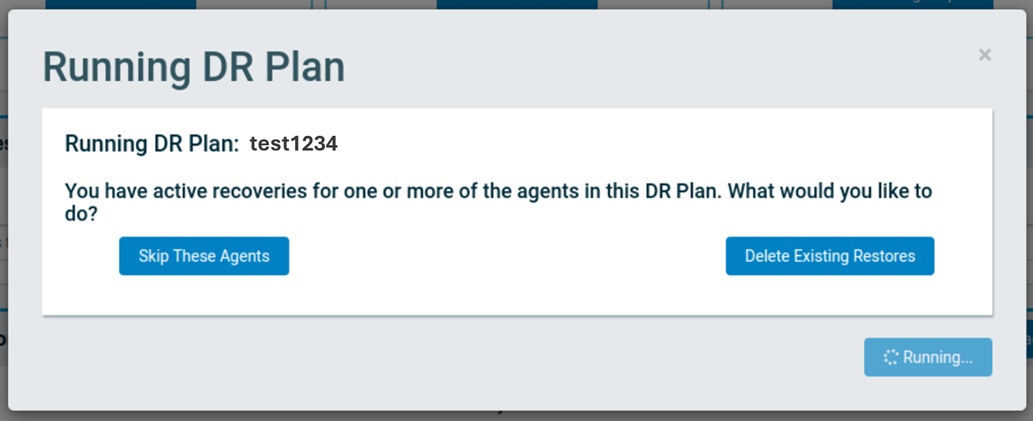
If the networks required to support the requested configuration are no longer available, you will be prompted to select another network, clone the one you need or use a Simple Network to create the DR Plan. Note that networks and other settings can be modified once the systems are created, via the usual process to edit VM Settings.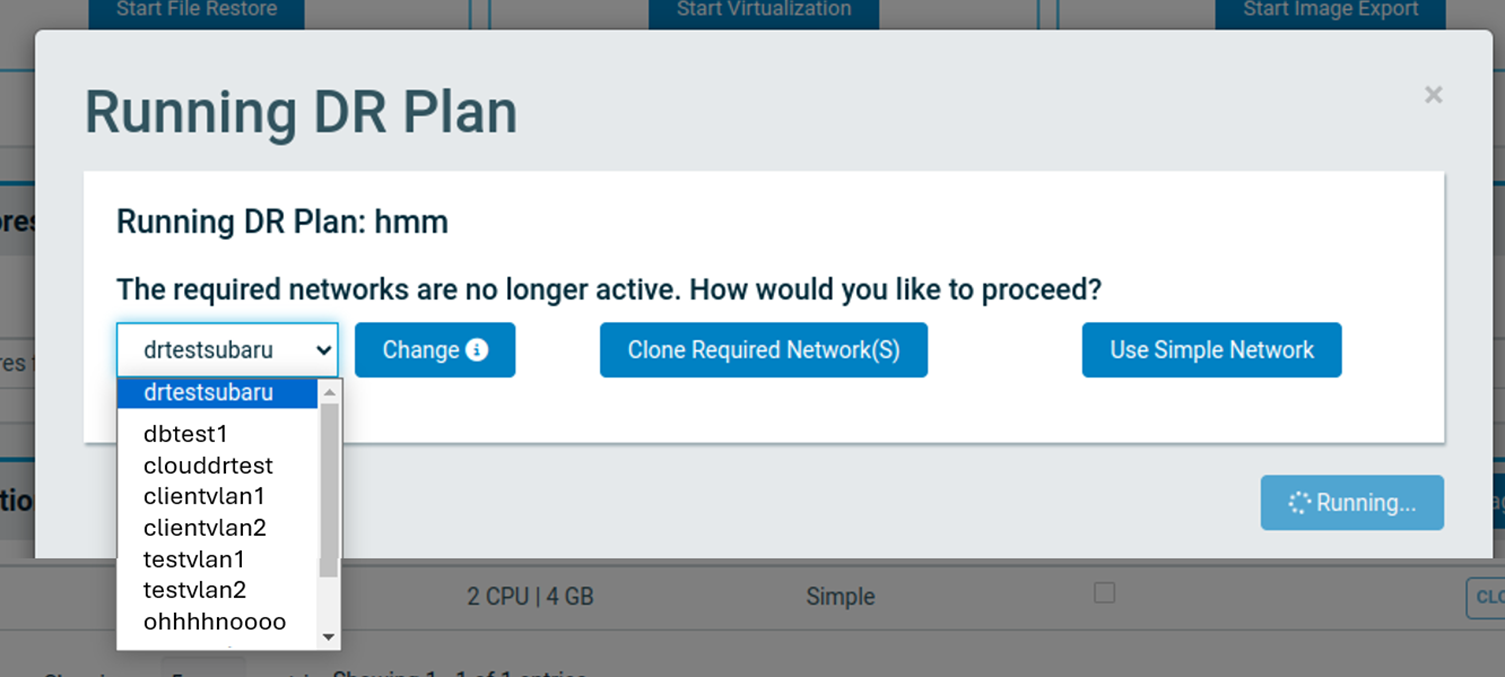
Once all of the required systems and VLANs are cloned and ready, you will receive a confirmation that your DR Plan creation has succeeded.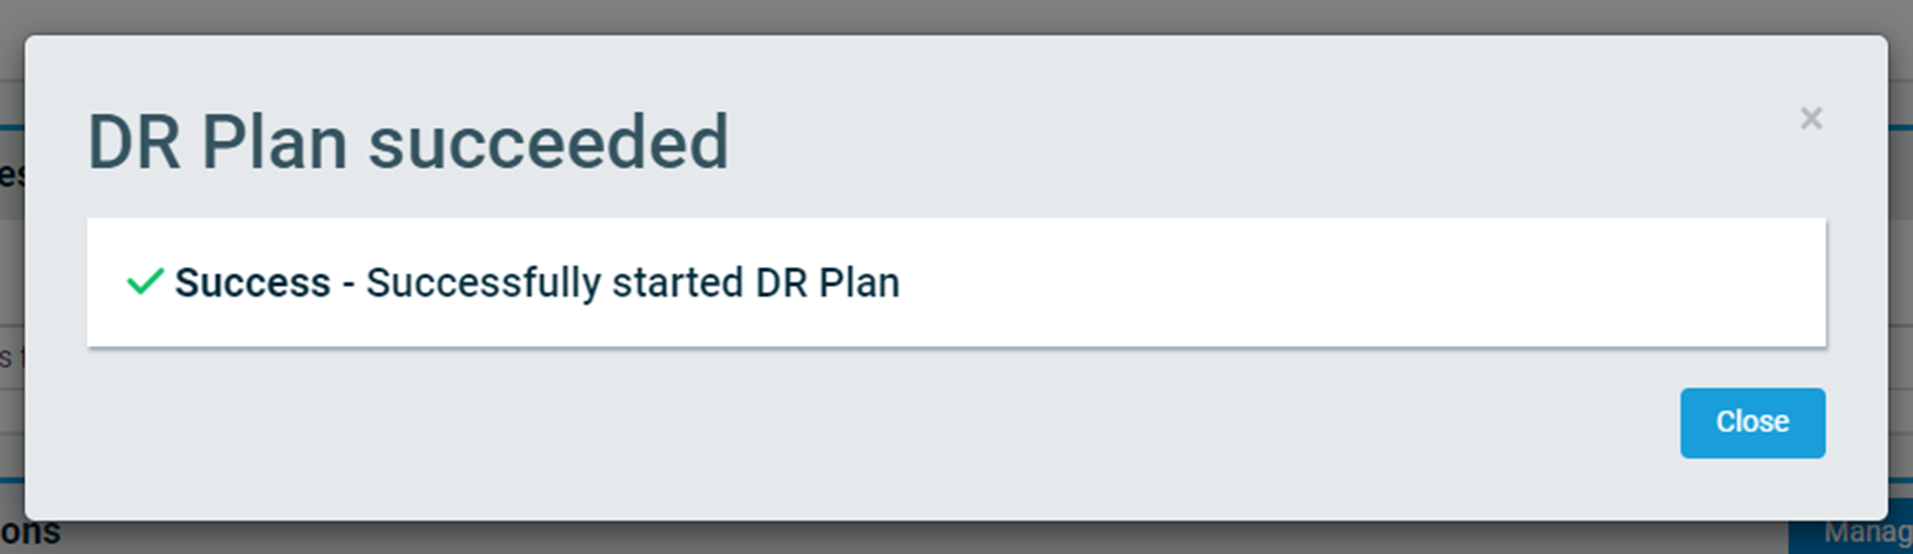
Important to note:
The DR Plan option replaces the time-consuming tasks associated with creating your cloud DR environment. VMs are currently still powered on manually, in the required order by the Recovery Launchpad user, as well as providing encryption passphrases when prompted.
The DR Plan option currently will not re-establish any VPN connections associated with the original network or previous recoveries. Any OpenVPN or IPsec connections will need to be recreated from the Network View, as described in New Recovery Launchpad Networking cloud virtualizations.
Shutting Down and Deleting all Active Virtualizations
All active virtualizations can be managed with one click using the Manage Virtualizations dropdown menu. This will let you quickly and easily power down all running virtualizations until you need them or you can choose to delete them at the conclusion of your DR Test or event.
Select the Manage Virtualizations Button at the top of the Virtualizations panel.
Select either the Stop all virtualizations or Delete all virtualizations option and confirm your selection when prompted.
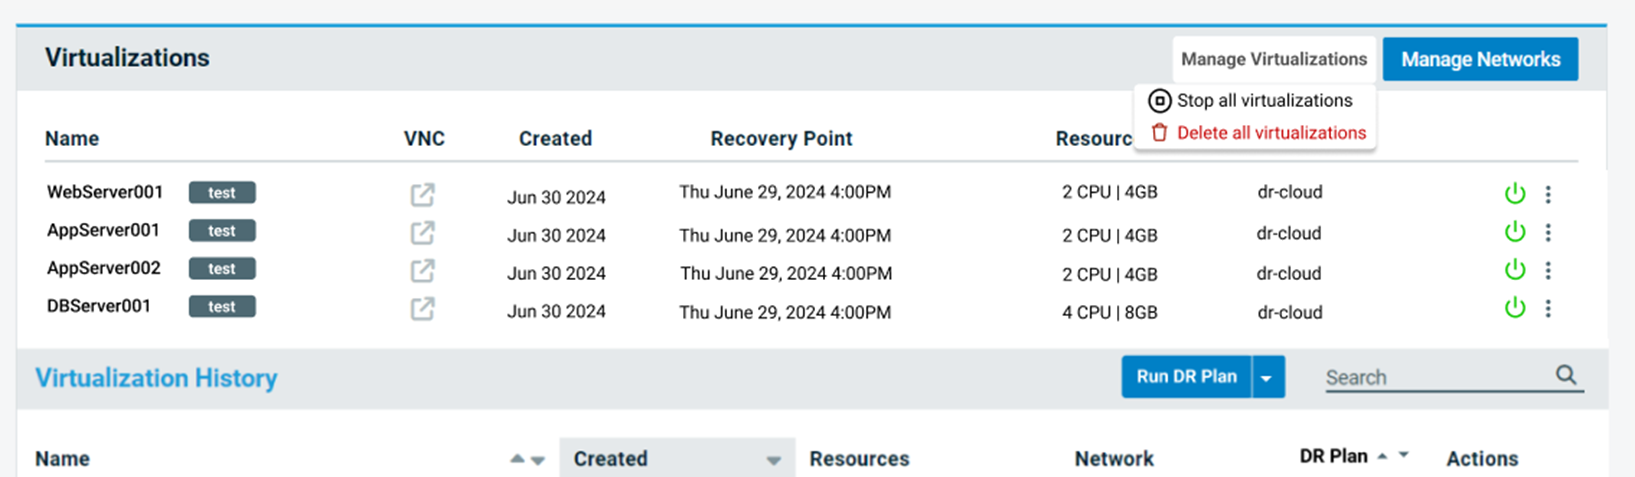
- The Stop all virtualizations option will shut down all running virtualizations.
- The Delete all virtualizationsoption will delete all running and stopped virtualizations.
Virtualizations in other states (e.g. starting, powering down, etc.) will not be included in the 1-Click request. If one or more virtualizations cannot be shutdown automatically, you can use the Force Power Off option to complete the operation. Please contact Technical Support if you have questions or concerns about retaining the data from your cloud virtualizations.
IMPORTANT If you select Delete all virtualizations, all active virtualizations will be permanently removed. Any changes that have been made while running in the cloud will be lost.


