Replacing the BOSS card or OS drive on SIRIS 5-(6 through 36)
This covers the process of replacing the BOSS card or an OS drive on Datto SIRIS 5-(6 through 36) devices.
NOTE Before removing your BOSS card, contact Datto Technical Support. A Datto technician will need to run back end procedures to monitor and complete the process. Do not remove the BOSS card if there is a disaster recovery scenario in progress.
Environment 
- Datto SIRIS 5-(6 through 36)
Description
The Dell Boot Optimized Storage Solution (BOSS) card is a PCIe expansion card that contains two M.2 SSD drives, in a RAID 1 configuration that functions as the operating system (OS) boot drive. Use this procedure to remove and replace the entire BOSS card, or replace just a single M.2 SSD drive on your Datto SIRIS 5 - 6 to 36TB models.
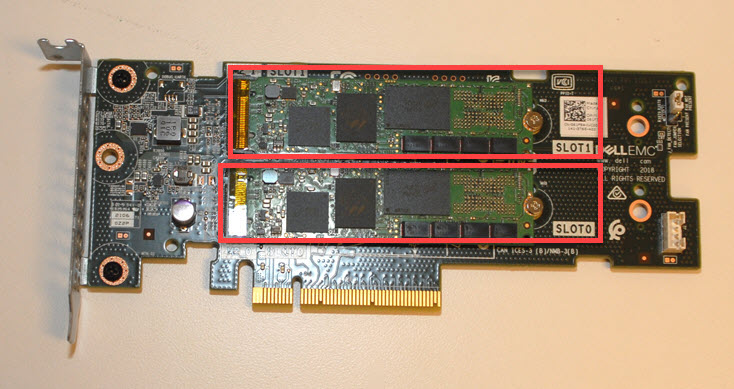
If replacing just the M.2 drive, Datto Technical Support will need to identify which M.2 drive (Slot 1 or Slot 0) will need to be replaced before proceeding with powering down the device and removing the BOSS card. The procedure will vary slightly depending on the chassis used for the device, select the model to proceed.

Removing the BOSS card
Power off the Datto device and remove it from the rack.
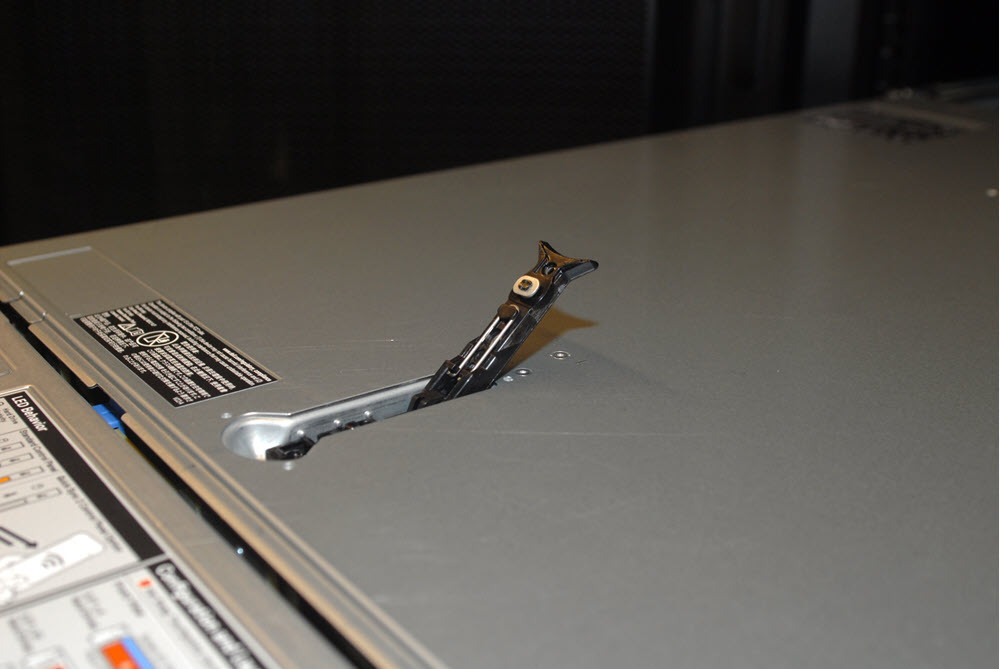
Open the case by turning the latch release lock counter clockwise with a Phillips head screwdriver and then lifting the latch. Then slide the case cover back and off of the unit.
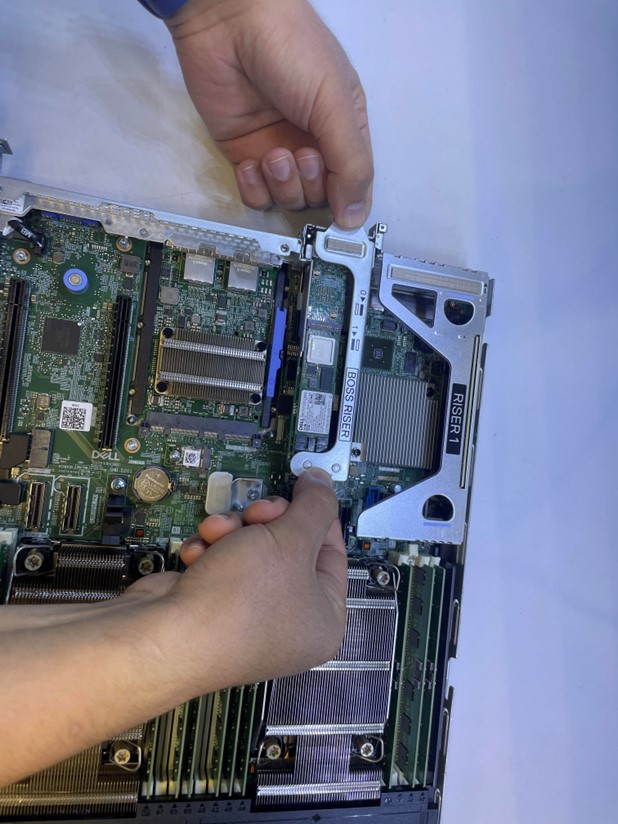
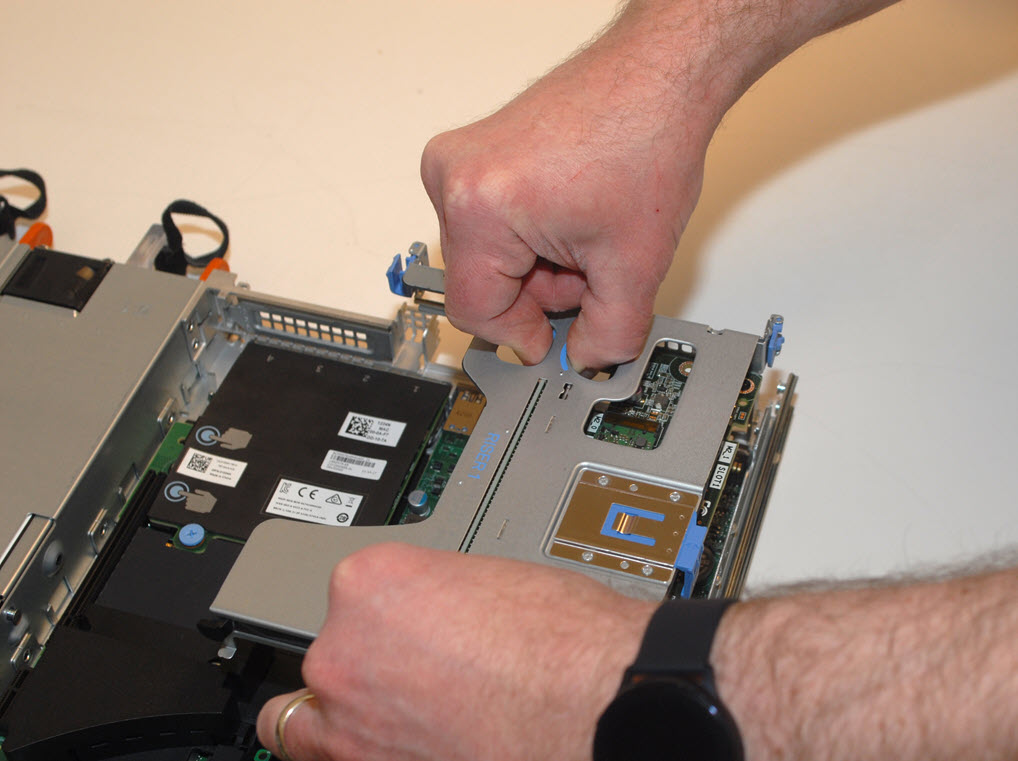
Locate the BOSS riser at the rear of the chassis and remove the expansion card riser by holding the touch points, then lift the expansion card riser, from the riser connector, on the system board.
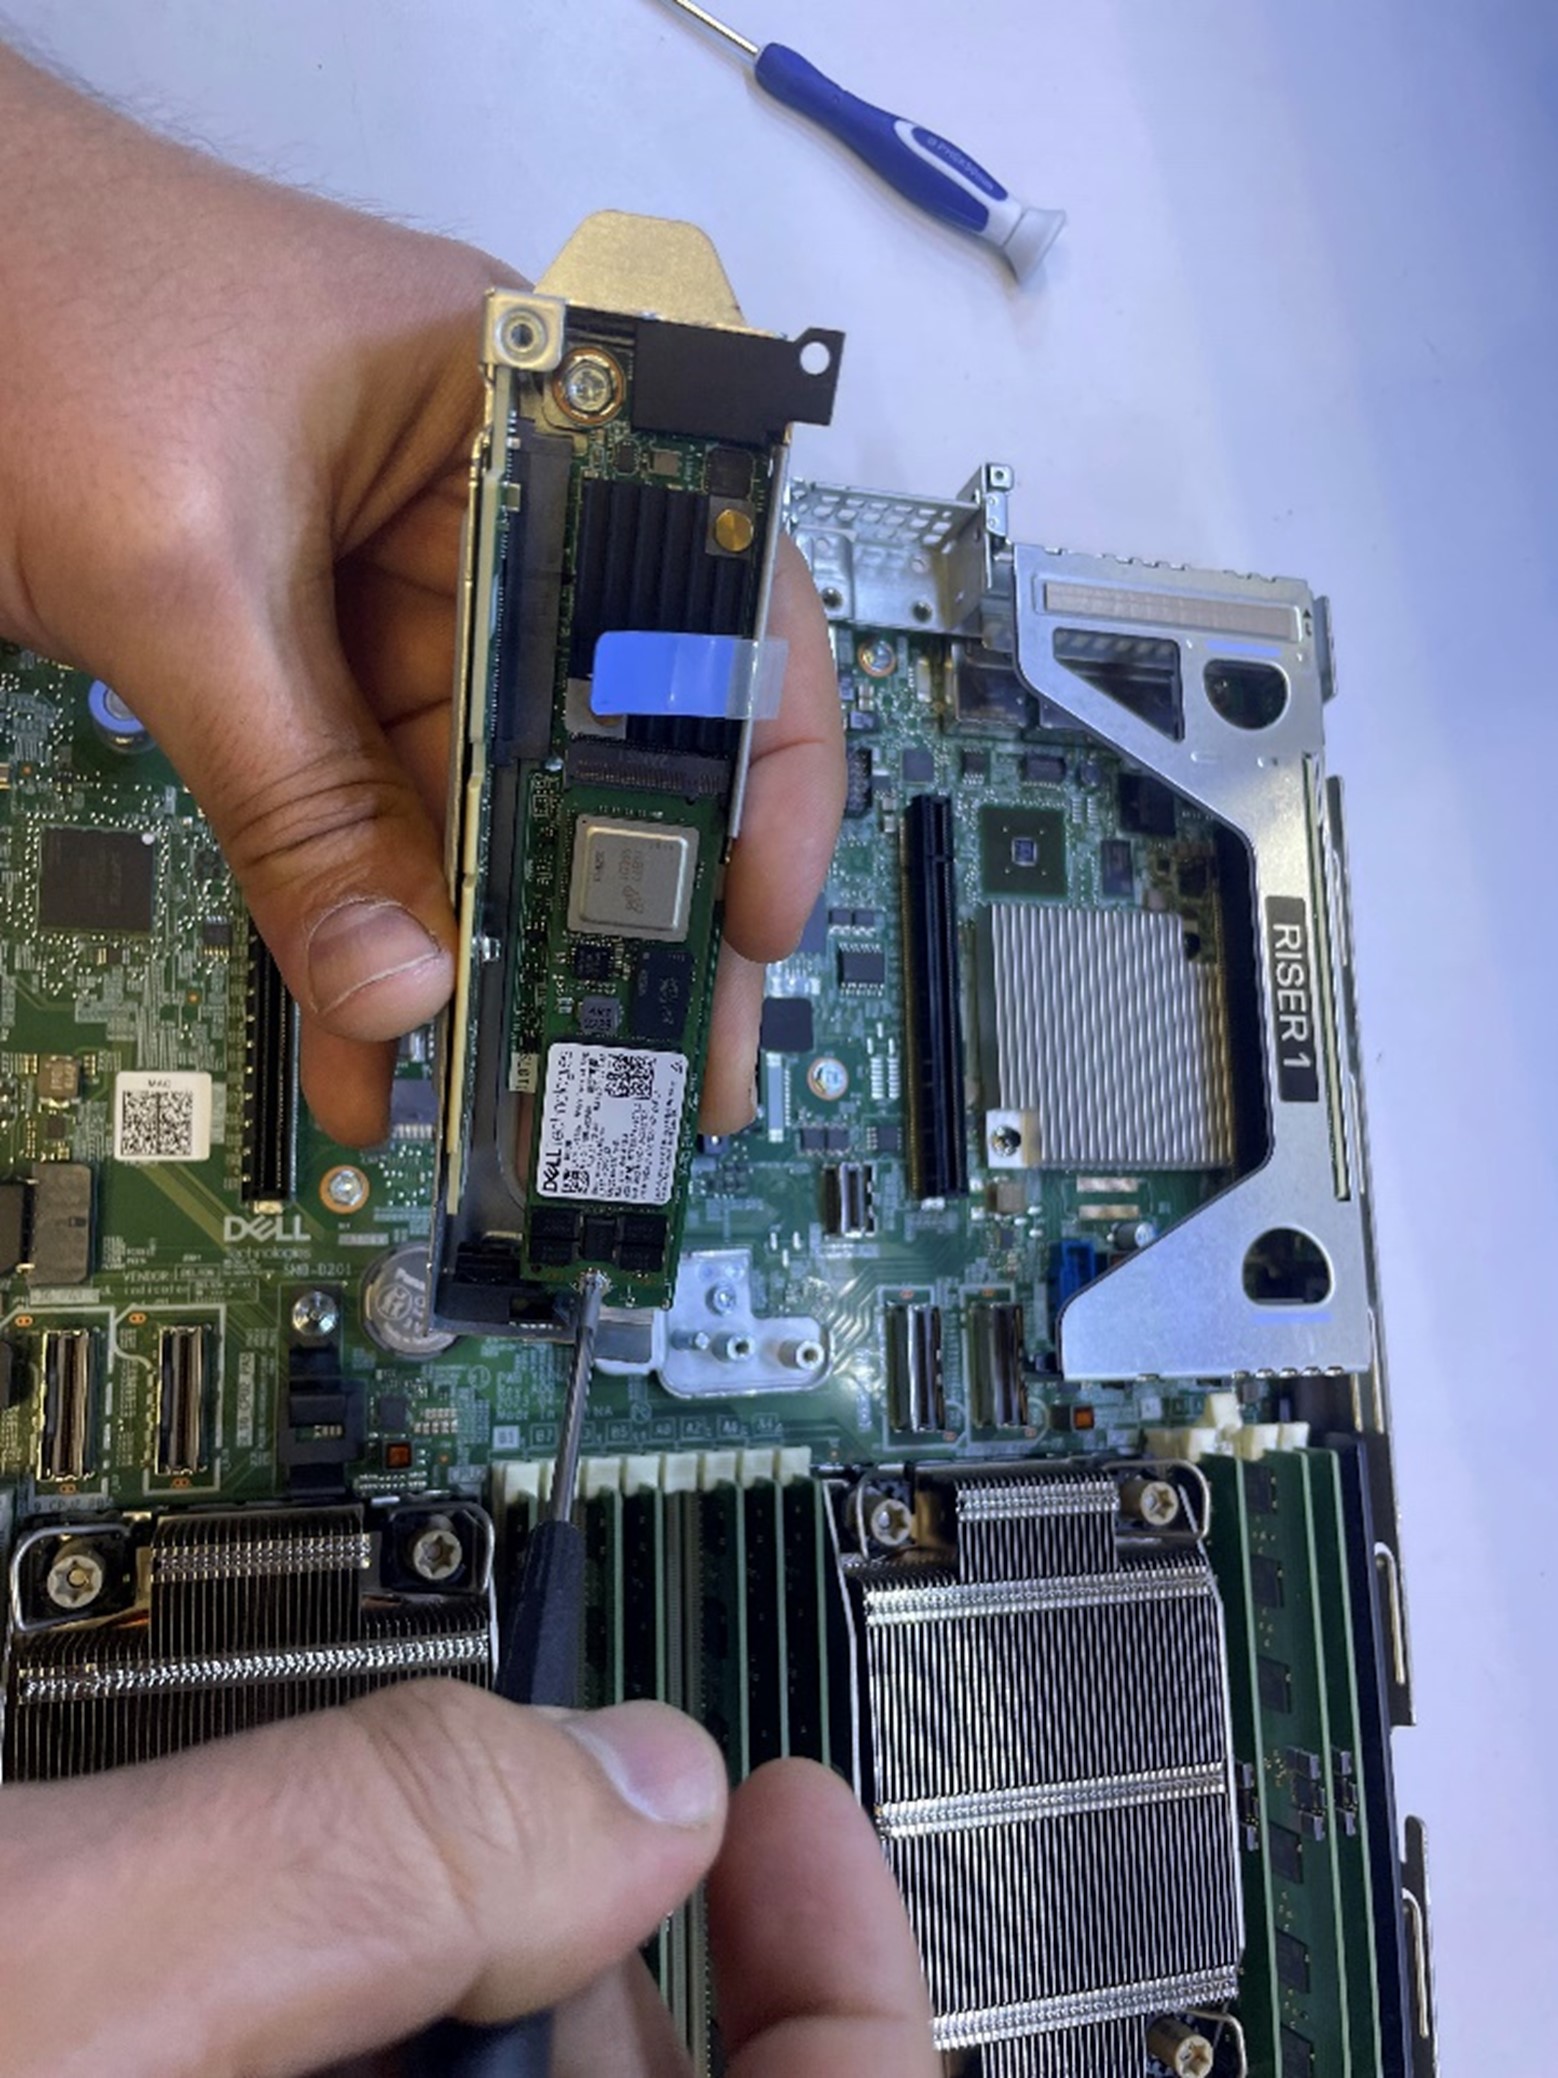
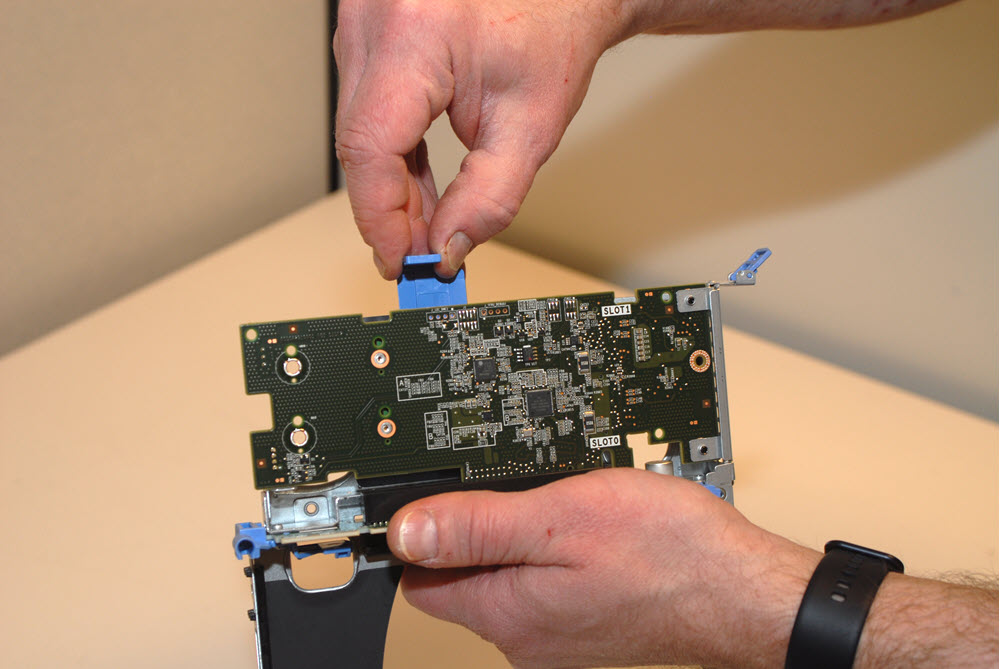
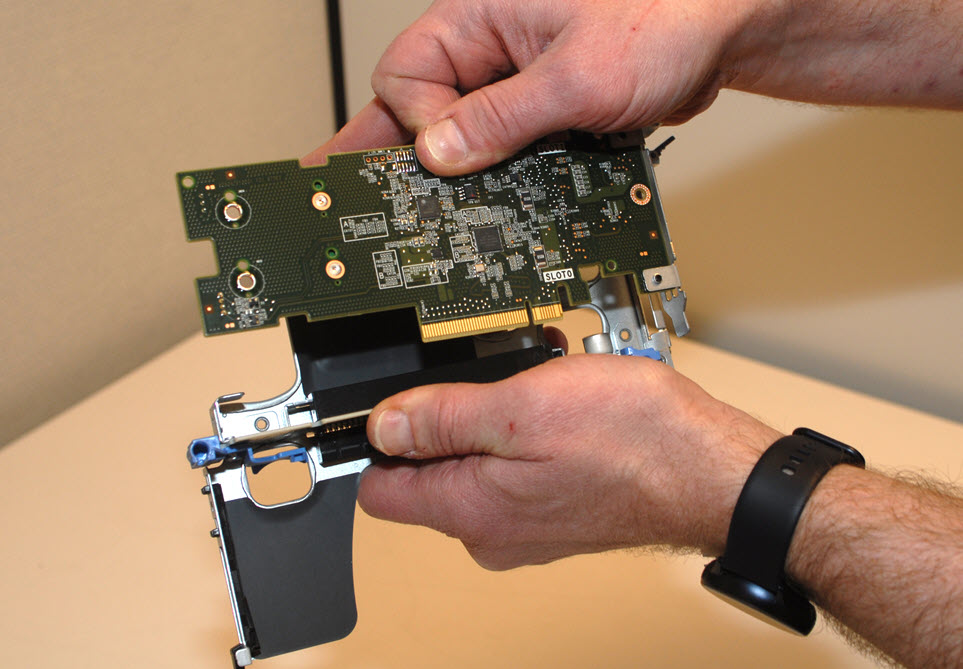
Remove the BOSS card by opening the blue side latches, then holding the card by its edges, pull the card until the card edge connector disengages from the expansion card connector on the riser.
If you are replacing the entire BOSS card, skip to the Re-installing the card section of this article.
If you need to replace just the OS SSD drive, continue to the next section titled Replacing the M2 drive.
Replacing the M.2 drive
Replace the bad M.2 drive by removing the Phillips head screw that holds the SSD in place on the BOSS card and replacing it with the new M.2 drive.
Be sure to remove and replace from the correct slot that has been verified by Datto Technical Support.

Re-Installing the card
Hold the card by its edges, and align the card edge connector with the expansion card connector on the riser.
Insert the card edge connector firmly into the expansion card connector until the card is fully seated.
Close the expansion card latches.
Lower the expansion card riser back into the Datto device until the expansion card riser connection is fully seated in the connector.
Place the case cover back on the Datto device and turn the latch lock clockwise to lock the cover back in place.
Power the device back on.
The remaining steps in the process will be completed by Datto Technical Support.
Removing the BOSS card
Power off the Datto device and remove it from the rack.
Open the case by turning the latch release lock counter clockwise with a Phillips head screwdriver and then lifting the latch. Then slide the case cover back and off of the unit.
Remove the expansion card riser by holding the blue touch points shown.
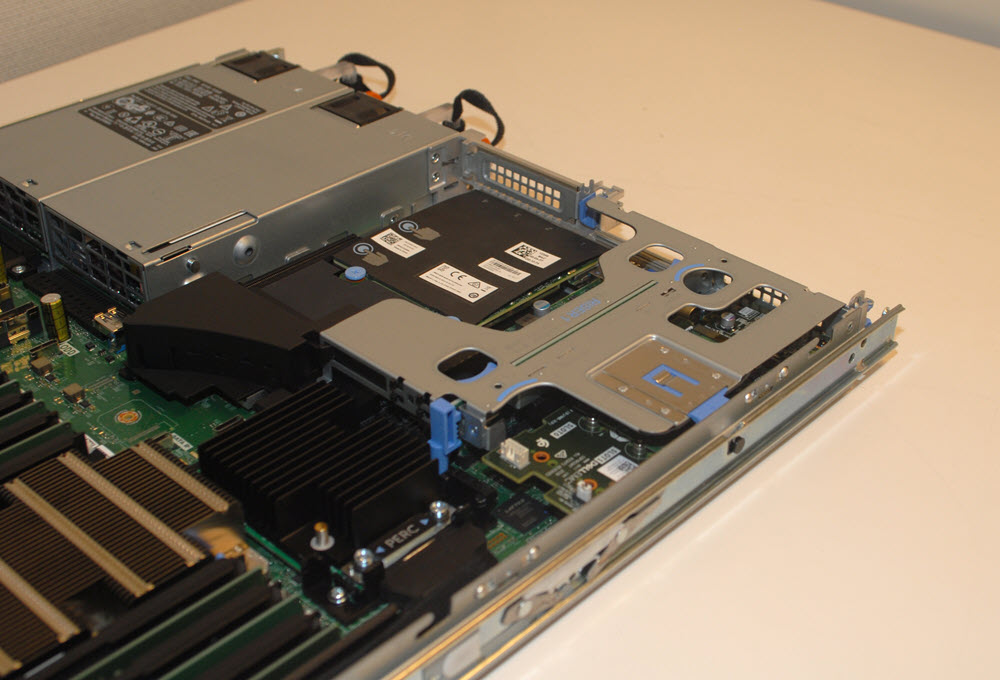
Lift the expansion card riser, from the riser connector, on the system board.
To remove the BOSS card, start by opening the blue side latches.

Holding the card by its edges, pull the card until the card edge connector disengages from the expansion card connector on the riser.
Removing the card:
If you are replacing the entire BOSS card, skip to the Re-installing the card section of this article.
If you need to replace just the OS SSD drive, continue to the next section titled Replacing the M2 drive.
Replacing the M.2 drive
Replace the bad M.2 drive by removing the Phillips head screw that holds the SSD in place on the BOSS card and replacing it with the new M.2 drive. Be sure to remove and replace from the correct slot that has been verified by Datto Technical Support.
Re-Installing the card
Hold the card by its edges, and align the card edge connector with the expansion card connector on the riser.
Insert the card edge connector firmly into the expansion card connector until the card is fully seated.
Close the expansion card latches
Lower the expansion card riser back into the Datto device until the expansion card riser connection is fully seated in the connector.
Place the case cover back on the Datto device and turn the latch lock clockwise to lock the cover back in place.
Power the device back on.
The remaining steps in the process will be completed by Datto Technical Support.


