Datto Endpoint Backup for PCs: Virtualization
This article explains how you can perform cloud virtualizations for endpoints protected by the Datto Endpoint Backup for PCs agent.
For information about performing cloud file restores, see Datto File Restore.
Environment 
- Datto Partner Portal
- Datto Endpoint Backup for PCs
Description
With Datto Endpoint Backup, you can mount any restore point as a cloud-hosted virtualization and connect to it via a browser-based VNC session. The virtual machine will operate as a standalone endpoint with internet access.
Technical Notes 
- Virtual machines hosted in the Datto Cloud have outbound internet access only.
- VNC sessions are single-instanced. If multiple users access virtualization via VNC simultaneously, they will share the instance.
- Datto uses a reverse proxy to provide the VNC frames over an encrypted connection.
Warnings
- It is not possible to restore changes made to the cloud-hosted environment back to the production machine. Virtualizations can be used to verify an existing production snapshot is viable to restore to the production machine via Bare Metal Restore.
- Datto Endpoint Backup virtualizations automatically power off after seven days but remain mounted. If you need your virtualization running longer, you will need to power it back on every seven days.
- Datto Endpoint Backup virtualizations are not accessible to end users. The restores are only accessible via the Partner Portal by Datto Partners or Datto Technical Support .
Procedure
To start cloud virtualization, log into the Datto Partner Portal and access the Datto Endpoint Backup for PCs Status page.
Select the organization you'd like to restore, and then click the launch icon.

You will see a launchpad page similar to the example below.
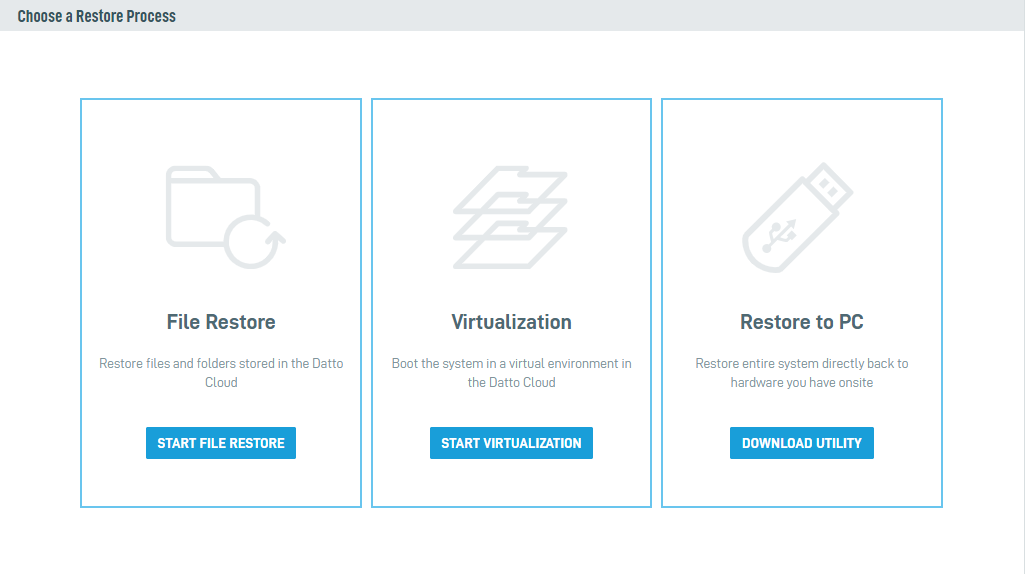
From this page, you can start either file restore, virtualization, or a restore to PC (visit Imaging A USB Drive with Datto Utilities for further directions) for the selected recovery point. You can only have one type of restore mounted at a time.
Click Start Virtualization to continue, you will see the Virtualization card.
In the Choose System(s) field, check the box next to the name of the system you would like to restore.
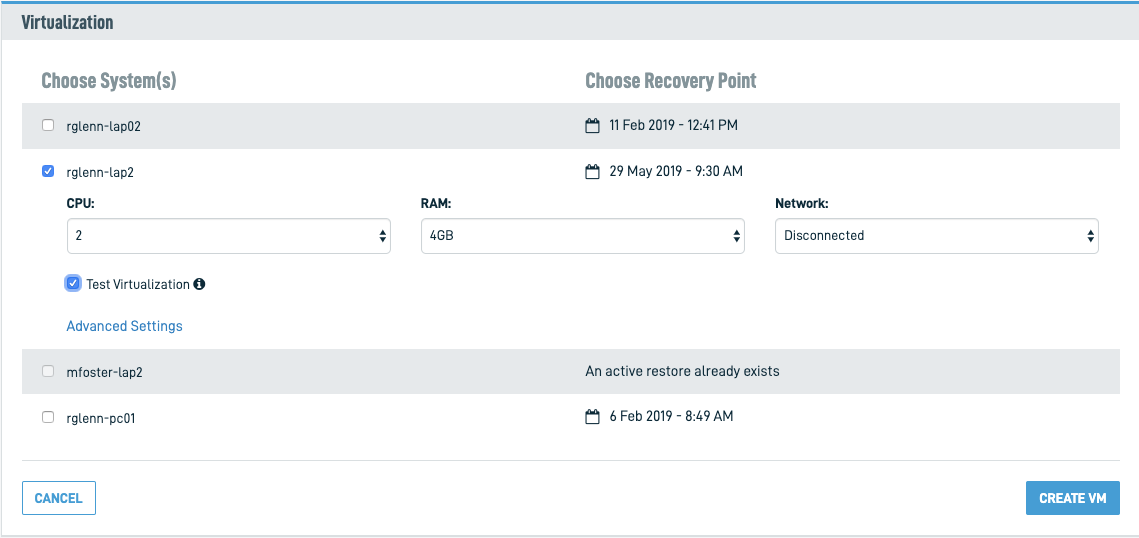
In the Choose Recovery Point field, select the snapshot you'd like to restore. The most recent backup displays by default. Clicking the date displayed will show additional recovery points. Dates shown in blue contain restorable snapshots.

Configure the virtualization's basic options. The available configuration choices are:
- CPU: Select the number of CPU cores that the virtualization will use. You can select up to eight cores. For best performance, Datto recommends using as close to the same number of cores as the production machine would use.
- RAM: Allocate RAM to the virtual machine. You can select up to 16 GB.
- Network: Configure the virtualization's networking.
- Selecting Simple Networking will boot the VM with full outbound access to the internet.
- Selecting Disconnected will boot the VM with no networking ability of any kind.
- Test Virtualization: Check this option to flag the VM as a test virtualization, letting other users know it is safe to remove.
Datto Technical Support may remove test VMs in the rare event that we need system resources for a live disaster recovery.

To configure the storage controller and NIC options, click Advanced Settings:
Controller: Enables you to select the virtualization storage controller, which the restore will use. Available controllers are VirtIO (recommended), IDE, SATA, or SCSI. If you do not use VirtIO, the storage controller value should match the configuration in use on the production machine.
NIC: Allows you to define the NIC which the virtualization should use. Selectable NICs are E1000 (1 GB NIC) or rtl8139 (10/100 NIC).
Once you have finished configuring the virtual machine, click Create VM. The virtualization will mount. You'll be redirected to the Restore page, where you will see an entry for the VM you just created on the Virtualizations card. Click the Power on button to boot the restore.

The following virtual machine management options are available from the Virtualization card:
VNC: Opens an interactive VNC session to the virtualization's desktop. This option will be unavailable if you have not powered on the virtual machine. After launching the VNC session, if your virtual machine requires a login, click the VM Controls dropdown and select Send Ctrl-Alt-Del to invoke the Windows login prompt.
Power options: Provides a toggle to power the virtual machine on or off.
Edit VM: Allows you to edit the VM's settings. You must power the virtual machine off before you can make changes.
Delete virtual machine: Unmounts and destroys the virtualization.

When you've finished using your virtualization, click Delete virtual machine.


