Bare Metal Restore: Advanced Partitioning
This article explains how to work with the Advanced Partitioning schemes available in the Datto USB BMR environment. It assumes that you have already booted the target hardware into the Datto Utilities environment and have begun the restore. For the steps to perform the BMR, refer to the Additional Resources section below, for the backup product used.
Environment 
- Datto SIRIS
- Datto ALTO
- Datto Endpoint Backup
- Datto Endpoint Backup with Disaster Recovery
- Datto Endpoint Backup for PCs
- Datto Bare Metal Restore (BMR)
Description
By this point in the process, you should see the Partition Manager environment.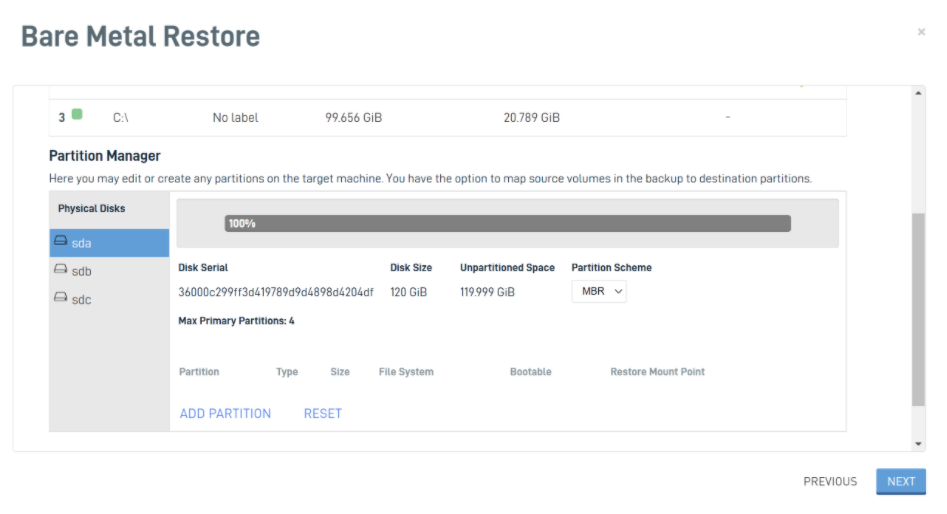
General Warnings 
- When a partition is too small for the minimum space required the status will show a warning and not allow the user to proceed.
- When a partition is too large for the size of the disk, the user will be prevented from continuing with a reason explaining why the partition table is not acceptable.
- When using the Mirroring option (BCDR only), you will not be able to manually partition unless the automatic partition fails. In this situation, you must ensure that the partition is larger than the volume you are restoring to it in order to accommodate the mirrored data.
Linux Partitioning
If you are performing a Bare Metal Restore of a Linux system, keep the following differences in mind while you go through this process:
- The file system type will be ext2, ext3, ext4, or xfs unless the partition is for swap. You'll need to use manual partitioning to add a swap.
- If there is only one partition, it will be bootable by default.
- If there is a separate
/bootpartition, set it to be bootable, and make sure it is the first partition listed.
Creating a partition
The OS partition steps selected depend on whether you want your target machine to use Master Boot Record or GUID Partitioning Table (GPT). The advantages of GPT include EFI booting and creating volumes over 2.2 TB in size. Make sure that you have hardware that supports EFI before you choose this option.
The data partition creation will need to be completed once for each data volume that needs to be restored.
IMPORTANT Any configurations made or accepted in this step will delete existing partitions on the production machine when the changes are committed. The BMR utility will not preserve existing production data.
IMPORTANT Do not exclude any partitions which reside on a single drive in a multi-partition configuration; doing so will cause all partitions to be erased.
The Bare Metal Restore wizard will suggest a partition layout, Review the information presented carefully.
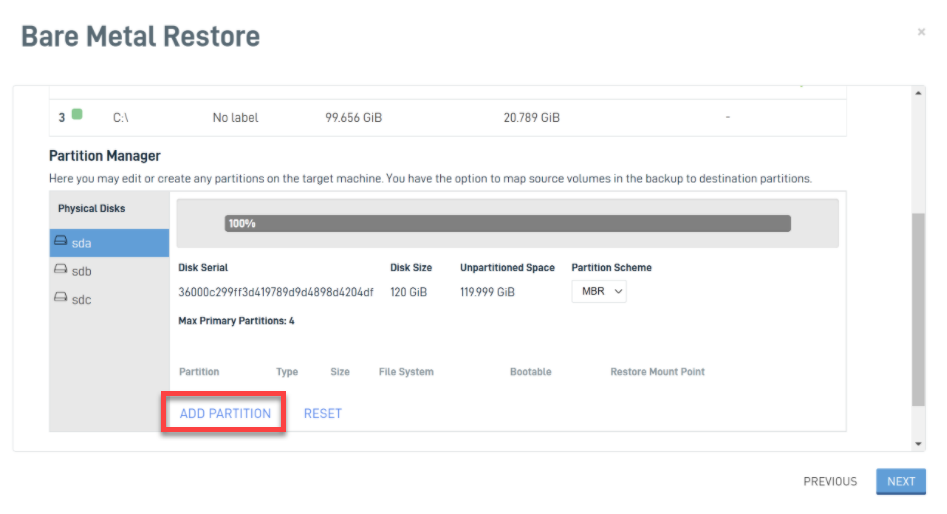
On the physical drive that you want to use for the OS, set the Partition Scheme to MBR.
Click Add Partition. Set the type to Primary, and the size to be larger than the OS volume that you are restoring. Set the file system to NTFS.
Click the checkbox to make it bootable.
Then, set the Restore Mount Point to the volume you are restoring.
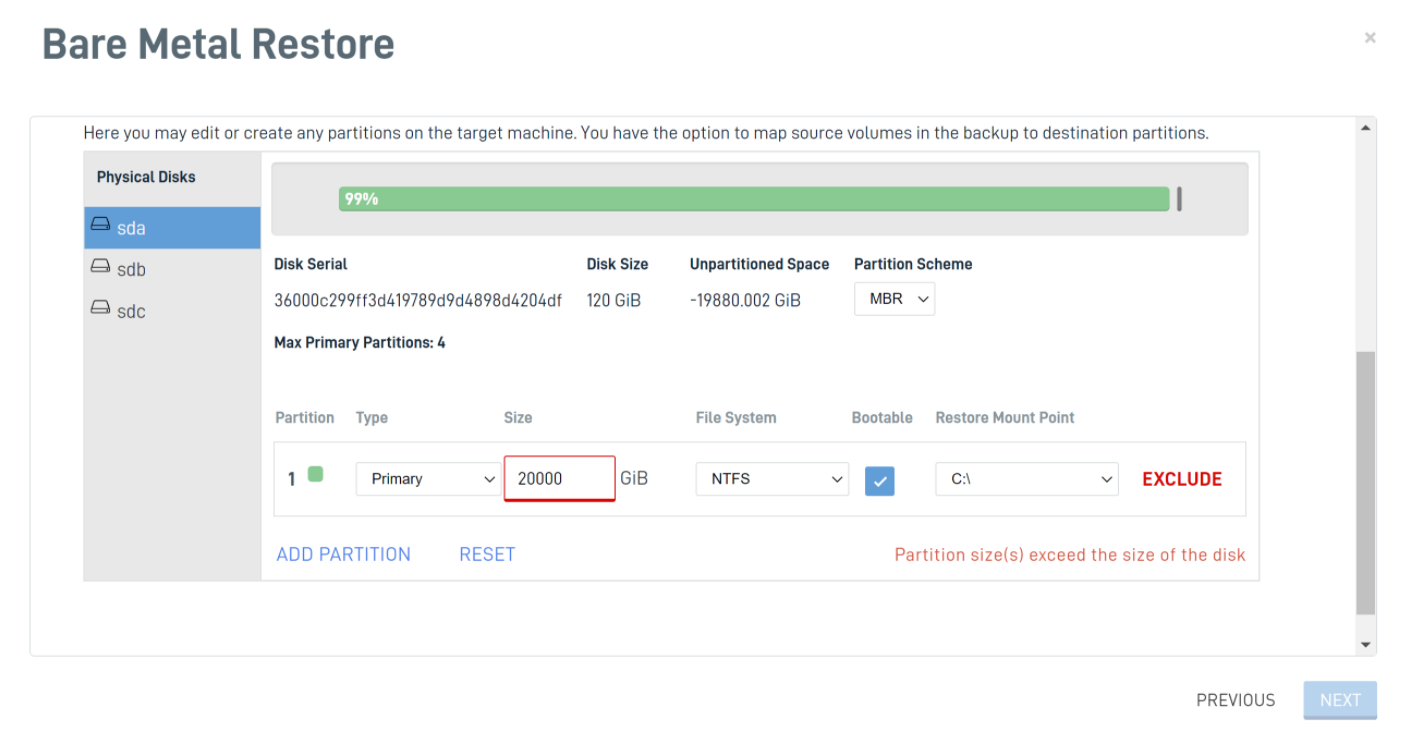
NOTE You'll receive a warning if the partition size exceeds the size of the disk, as in the example above.
If you need to create a data partition, go to the Creating a data partition section below.
If you are done with partitioning, click Next. Then proceed with the BMR process (links provided below).
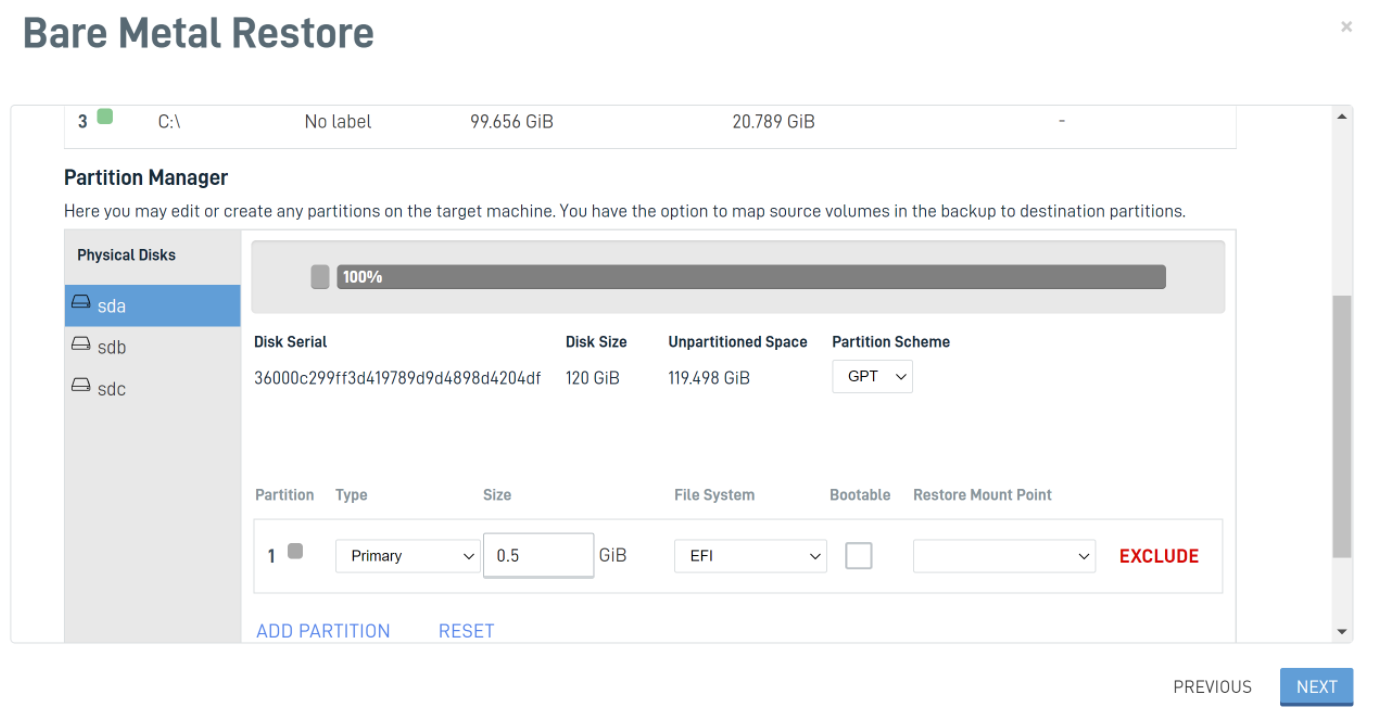
The Bare Metal Restore wizard will suggest a partition layout. Review the information presented carefully.
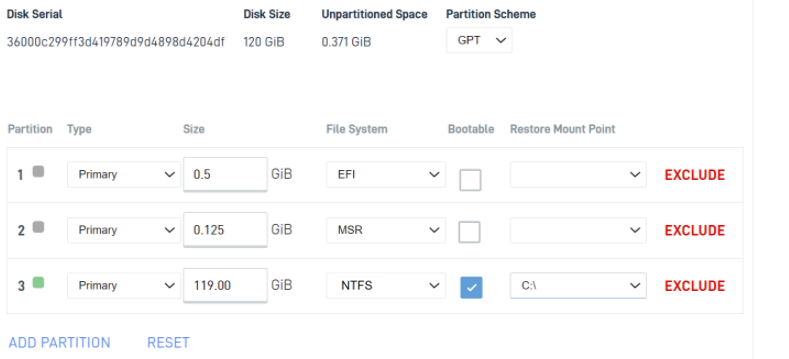
On the physical drive that you want to use for the OS, set the Partition Scheme to GPT.

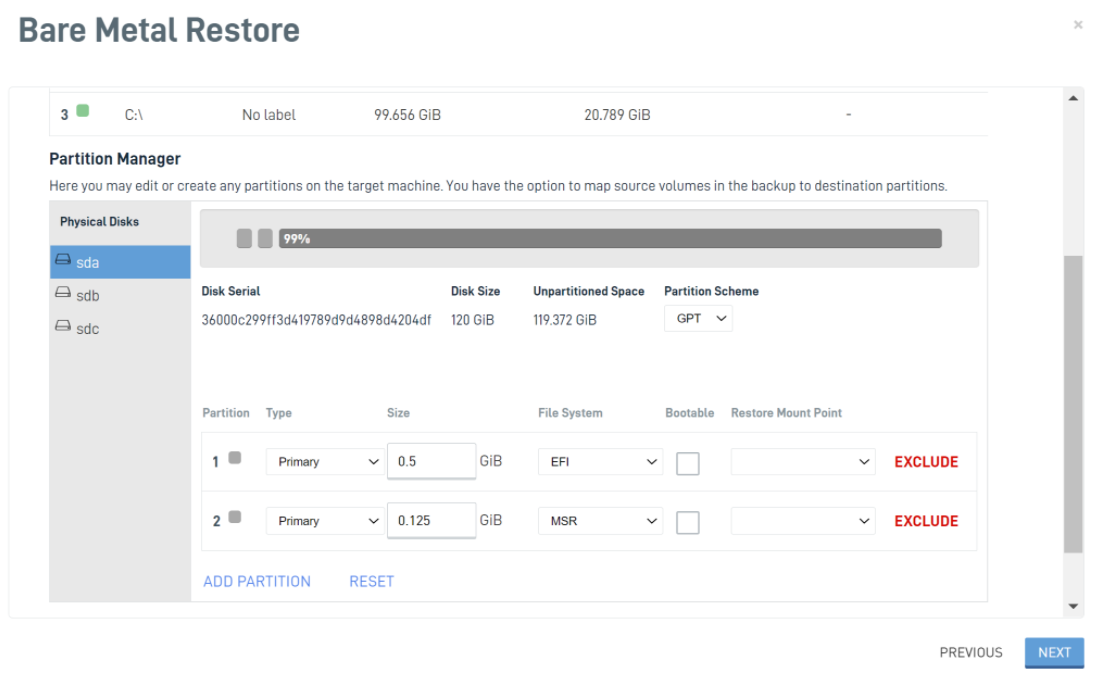
Click Add Partition, and create a primary GPT partition with an EFI file system format. Set the Size to 512 MB by entering .5 in the Size field.
Click Add Partition again, and create a Microsoft Reserved partition with an MSR file system format. Set the Size to 128 MB by entering .125 in the Size field.
Click Add Partition, and create the OS partition as the primary boot partition. Set the size to at least 20% more storage space than the volume you are restoring. Set the file system to NTFS, check the Bootable box, and select the Restore Mount Point of the volume you are restoring.
If you need to create a data partition, go to the Creating a data partition section below.
When done with partitioning, click Next. Then proceed with the BMR process (links provided below).
IMPORTANT Any configurations made or accepted in this step will delete existing partitions on the production machine when the changes are committed. The BMR utility will not preserve existing production data.
IMPORTANT Do not exclude any partitions which reside on a single drive in a multi-partition configuration; doing so will cause all partitions to be erased.
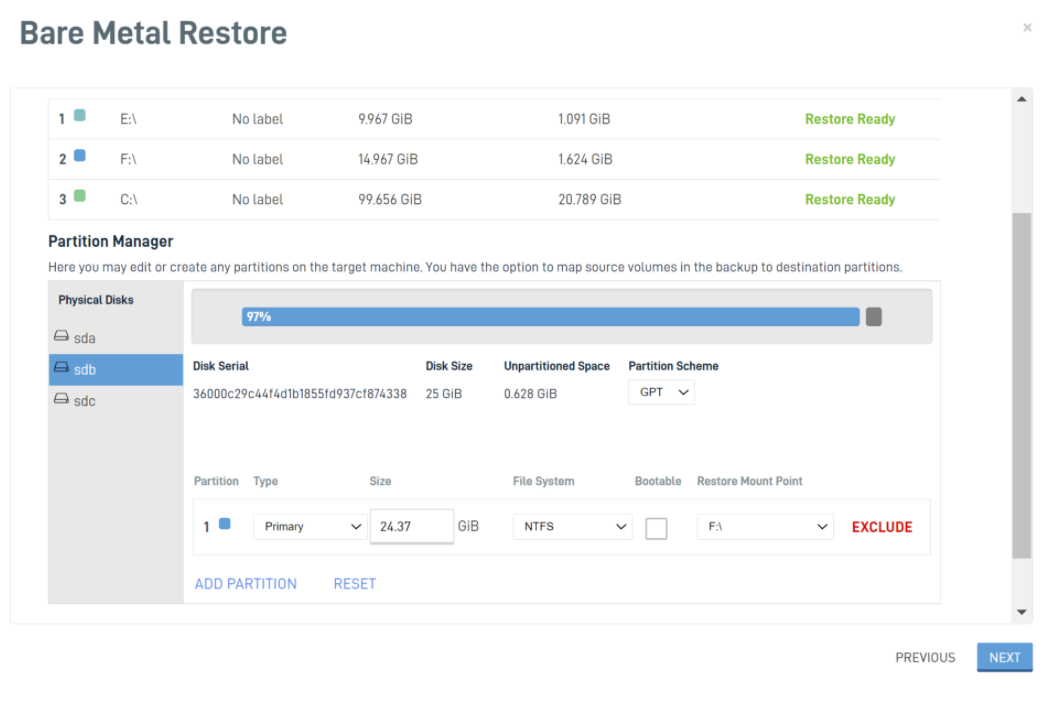
Select the drive to create the data partition on from the left-hand menu.
Confirm the partition scheme of the drive matches the desired scheme (GPT or MBR).
For a GPT scheme, click Add Partition and create a Microsoft Reserved partition with an MSR file system format. Set the Size to 128 MB by entering .125 in the Size field.
Click Add Partition again, to create the new partition on the selected physical disk.
Set the size of the partition using the space available above as reference. It is recommended to make the size at least 20% larger than the existing data set that will be restored to the volume.
Choose NTFS for the file system and set the Restore Mount Point, using the dropdowns.
If you want to set up another data partition, repeat Steps 1-5.
After reviewing the partitions, click Next. Then proceed with the BMR process (links provided below).


