Creating an iSCSI Restore
Topic
This article describes how to mount a file restore of an iSCSI share from a Datto NAS or SIRIS.
Environment
- Datto SIRIS
- Datto NAS
Description
This type of restore will create an iSCSI share from the desired local snapshot of a hosted iSCSI share. The primary share will still be accessible during this time and continue normal operations.
Procedure
To perform an iSCSI Restore, connect to the Datto Device's UI.
Select Restore from the main menu.

Select the desired iSCSI share dataset, then select iSCSI Restore.
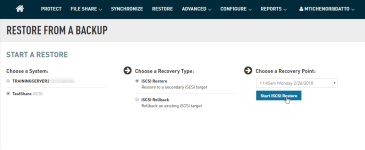
Select the desired recovery point, then select Start iSCSI Restore.
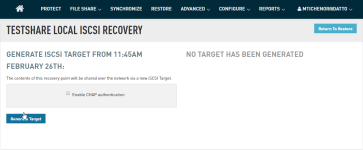
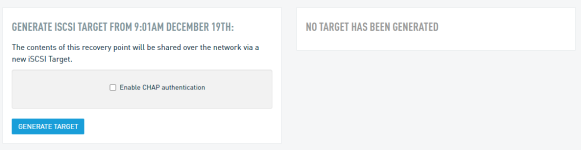
Datto appliances can protect iSCSI shares with CHAP authentication. Adding CHAP authentication to the share helps protect its data against networking attacks by requiring endpoints to provide access credentials to each other. To activate this feature, check the Enable CHAP authentication box. Enter the following information:
- CHAP Username: Create a username which endpoints will use to connect to the iSCSI share on the Datto appliance.
- CHAP Secret: Create a password 12-16 characters in length that endpoints will use to connect to the share.
To use two-way CHAP authentication, check the Use mutual CHAP authentication box. In the fields which populate, enter the following information:
- Mutual CHAP Username: Enter a username that the Datto appliance can use to connect to the endpoint.
- Mutual CHAP Secret: Enter the password that the Datto appliance can use to connect to the endpoint.
IMPORTANT For Mutual CHAP authentication to work correctly, the CHAP secret and Mutual CHAP secret must not be the same.


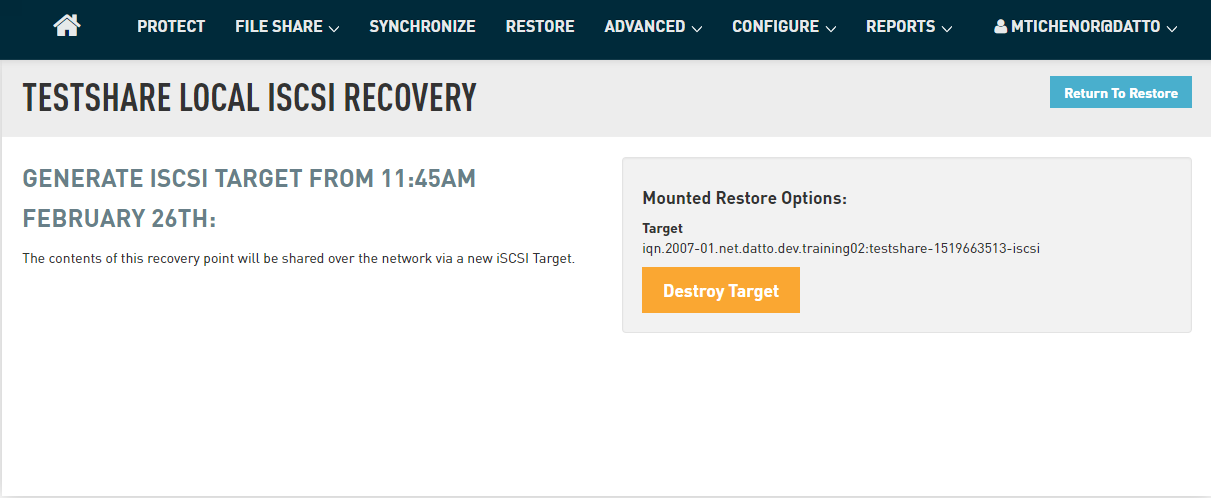
Once complete, click Generate Target to continue.
The Datto appliance will share the contents of the selected recovery point over the network. Make a note of the Target address displayed in the Mounted Restore Options field.

Follow the steps in the Mounting an iSCSI Share in Windows article to attach the recovery point as a logical drive to your production machine.
When you have finished with your restore, unmount the share by using the Destroy Target button.