Mounting an iSCSI Share in Windows
This article describes how to mount a Datto iSCSI share in Windows.
Environment 
- Datto SIRIS
- Datto ALTO
- Datto NAS
- Microsoft Windows
Description
Follow the steps below to mount an iSCSI Share in Windows. For steps on restoring a volume via iSCSI, see the Performing a Volume Restore article. For steps on restoring a backup of an iSCSI share, see the Performing a Volume Restore article.
NOTE Copying and pasting files from an iSCSI volume restore through Windows Explorer may result in a loss of file/folder permissions. Datto recommends using Robocopy to copy files from the restore.
Obtain the iSCSI target 
You will need to obtain the iSCSI target in the Datto appliance's GUI to connect to the share later in Windows.
Access the GUI of the Datto appliance.
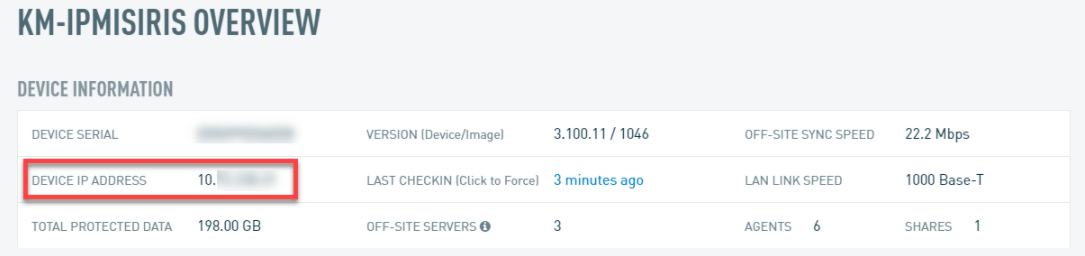
Make a note of the Datto device's local IP address listed on the top left side of the homepage for later connection steps.
Locate the Share information:
- If this is an iSCSI share on the Datto device: Click the File Share tab then choose Network Attached Storage
- If this is an iSCSI restore mounted on the Datto device: Click the Restore tab, then select Manage Restore
Make a note of the listed iSCSI target address for later steps.
Mount the iSCSI Target in Windows
On the Windows machine, search for and launch iSCSI Initiator.
 CHAP Authentication
If the iSCSI target uses a password (such as a cloud-based target created by Datto Support) or if it is an iSCSI volume restore that has CHAP Authentication enabled. Take the following steps to avoid an Authentication Failure message.
Click Connect, then click Advanced...
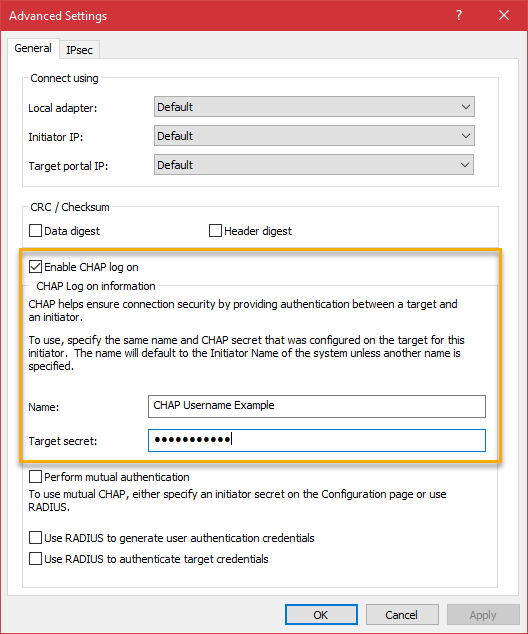
Select the checkbox for Enable CHAP log on, and enter the Name and Target secret.
- Name: Enter the CHAP Username as defined in the iSCSI share's CHAP authentication configuration.
- Target secret: Either enter the CHAP Secret as defined in the iSCSI share's CHAP authentication configuration, or the password provided by Datto Technical Support.
Click OK, then OK again on the window behind it. The target should now show as Connected.
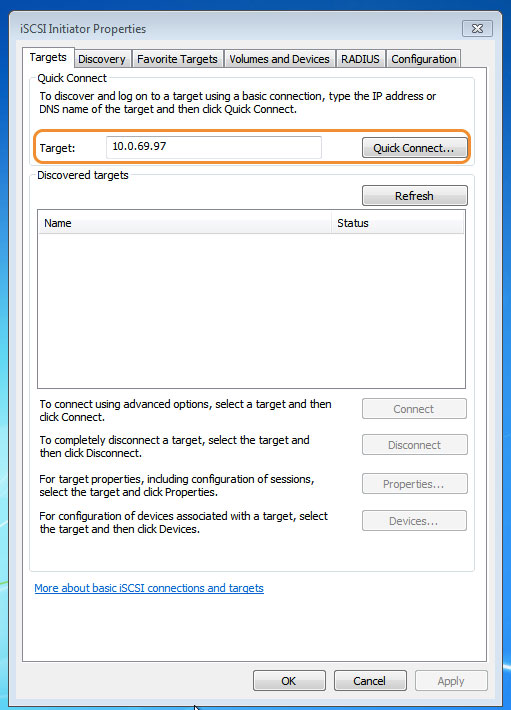
In iSCSI Initiator, enter the IP address of the Datto appliance or offsite server hosting the share into the Target field. Then, click Quick Connect.
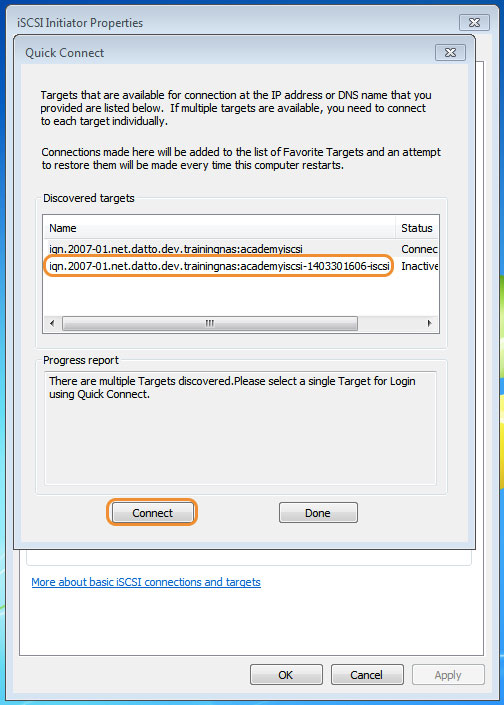
In the Quick Connect window, click the iSCSI target you want to connect to, Then, click Connect.
Configure the iSCSI share in Windows Disk Management
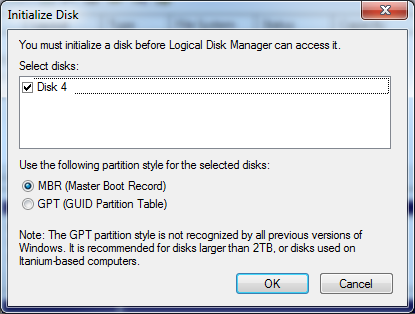
If this is a new share, you need to initialize and format it for use in Windows when you first mount it.
Start the Disk Management program in Windows. As the program opens, the Initialization window will also display. Click OK.
Right-click the disk volume for the share, and then choose a volume formatting option.
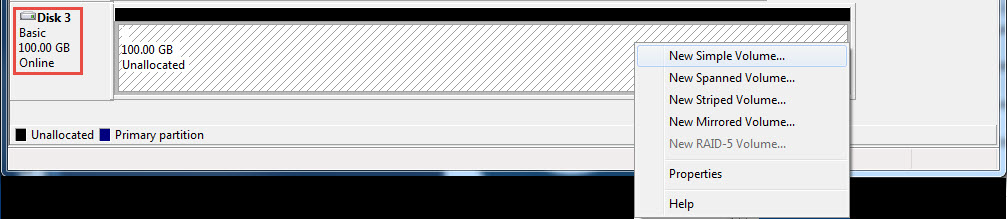
If the share does not display in Windows Explorer as an available drive, you may need to mark it as Online. In Disk Management, right-click the drive, and click the option for Online.


