SIRIS Virtual Deployment on VMware vSphere
This article describes the process to deploy a virtual SIRIS device onto a VMware host.
Environment 
- Datto Virtual SIRIS
- VMware
Procedure
Before proceeding with the steps described in this article, review the prerequisites for running SIRIS Virtual and the Unified Backup Networking Requirements to make sure that your virtual appliance has all of the necessary access to communicate with the Datto Cloud. After reviewing the appropriate requirements, Download the .OVA file.S
Navigate to the Datto Download page.
Agree to the License to proceed.
Select the Datto Images tab.
Under SIRIS Virtual, download the .OVA file.
Virtual Datto appliances need at least two virtual disks: a 30GB disk containing the appliance's operating system, and a storage disk equal to the size of the appliance that was purchased. These virtual disks can live on the same datastore, or can be placed on separate datastores. You can create a new datastore, or use an existing one with sufficient space. This articles guides you through the creation of a single datastore to hold both the 30 GB appliance disk and the storage disk.

If a new datastore is needed, provision a new one using the steps below:
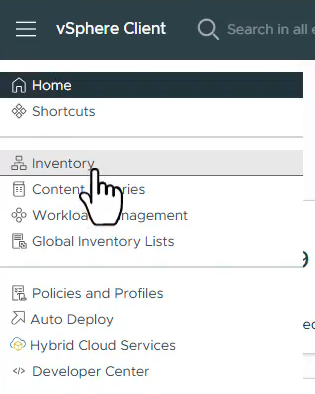
Open the vSphere Client, and sign into the ESXi host or vCenter server.
From the menu, select Inventory.
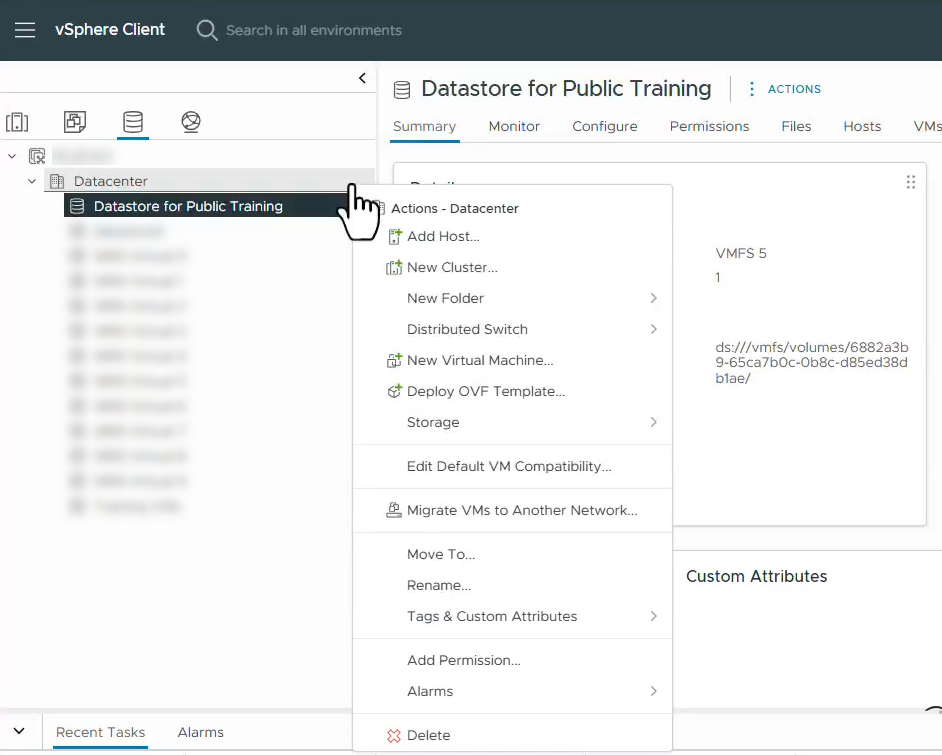
Navigate to the desired Datacenter.
Select Actions, then Storage, New Datastore... from the dropdown.

In the New Datastore window, specify VMFS as the datastore type, then click Next.
Name the datastore, then select the host from the dropdown.
Choose the Disk/LUN to use for the datastore. It can be a LUN from a SAN or a local disk on the ESXi host. Then, click Next.
Set your preferred file system version and click Next.
Adjust the partition configuration and datastore size as needed, then click Next.
Review the selection and click Finish.
Deploy OVA
Right click the datastore that will be used for the SIRIS Virtual device and select Deploy OVF Template... from the menu.
Select Local file, then Upload Files. Browse to the location where the
virtualSiris.ovaimage was downloaded. Click Next.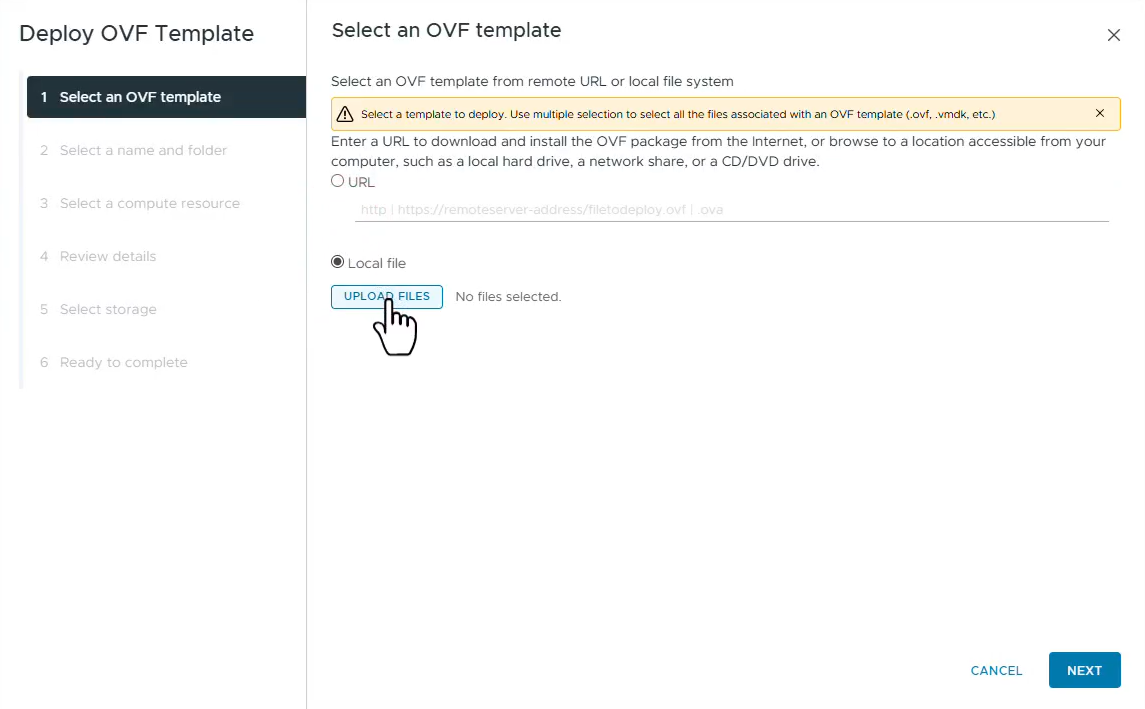
Assign the name for the virtual machine that is being created and browse to the folder where it will be located.
Select the compute resource for the new virtual machine. Click Next.
Review the details of the current selections. Click Next.
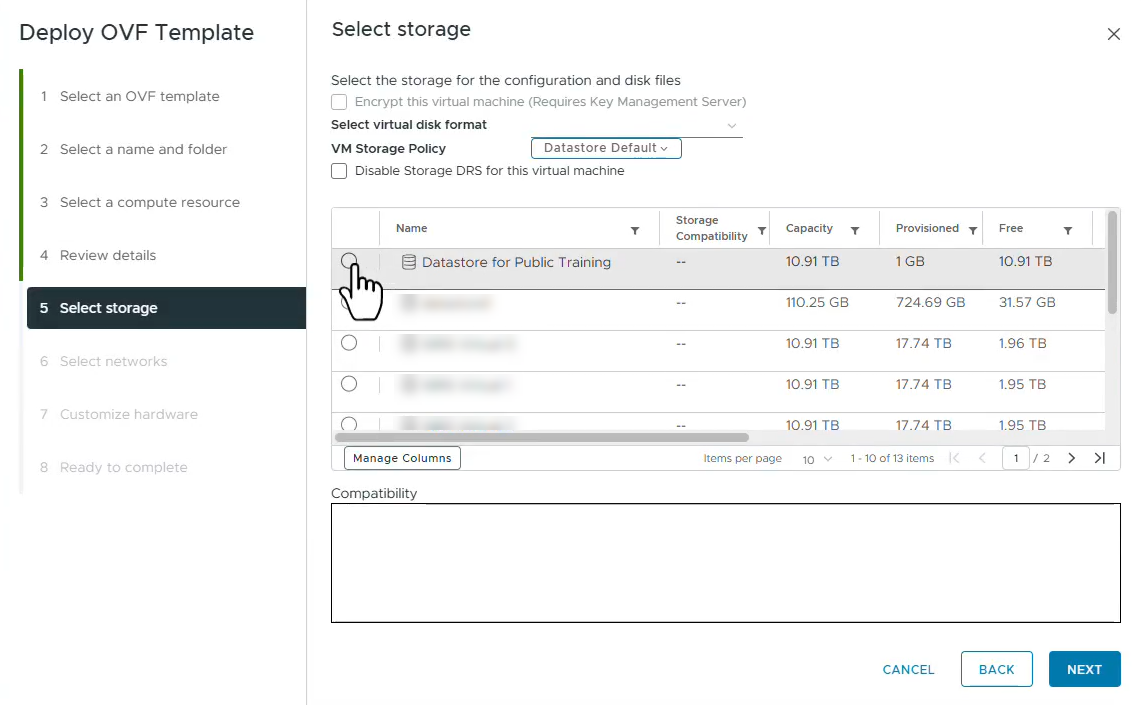
Select the datastore from the list and set the virtual disk format to Thick Provision Eager Zeroed. Click Next.
Select the network to be used. Be sure that the network chosen meets Datto's Networking Requirements. Click Next.
Review the Virtual Hardware and VM Options
Review the settings chosen, then click Finish. The status will be visible in the Recent Tasks section.
In VMware, right-click your new virtual machine, select Settings.
Select Add New Device, then New Hard disk, and configure the following options:
- Disk Size: Set this option equal to the size of the virtual appliance that you purchased.
- Location: Use the Browse... button to select the datastore or location that VMware will store the disk.
- Disk Provisioning: Select Thick Provisioned and eagerly zeroed.
The recommended resources are located in the prerequisites. Click Next.
In VMware, right-click your new virtual machine, select Power, and then select Power On.
Once the virtual appliance powers on, you may see the GRUB boot manager. Select the first option, and press Enter.
After the virtual machine fully boots, the Device Registration process will begin. Follow all steps in the How to register a Datto backup appliance article to continue.
NOTE If hybrid virtualizations are not communicating to the local LAN, but are communicating with the virtual Datto device, you may need to enable promiscuous mode and forged transmits on the vSwitch.


