SIRIS Virtual Deployment on Microsoft Hyper-V
This article describes how to configure and deploy a SIRIS Virtual instance by using Microsoft Hyper-V.
Environment 
- Datto SIRIS Virtual
- Microsoft Hyper-V
Procedure
Before proceeding with the steps described in this article, review the prerequisites for running SIRIS Virtual and the Unified Backup Networking Requirements to make sure that your virtual appliance has all of the necessary access to communicate with the Datto Cloud. After reviewing the appropriate requirements, download the SIRIS Virtual VHDX image.
Navigate to the Datto Download page.
Agree to the License to proceed.
Select the Datto Images tab.
Under SIRIS Virtual, download the .VHDX file.
Virtual Datto appliances need at least two virtual disks: a 30GB disk containing the appliance's operating system, and a storage disk equal to the size of the appliance that was purchased. These virtual disks can live on the same datastore, or can be placed on separate datastores. You can create a new datastore, or use an existing one with sufficient space. This articles guides you through the creation of a single datastore to hold both the 30 GB appliance disk and the storage disk.

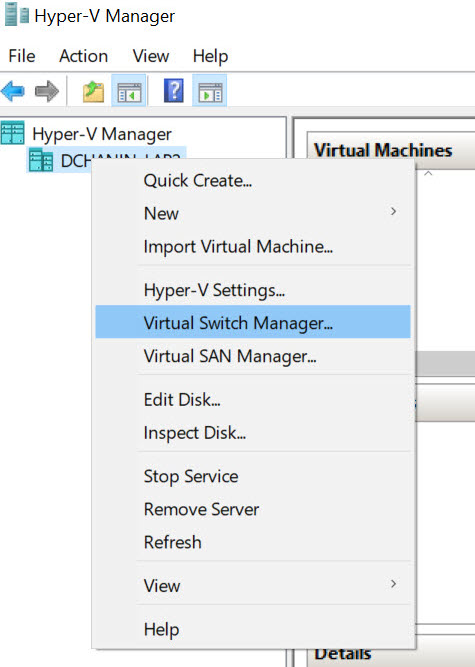
In the list of hypervisors under Hyper-V Manager, right-click the server that is hosting the SIRIS Virtual instance, and click Virtual Switch Manager.
Configure at least one virtual switch that the SIRIS Virtual instance will use. You can either use an existing virtual switch or add a new one.

When configuring a virtual switch, ensure that its Connection type uses an External network. Consult Hyper-V documentation for more information about setting up a virtual switch.
When you are finished configuring your virtual switch, click OK.
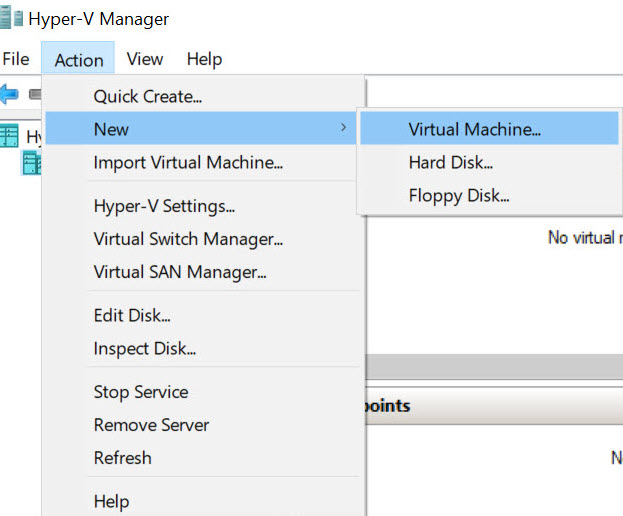
- In the Actions menu of Hyper V-Manager, click New > Virtual Machine. This link will initiate the New Virtual Machine Wizard.
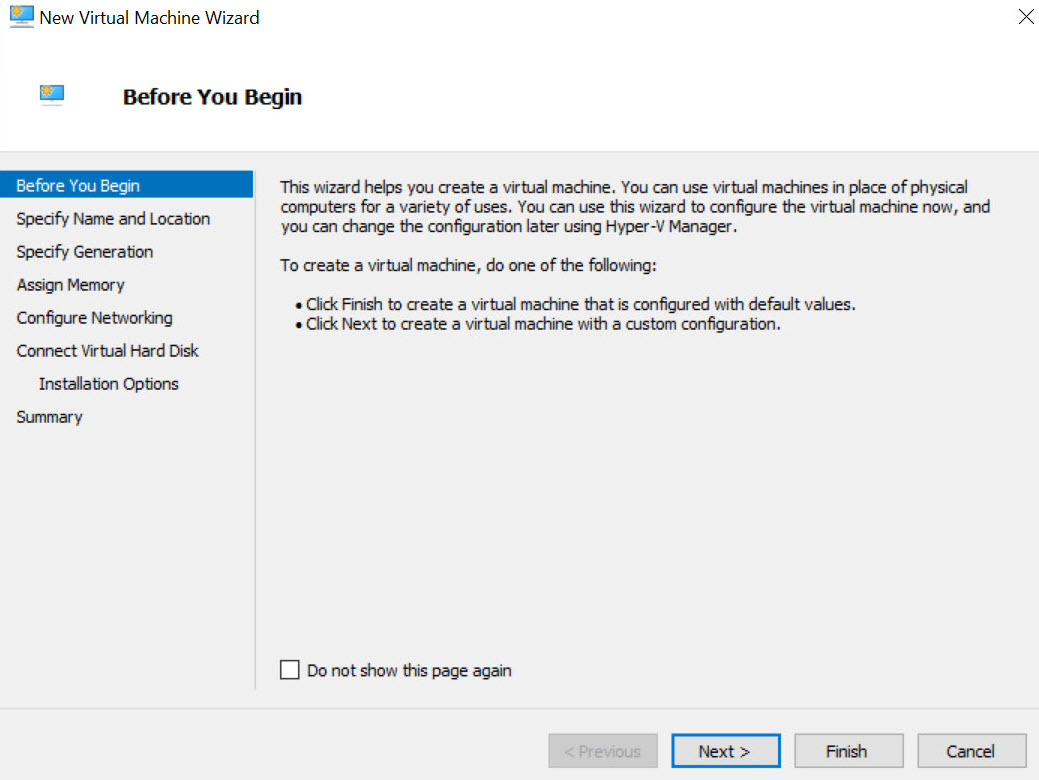
Read the overview in the Before You Begin section, then click Next.
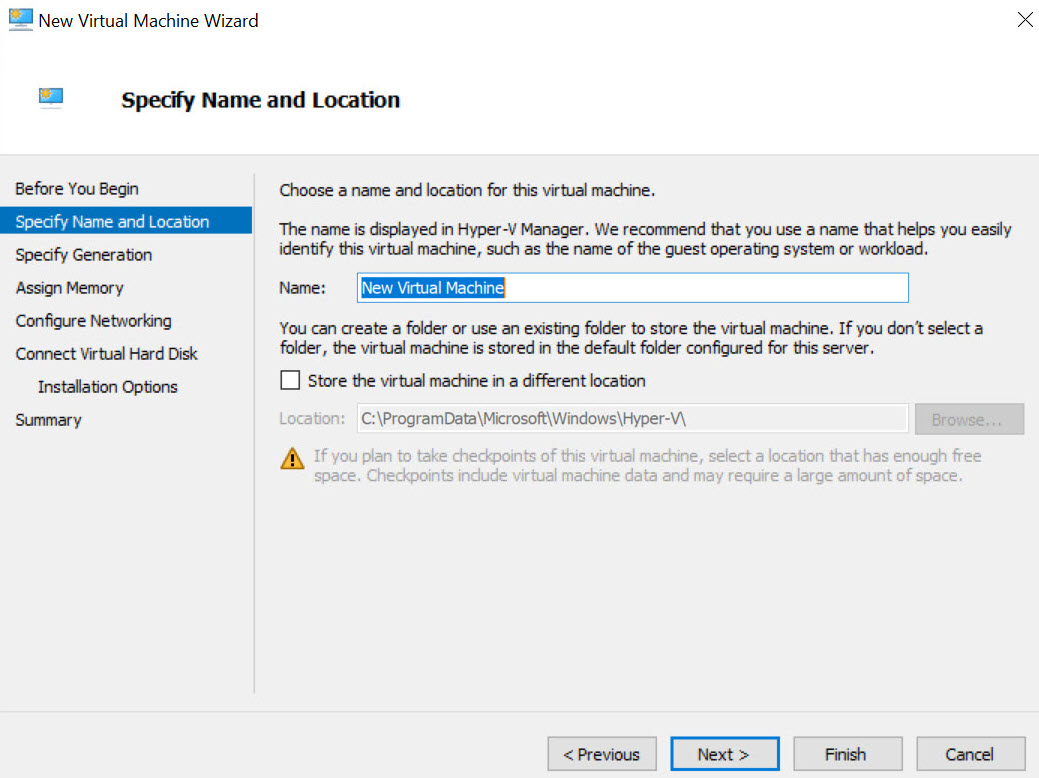
For the Specify Name and Location section, enter the name of your virtual machine in the Name field. Click Next to proceed.
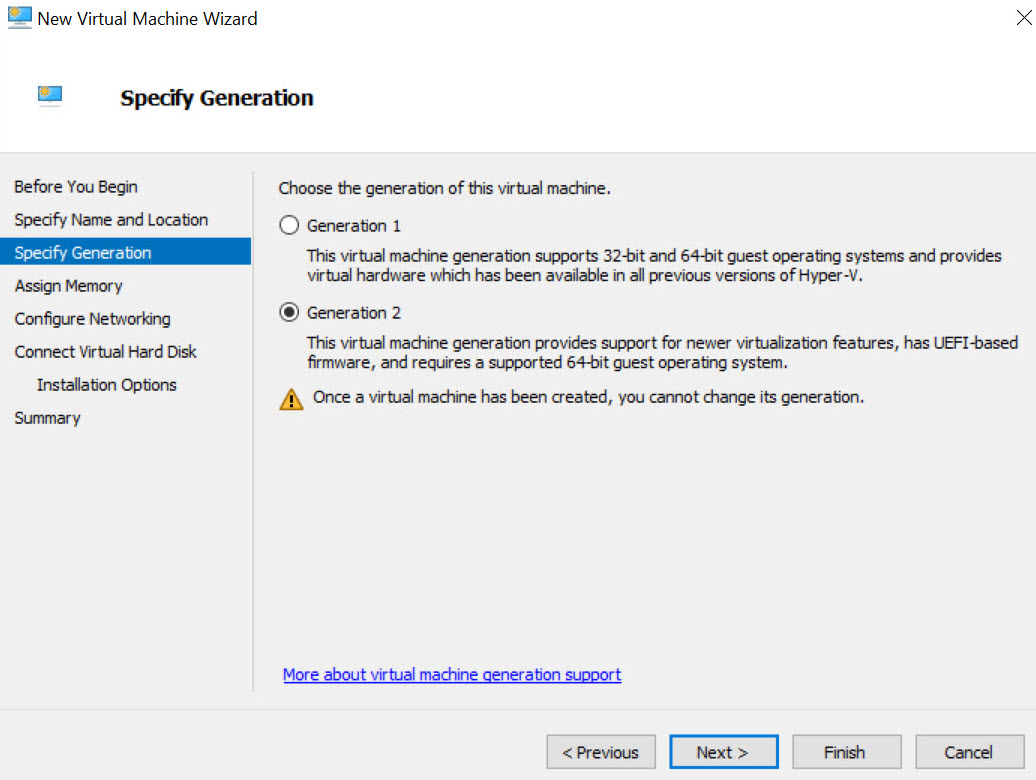
For the Specify Generation section, select Generation 2. Click Next to proceed.
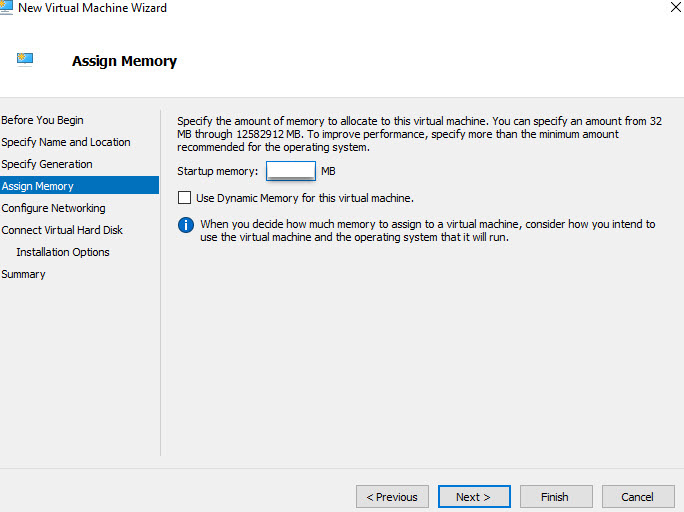
For the Assign Memory section, enter at least 16384 MB in the Startup memory field and uncheck the box next to Use Dynamic Memory for the virtual machine. Click Next to proceed.
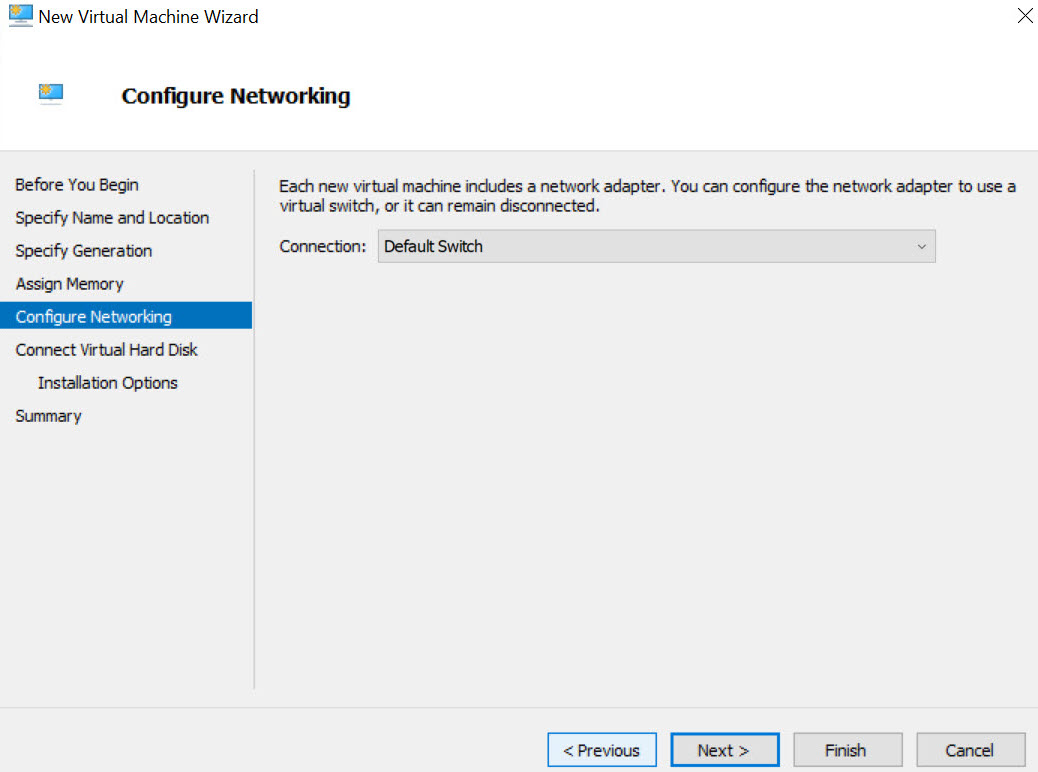
For the Configure Networking section, select the virtual switch you configured as part of the Configure a Virtual Switch section. Click Next to proceed.
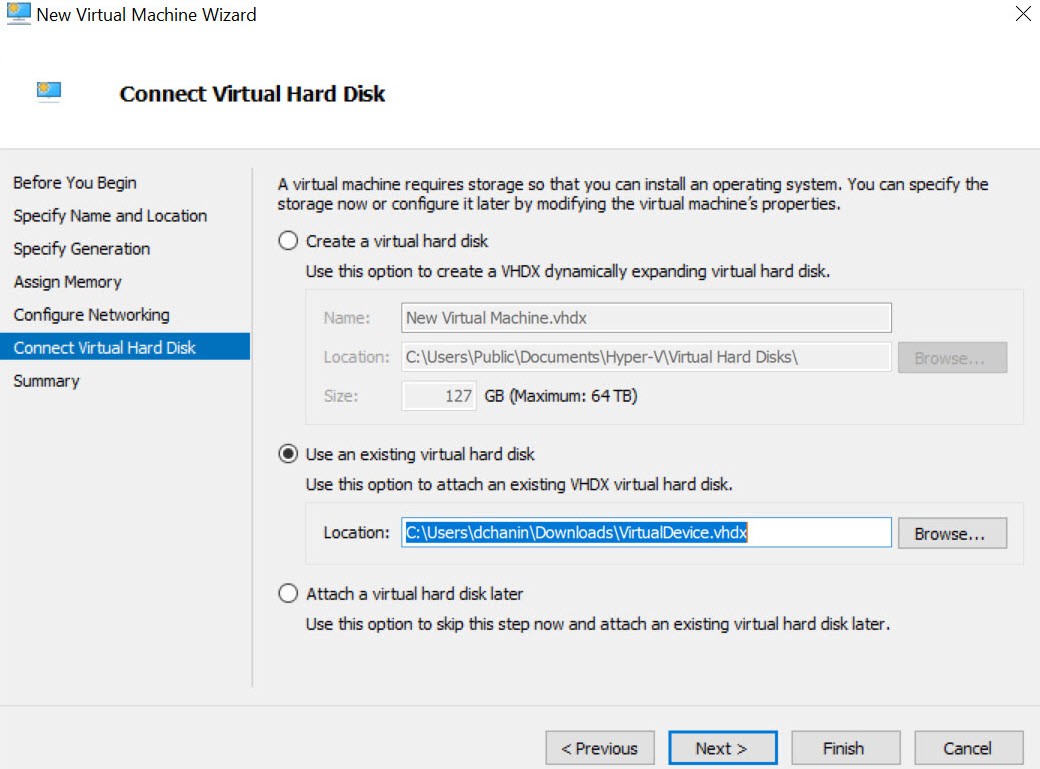
On the Connect Virtual Hard Disk screen, click Use an existing virtual hard disk > Browse to locate and select the SIRIS Virtual VHDX. Then, click Next to proceed.
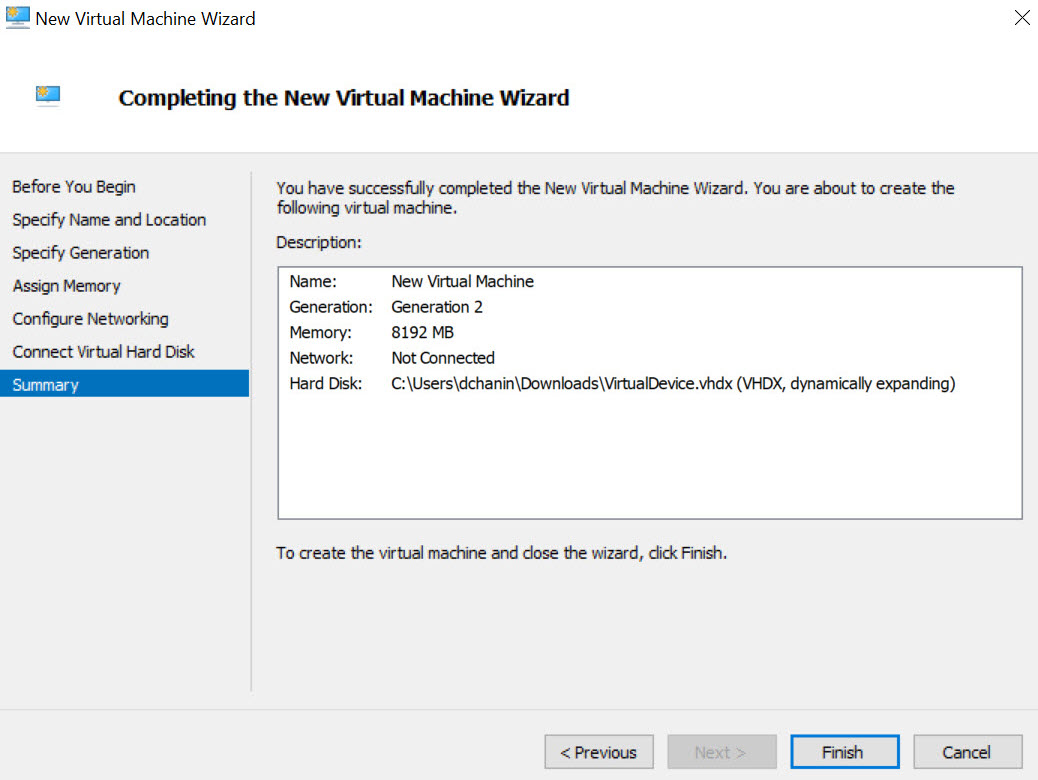
Review your configured settings in the Summary and click Finish to create your virtual machine.
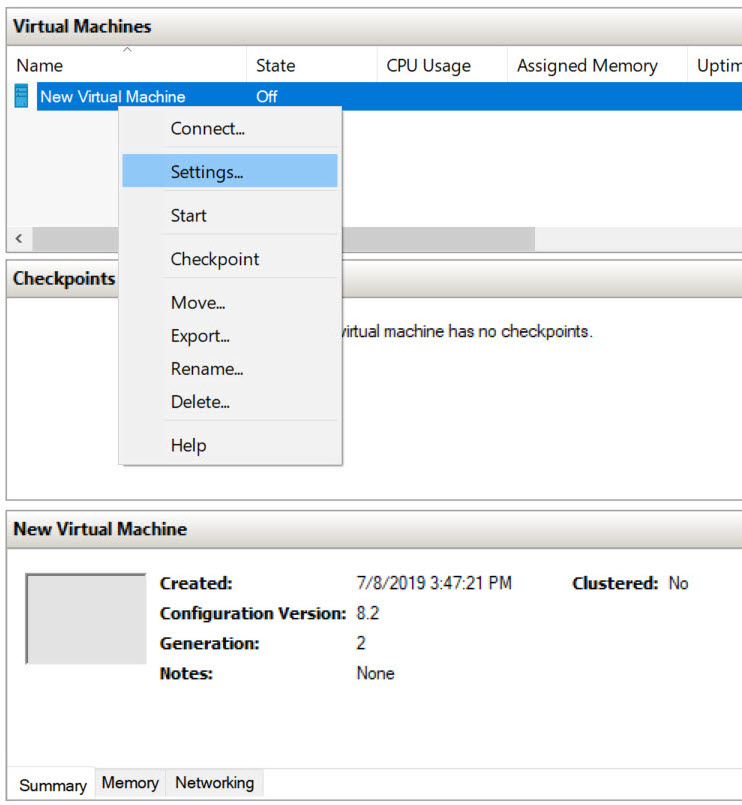
Right-click your new virtual machine in the Virtual Machines table of Hyper-V Manager, and select Settings.
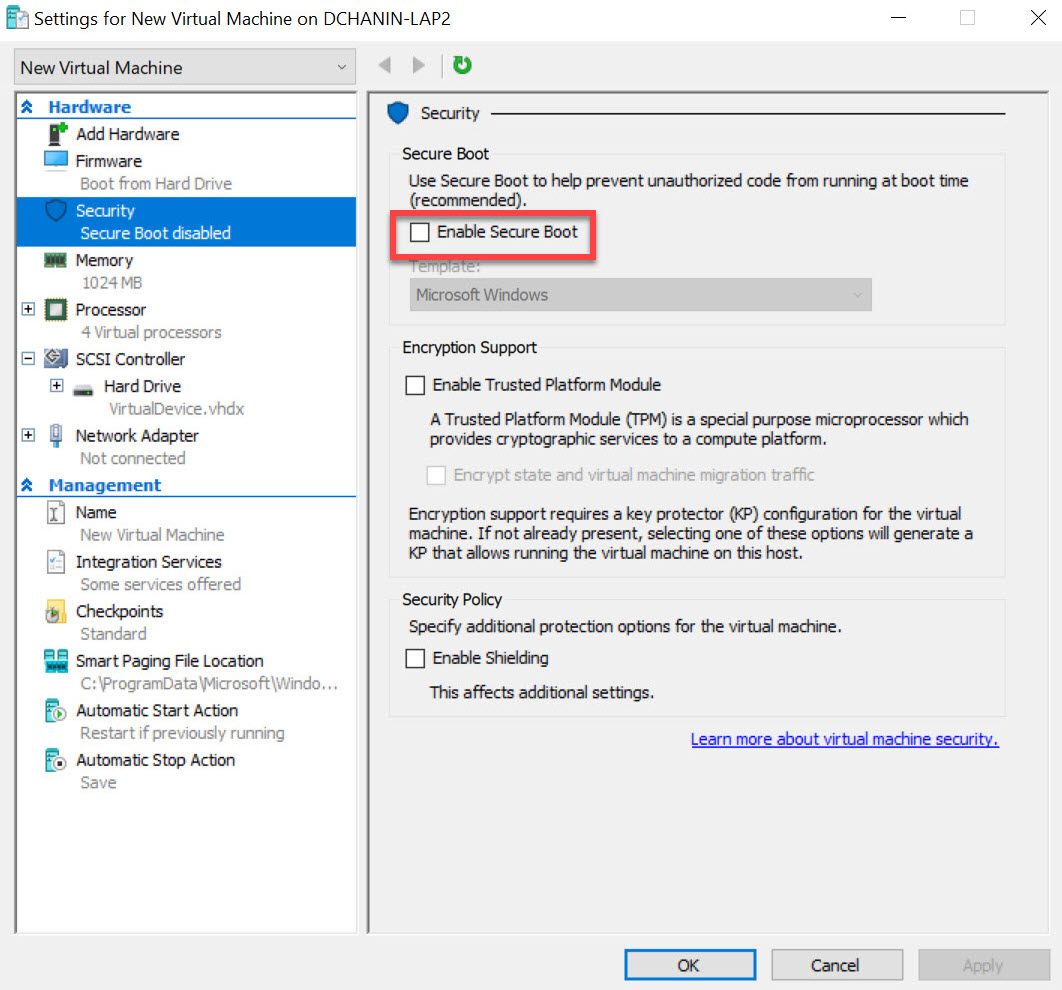
Select the Security category. Uncheck the box next to Enable Secure Boot to disable it.
Next, select Processor and increase the Number of virtual processors to 4.

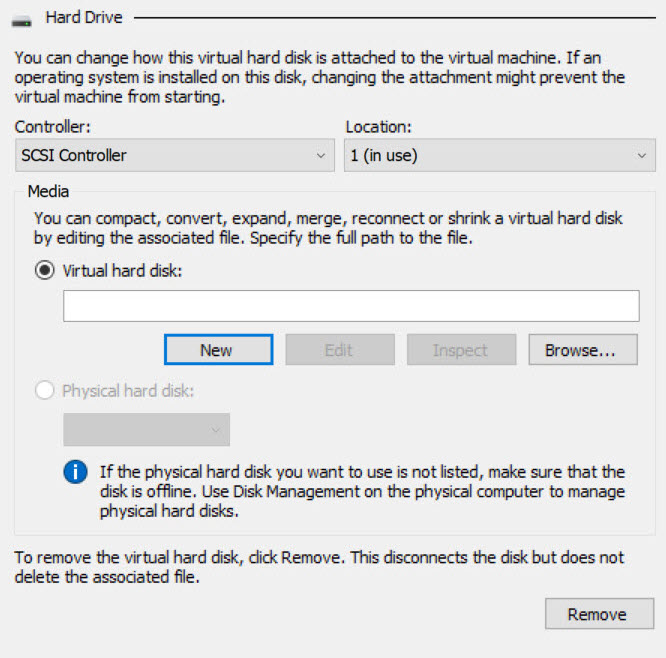
Select your primary storage controller, select Hard Drive, and then click the Add button.

Click the Virtual hard disk option, then click the New button to initiate the New Virtual Disk Wizard.
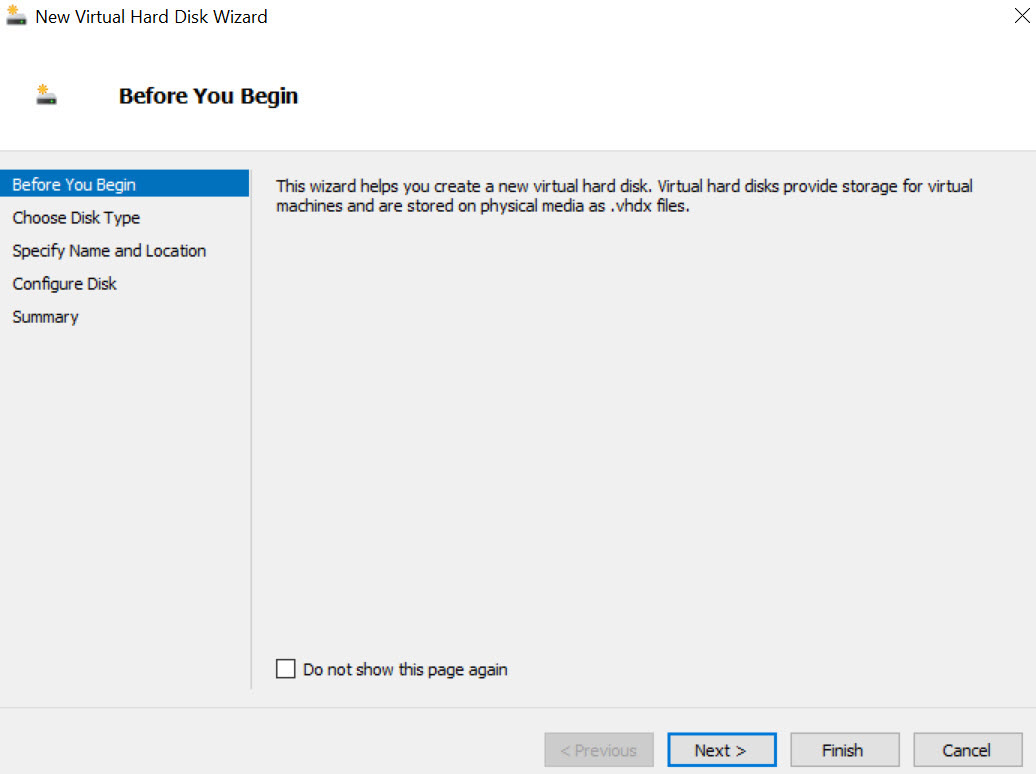
Read the overview in the Before You Begin section, then click Next.
For the Choose Disk Type section, select Fixed Size. Click Next to proceed.

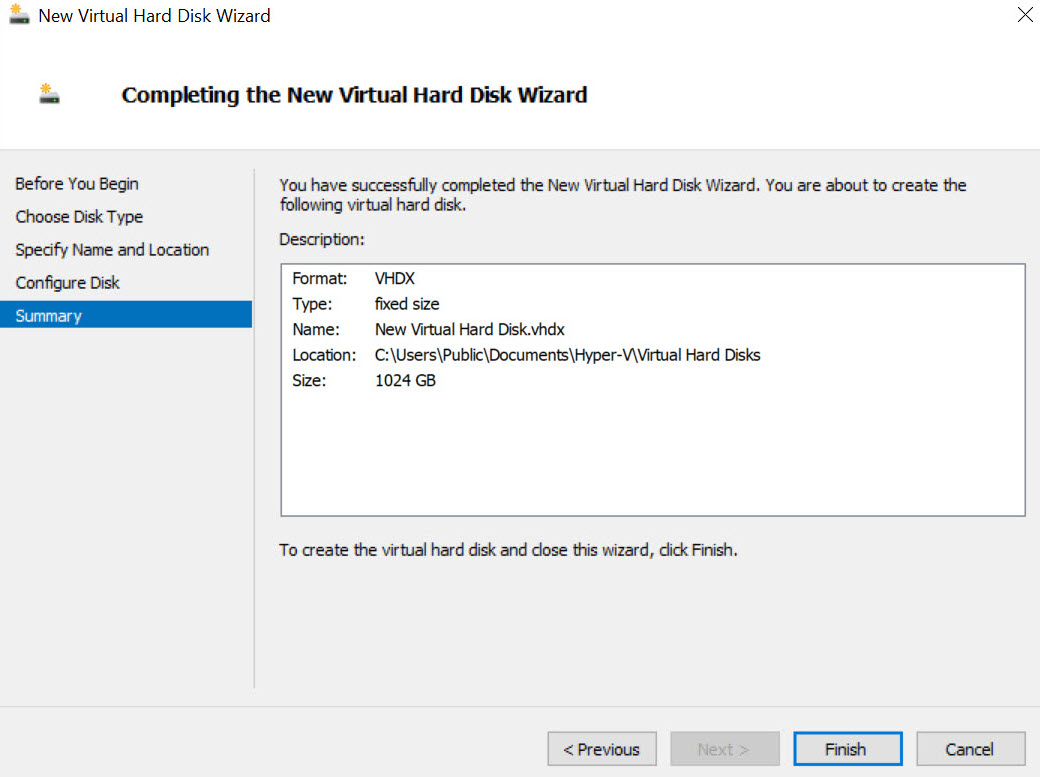
On the Specify Name and Location screen, enter the file name of your VHDX and its storage path. You may use any file name and file path. Click Next to proceed.

For the Configure Disk section, select Create a new blank virtual hard disk and enter at least 1024 GB for its Size.Click Next to proceed.

Review your configured settings in the Summary, then click Finish to create your virtual hard disk.
Starting the Virtual Machine
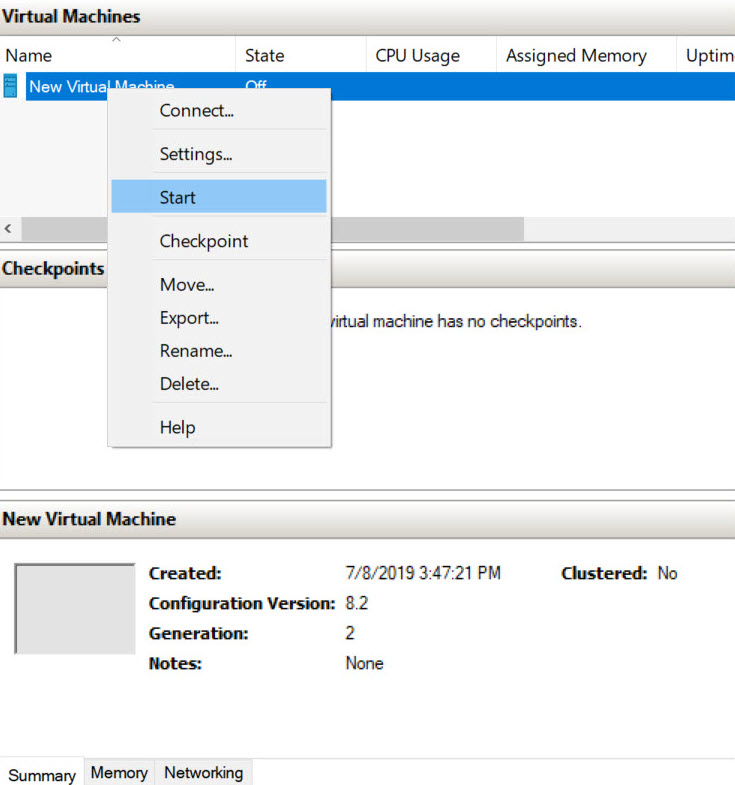
Right-click your newly created virtual machine in the Virtual Machines list of Hyper-V Manager and select Start.
Double-click on the name of the virtual machine to open a console window displaying the Virtual Product Authorization process.
Follow the registration process, outlined in: How to register a Datto backup appliance.


