Performing Cloud and Hybrid virtualizations
This article explains how to restore downed production machines as virtual machines in the Datto Cloud by using the new Recovery Launchpad.
Environment 
- Datto SIRIS
- Datto ALTO
- Datto Partner Portal
Description
The Recovery Launchpad lets you create virtual machines from your backups that reside on Datto's cloud servers for business continuity in disaster scenarios.
Boot mode (BIOS or UEFI) is automatically detected during virtualization to ensure compatibility with the original system configuration.
You can connect your cloud virtualization to an existing network or create a new one. To set up a network for use with your cloud virtualization, see Networking Cloud Virtualizations.
Cloud virtualizations are intended for temporary use during a recovery event or related testing exercise and should be removed when no longer needed. Virtualizations that are not supporting a business continuity/recovery event or that have been running for more than 30 days may be powered off and subsequently deleted.
You can connect your cloud virtualization to your local SIRIS device to create a “hybrid virtualization” that uses your local network to access a virtualization running in the Datto cloud.

Method 1
In the Datto Partner Portal, click the Status tab, then select BCDR Status from the drop-down menu.

In the section for the target device, click the ellipsis icon on the far right-hand side of the screen, then click Recovery Launchpad from the drop-down menu.

Method 2
Alternatively, from the BCDR Status page, click the name of the Datto device.

On the top right of the Device Details page, click Recovery Launchpad.

Performing a cloud virtualization
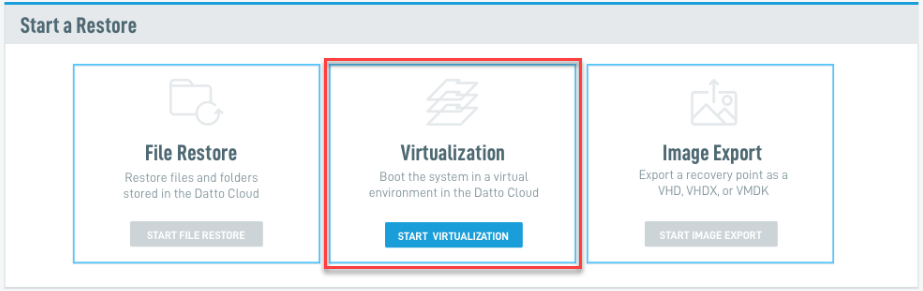
Click START VIRTUALIZATION under the Virtualization restore option.
On the Virtualization card, check the box next to the name of the machine you wish to restore.
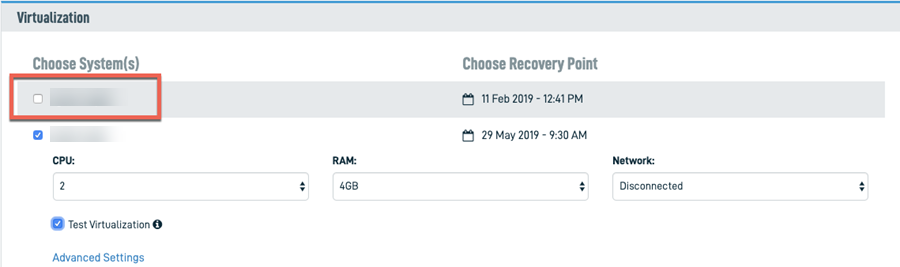
NOTE You will only see systems listed that are capable of cloud virtualization. If a system is not listed, you will need to choose a different restore method.
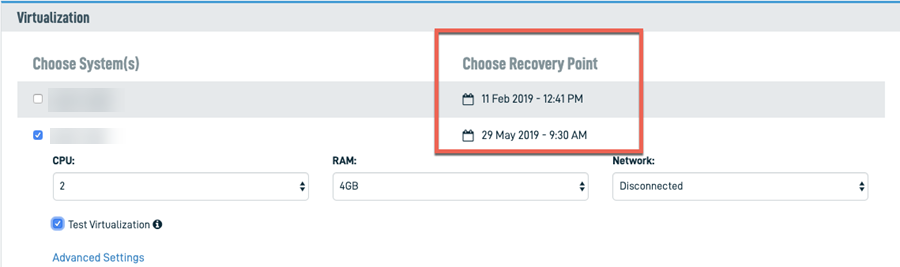
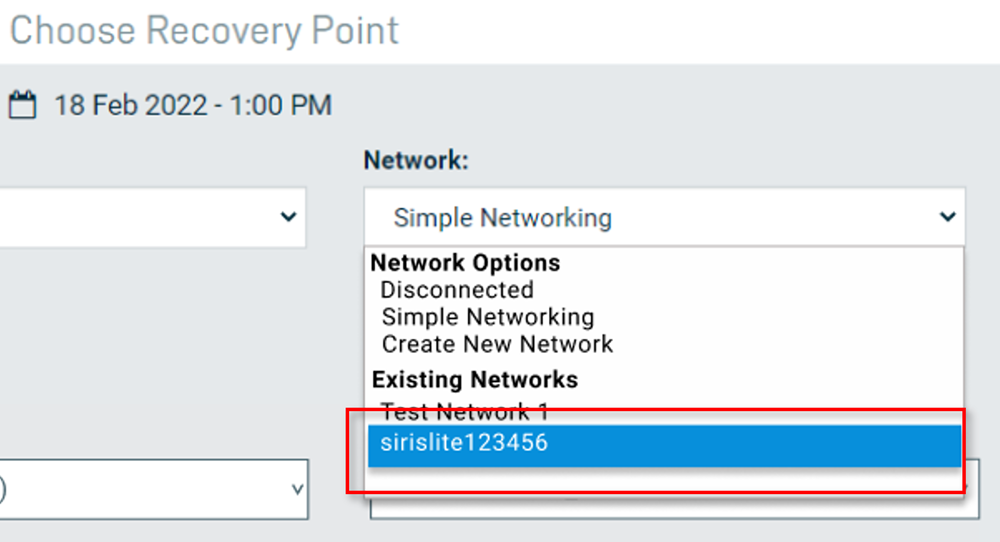
Click the date under the Choose Recovery Point column to select a recovery point. The latest recovery point will display by default.

After you select the agent and recovery point, the Virtualization card will expand to include CPU, RAM, and Network options. Enter the following information:
CPU: Enter the number of CPU cores to allocate to the restore.
RAM: Enter the amount of system RAM to assign to the restore.
NOTE The Recovery Launchpad will allow a maximum of 8 CPU cores and 16GB RAM per virtual machine to be entered via the Partner Portal. If you encounter performance issues and/or need to request additional CPU or RAM resources for a particular cloud virtualization, contact Datto Technical Support for assistance.
Click the drop-down menu under the Network field, then select from the following networking options:
- Simple Network
- Disconnected
- Create a New Network
- Select an existing network
See Networking Cloud Virtualizations for details on creating a network or the options available.
Select the Test Virtualization checkbox if this virtualization is for testing/non-production use.
By default, all cloud virtualizations will be powered off after 30 days. If you will need this VM longer than 30 days, uncheck the Power off after 30 Days option. This selection can be changed at any time using Configure Settings option in Recovery Launchpad.
 Advanced Options
 Advanced Options allow you to change the default settings of several parameters of your virtualization if required.
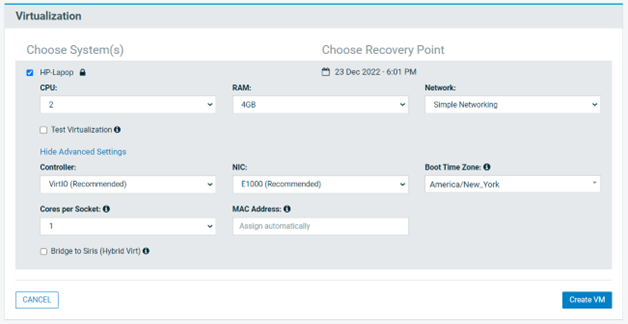
Click Advanced Options to change any of the following settings:
Controller
Change the default Storage Controller
NIC
Change the default Network Card.
Boot Time Zone
By default, a cloud virtualization will boot to the time zone that was configured on the Datto appliance. If you would like to override this setting, select the desired time zone from the Boot Time Zone drop-down
Cores per Socket
You can override the default of 1 core per socket in order to optimize cloud virtualizations in accordance with your production system. Choose 1, 2, 4, or 8 cores per socket.
MAC Address
If you need to specify a MAC address for your cloud virtualization, you can enter the value here by typing in the twelve-character MAC address. Otherwise, leave this field black and the system will assign this for you.
- Bridge to SIRIS (Hybrid Virt)
Select Bridge to SIRIS (Hybrid Virt) if you want to create a hybrid virtualization where the cloud virtualization is connected to the local SIRIS over a VPN tunnel. This hybrid configuration was previously available as a setting on SIRIS device, but is now done via the Recovery Launchpad.
By selecting the Bridge to SIRIS (Hybrid Virt) check-box, and Create VM,you will create a new virtualization with a VPN tunnel back to the on-prem SIRIS device.
If you have previously created a Hybrid Virt connection to the SIRIS device, it will appear in the Network drop-down. It will begin with a “sirislite” prefix. Select the existing network, if desired.
When you have finished making all your selections, click the Create VM button at the bottom of the screen.
NOTE Once the VM has been created you can still change any of your settings selections using the Configure Settings option as outlined below.
The Recovery Launchpad will create and boot a virtual machine from the selected recovery point automatically configuring the appropriate firmware mode (BIOS or UEFI) based on the original system configuration. When the boot process completes, you can log into the VM and work from it as you would on your production machine. When virtualizing encrypted agents, you will first be prompted for the encryption password.
Click the kebab menu on the right of the VM listing for control options. The options you have are different depending on whether your VM is powered on or off.
NOTE For Linux-based systems, including Ubuntu, EFI system partitions are included in the backup snapshot. During cloud virtualization, the platform automatically detects whether the source system was configured for BIOS or UEFI and generates the appropriate boot configuration. In UEFI environments, an EFI boot structure may be created to ensure proper startup within the Datto Cloud.
Control Options
Options when the VM is powered off

Configure Settings
- Opens a modal where you can make configuration changes to your virtual machine.
Delete Virtual Machine
- Deletes your virtual machine.
NOTE Deleting a virtualization with a Hybrid network will only delete the VPN connection when the last associated virtualization is deleted.
Convert to File Restore
- This action will convert your virtualization to a file restore. The virtualization will be removed.
Convert to Image Export
- This action will convert your virtualization to an Image Export. The virtualization will be removed.
Options when the VM is powered on
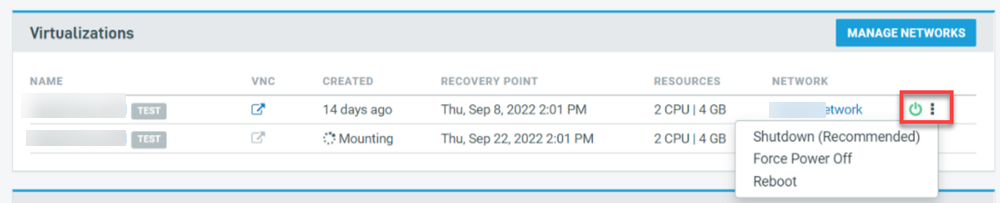
Shutdown (Recommended)
- Initiates a soft shutdown of the virtual machine
Force Power Off
- Initiates a hard shutdown of the virtual machine
Reboot
- Forces a reboot of the virtual machine

NOTE You can mirror the Ctrl+Alt+Del command to the virtualization by clicking VM Controls at the top right of the screen, and then clicking Send Ctrl+Alt+Del in the drop-down menu.
Datto is not responsible for configuring a virtual machine's network adapter settings once the virtual machine is connected to a network during a Disaster Recovery scenario or test. Further assistance with network configurations is available from Microsoft and Ubuntu(external links).
Virtual machine snapshots
Virtual machine snapshots provide automatic protection of organization data while running in the Datto Cloud. This new feature helps ensure that partners and their organizations are not at risk while running virtual machines in disaster recovery scenarios.
Virtual machine snapshots are designed to automatically snapshot cloud VMs each hour, so that VM's can be rolled back to an earlier state should the need arise. We retain the most recent snapshots up to 120 in total.
NOTE
- Snapshots stop running if the VM is powered down, and snapshots will only be taken if data has been written to the dataset. When the virtual machine is deleted, the snapshots are also deleted.
- Snapshots are not visible to, and cannot be initiated by partners or end-users. Rollbacks can only be initiated by Datto Technical Support.
- Virtual machine snapshots are run and removed automatically by the system at predetermined intervals that are not adjustable by partners or Datto Technical Support. They are temporary, and are not designed to be long-term backups.
Cloning a cloud virtualization from history
The quickest way to create a cloud virtualization is to clone it using a previous restore as a template. For more information on creating VMs, Networks, or DR plans from previous tests refer to: 1-Click Disaster Recovery in the Datto Cloud


