Restoring to Microsoft Azure using an uploaded VHD and Datto Utilities
This article describes how to restore a Datto-protected Hyper-V system to a Microsoft Azure environment.
Environment 
- Hyper-V Manager
- Datto Utilities
- Microsoft Azure
Description
This article presents two methods for restoring a Hyper-V VHD to Azure. The first method is simpler and is made possible by recent improvements to our VHD Export process.
The second method is included as an alternate method as it does still work, but requires more steps. This method should only be used if method one fails.

The current recommended method is to create a VHD Export and upload to Azure.
Create the VHD Export. See the following article for instructions on creating a VHD Export: Export Image
Upload to Microsoft Azure.
Follow the steps in Prepare a Windows VHD or VHDX(external link) and Upload a generalized VHD and use it to create new VMs in Azure (external link) articles to prepare and upload your created VHD.
This legacy method should only be used if method one is unsuccessful.
Create a Fixed-Size VHD, associate the image and the Datto Utilities ISO with a new virtual machine, then upload it to Microsoft Azure.
While this article describes how to create a single Fixed-Size VHD, multiple can be created if needed.
Creating a Fixed-Size VHD
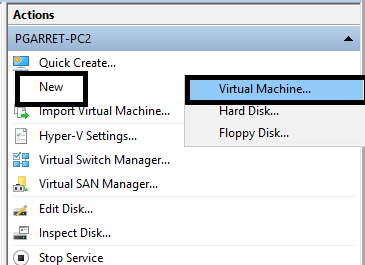
From Hyper-V Manager, click Actions > New > Hard Disk.

Click Next on the Before You Begin screen.

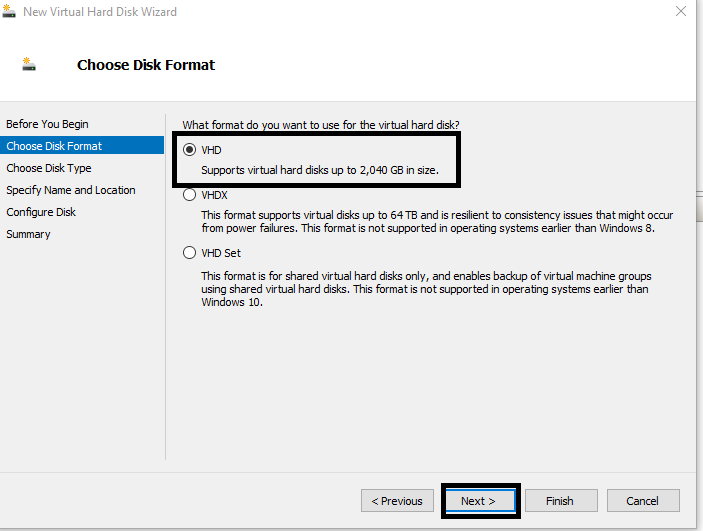
Select VHD, then click Next.
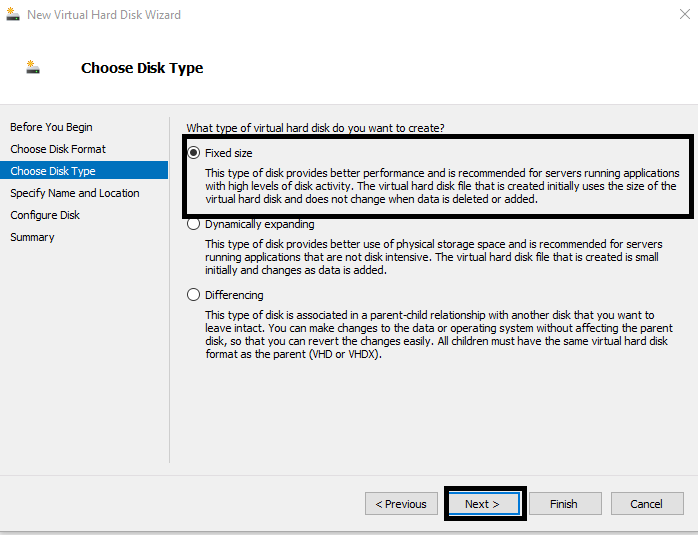
Select Fixed-Size as the Disk Type.
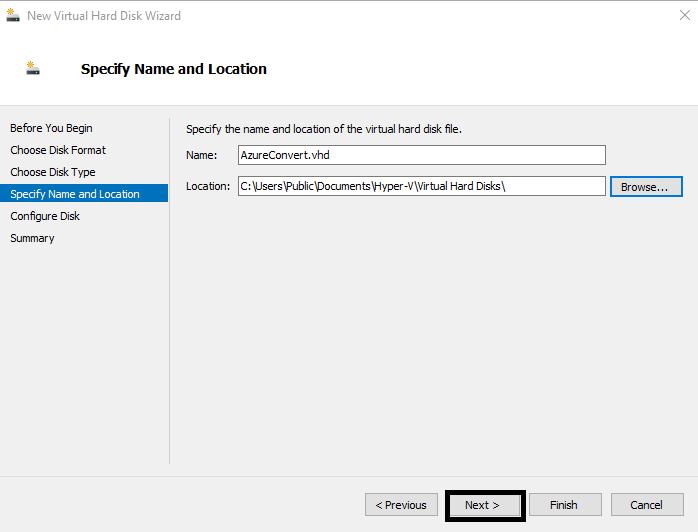
Enter the name and location of where the VHD will be created.
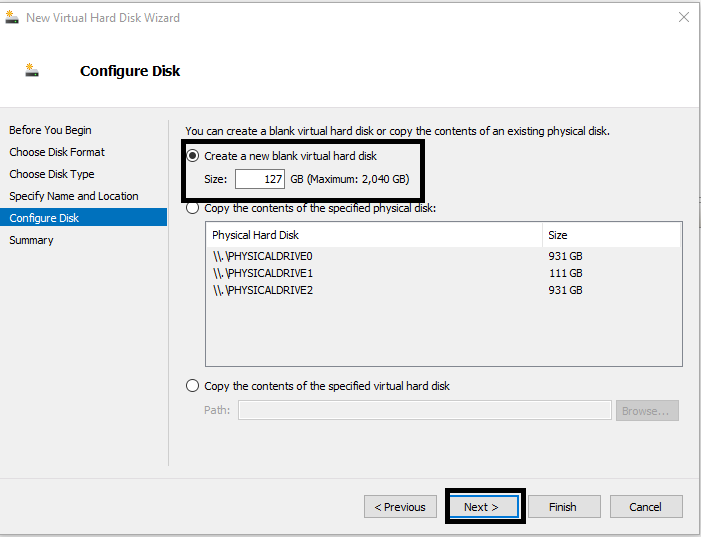
Select Create a new blank virtual hard disk, enter a size, then click Next. The default size is 127GB; the maximum size Microsoft Azure allows is 1TB.
Review your new virtual hard disk, then select Finish.
Creating a new Virtual Machine
From Hyper-V Manager, click New > Virtual Machine to display the New Virtual Machine Wizard. In the wizard, select Next.
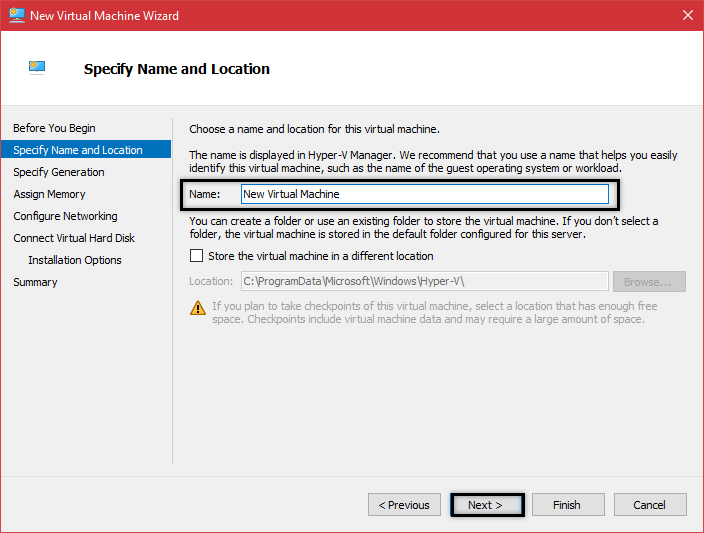
Enter the name of the virtual machine, then click Next.
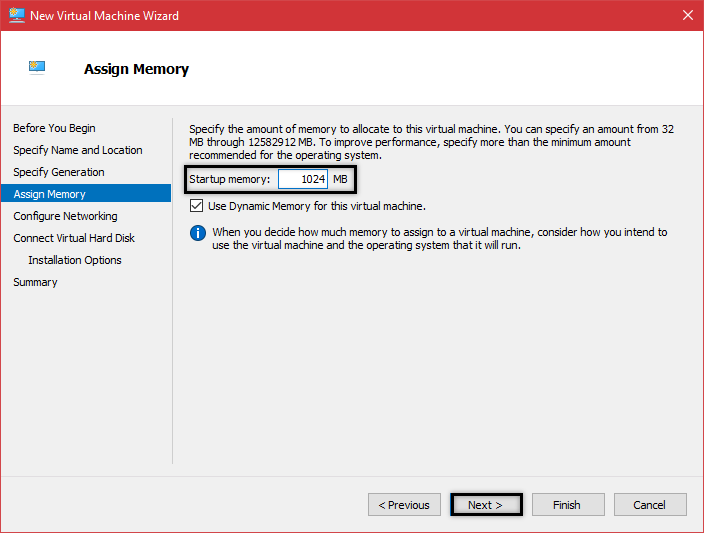
Enter the amount of memory to allocate the virtual machine, then click Next.
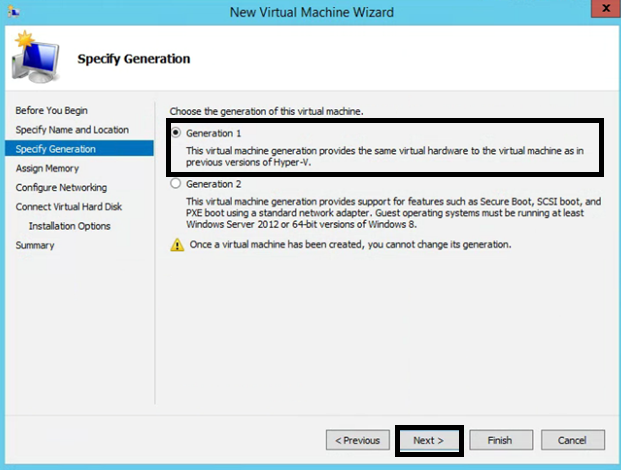
Select Generation 1 for the virtual machine generation, then click Next. Once a virtual machine has been created, you cannot change its generation.
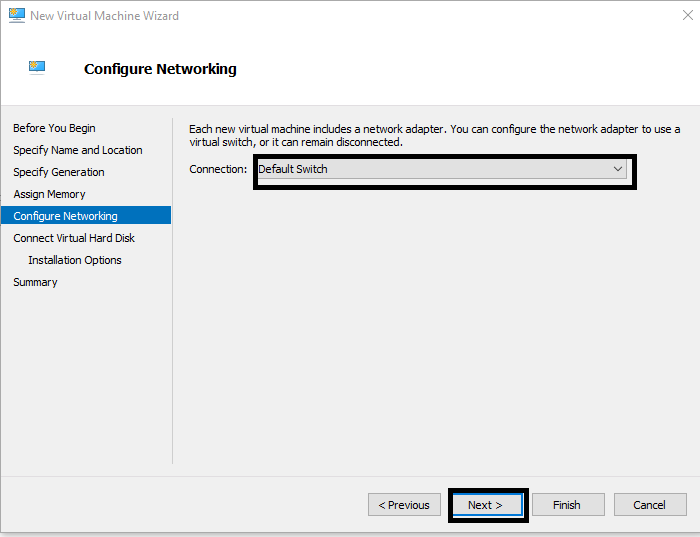
Configure the network adapter that the virtual machine will use, or select None using the Connection drop-down, then click Next.
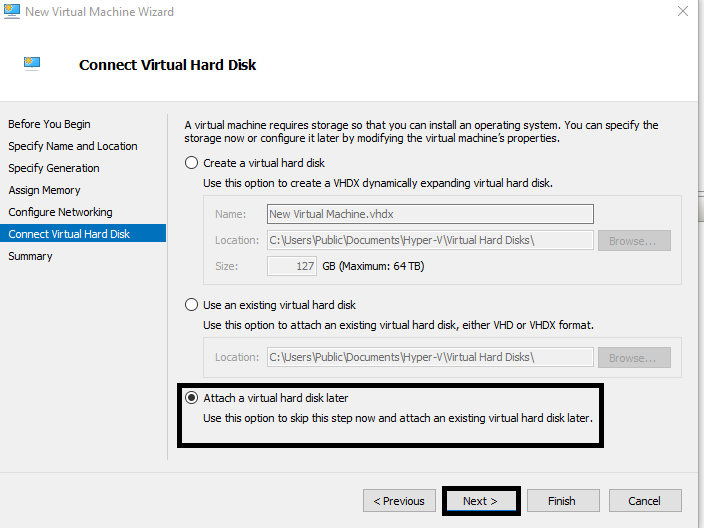
Select Attach a Virtual Hard Disk later, then click Next.
Review all configured virtual machine settings, then click Finish. Repeat all steps as necessary for multiple VHD files.
Attaching the VHD and Datto Utilities ISO
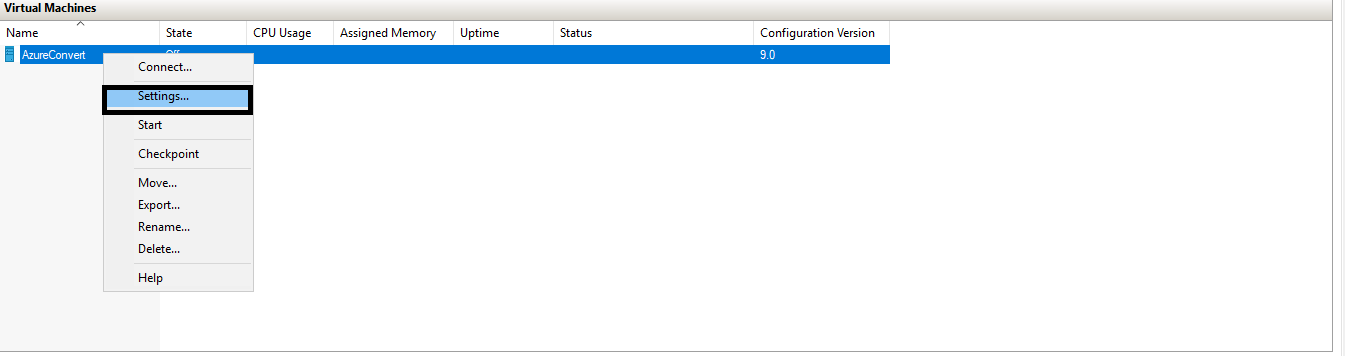
Right-click the virtual machine, then click Settings.
Select IDE Controller 0, followed by Hard Drive, then click Add.
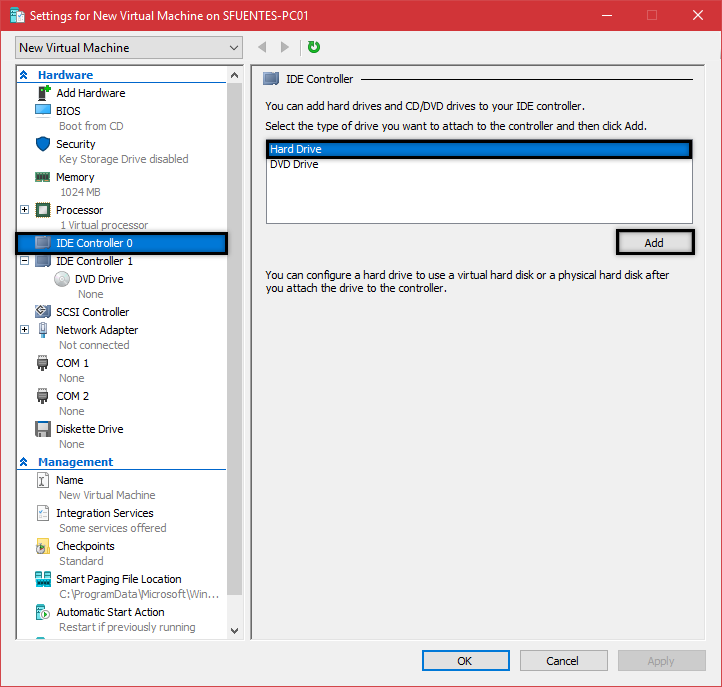
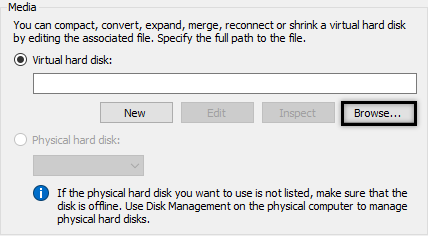
Click Browse and navigate to the location of where the VHD file was created, then click Open.
In the virtual machine's hardware listing, select IDE Controller 0, followed by DVD Drive, then click Add.

Select Media is Image File and then attach the Datto Utilities ISO, which is available from https://www.datto.com/downloads/datto-utilities.iso(external link).
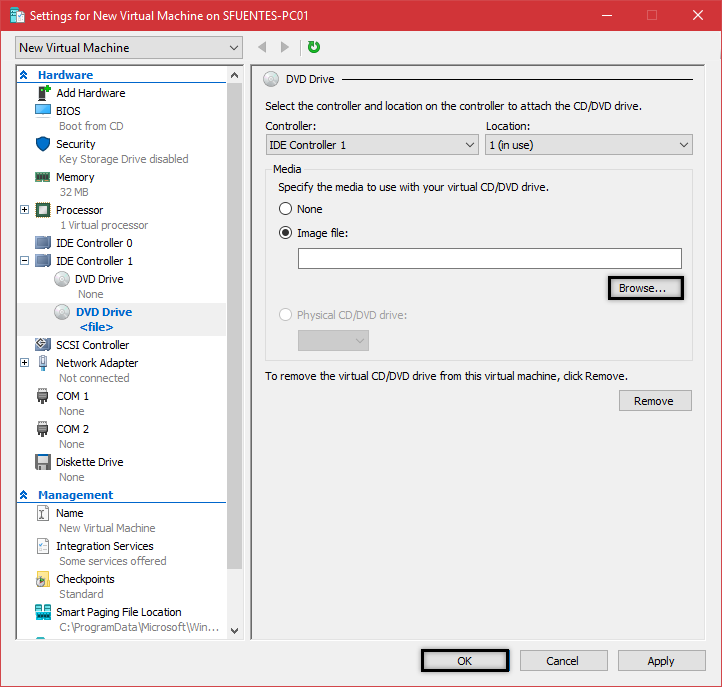
Click OK to save modified settings.
Verify that the BIOS setting in Hardware displays as Boot from CD.
Upload to Microsoft Azure
Follow the steps in Prepare a Windows VHD or VHDX (external link) and Upload a generalized VHD and use it to create new VMs in Azure (external link) articles to prepare and upload your created VHD.
Performing the BMR
After the upload is complete, you can then boot into the Datto Utilities environment in Microsoft Azure by following the steps in the Booting a Target Machine with Datto Utilities article, and perform a Bare Metal Restore.


