Booting a Target Machine with Datto Utilities
This article provides the steps required to boot a target machine into the Datto Utilities environment from a USB drive.
Environment 
- Datto Utilities
Description
Prerequisites 
This article assumes that you have already imaged a USB stick with Datto Utilities. If you have not already done this, see the article Imaging a USB Drive with Datto Utilities.
If the Datto appliance is using a second NIC to communicate to another subnet specifically or another network, they both must meet the networking requirements in the Troubleshooting Network Issues section, below.
To avoid networking and transport issues, Datto recommends ensuring that only one NIC on the target hardware has a connection to the Datto device.
Procedure
Plug the USB drive into the target machine.
- If you are imaging or restoring physical hardware, Datto recommends using the USB ports that have a direct connection to the motherboard. You can often find these ports on the back of the machine. For best performance, use a USB 2.0 port or better.
- If you are imaging or restoring a virtual machine, you will need to enable USB passthrough or attach the Datto Utilities ISO to the virtual machine as a logical drive. Be sure to configure your VM template correctly before booting into the datto-utilities ISO. If the asset being restored is MBR, set the template to BIOS, if the asset is UEFI, set your VM template to EFI.
NOTE If the target machine cannot natively boot from USB, you can use Plop Boot Manager(external link) to enable USB support. While Datto cannot provide support for the use of Plop Boot Manager, the application has historically produced reliable results.
Boot the target machine into its BIOS or Motherboard Firmware (UEFI) settings. Configure it to boot from the USB drive. Depending on your motherboard and how the BIOS handles the boot process, you may need to disable the UEFI Secure Boot feature as well. After configuring your settings, reboot the production machine.
IMPORTANT It is important to ensure you are booting into the correct boot type (MBR or EFI) for the system you are restoring. Failure to do so will cause errors.
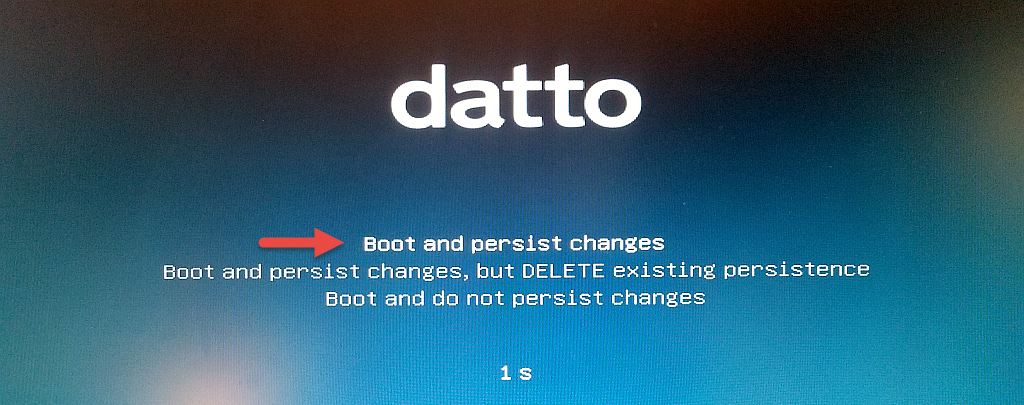
When the target machine finishes booting, select Boot and persist changes.
The Datto Utilities environment will attempt to autoconfigure networking via DHCP. If it is able to, it will proceed to the next step. The IP address will be displayed at the top of the screen which can be used to start the restore from another machine on the network. Alternatively, it may be reached via hostname on the local LAN: datto-utilities.local.
If the environment cannot obtain an IP address, you will see a prompt to configure networking manually.
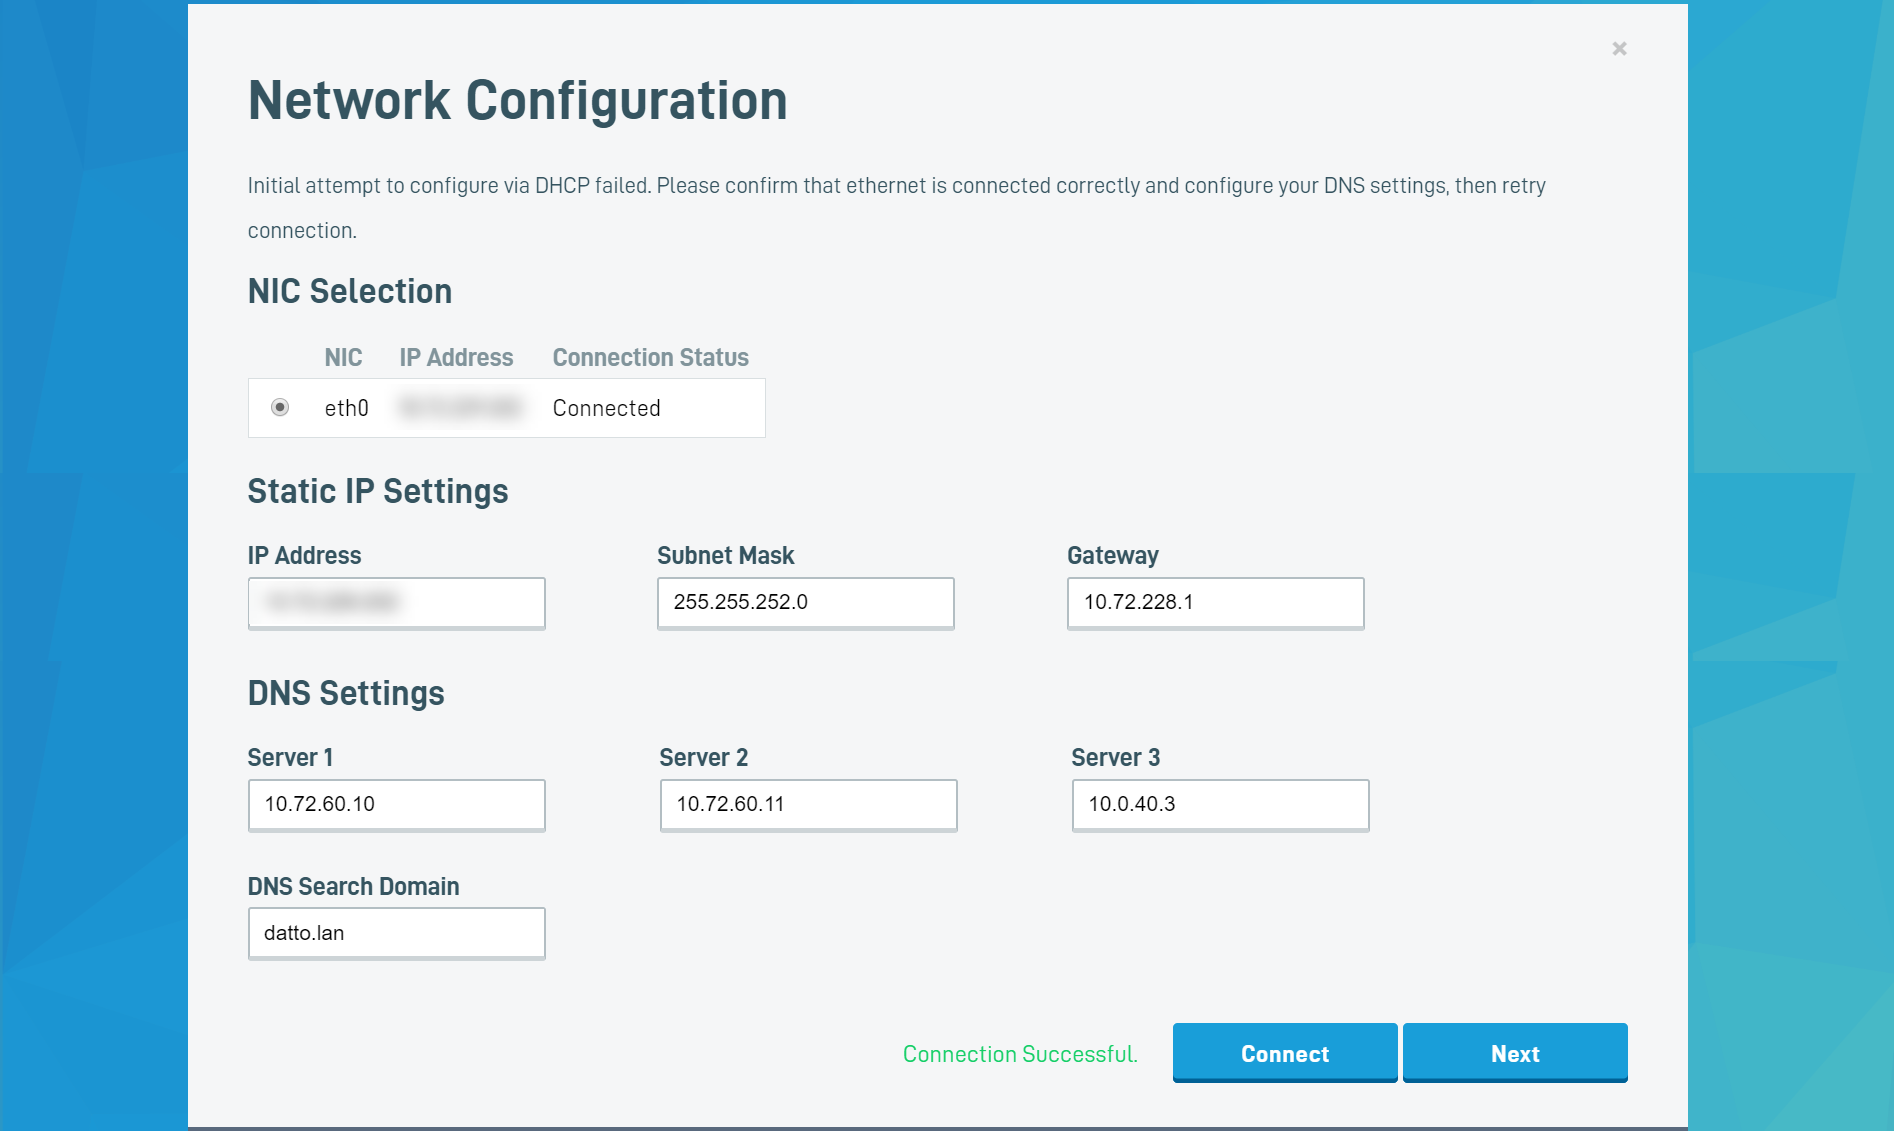
NOTE If no local DNS is available, you can set the DNS setting to 8.8.8.8 so the BMR can connect and continue.
When you finish configuring networking, click Connect. To save the configuration changes and return to the main menu, click Next.
Following a successful network check, you will see the Checking for Updates message. Allow the environment to download and apply updates.

If the updater is unable to complete and exits with a failure state of "Error during stick update: Unable to determine if stick is out of date," it means the imager was unable to reach Datto's servers to check for updates. You will need to resolve any issues in the production environment, which may be preventing the target machine from configuring networking. Make sure that the target machine's environment meets the Networking and Bandwidth Requirements. Then, click Retry.
IMPORTANT Bypassing the update process may cause the imaging process to fail.
When the updates complete, the page will redirect to the Datto Utilities application menu. Select the application you would like to launch.

NOTE Rapid Rollback is not available for Datto Endpoint Backup based restores.
Next Steps
Select the process you are performing to continue:
- Bare Metal Restore (BMR)
- Rapid Rollback
- How to upgrade SIRIS Imaged or SIRIS Virtual devices
- Datto Endpoint Backup for PCs Bare Metal Restore
- Datto Endpoint Backup with Disaster Recovery Bare Metal Restore: Getting started
Troubleshooting Network Issues
If the Datto device does not appear when initiating a restore:
Make sure the Datto device is on the same IP scheme as the target hardware.
Make sure the network has proper routing.
Make sure the Datto device is using the same public IP address as the target hardware.


