IPMI On SIRIS 4 Business and SIRIS 4/4X Professional
This article explains how to configure, access, and use the Aptio Setup Utility to access a SIRIS 4 Business, SIRIS 4 Professional, or SIRIS 4 X Professional through IPMI.
Environment
- Datto SIRIS 4 Business
- Datto SIRIS 4 Professional
- Datto SIRIS 4 X Professional
Description
Configure IPMI
Before you can access the Datto appliance's remote management interface, you will need to configure IPMI. See the Network Configuration article for more information.
If you are unable to configure IPMI via the GUI, you can perform the following steps.
Set up the IP Address
To configure IP and MAC addresses, enter the Aptio Setup Utility by pressing F2 on boot.
- Enter the BIOS password. You will then see the main page of the setup utility.
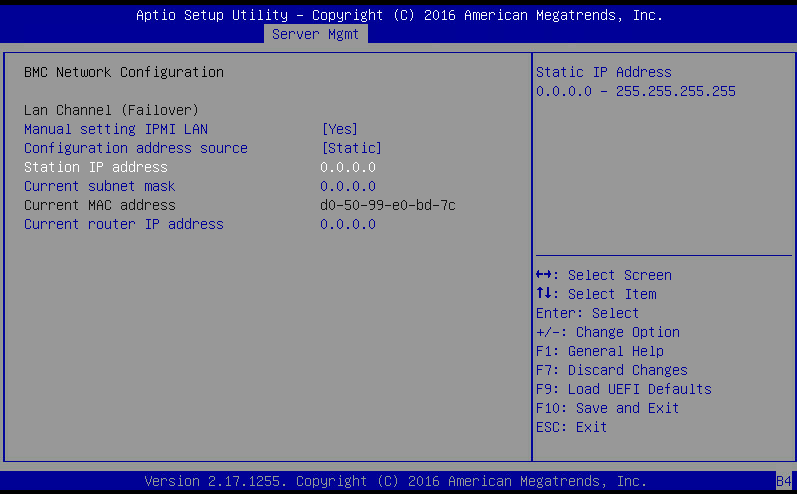
- Select Server Mgmt, and press Enter. From there, select BMC Network Configuration.
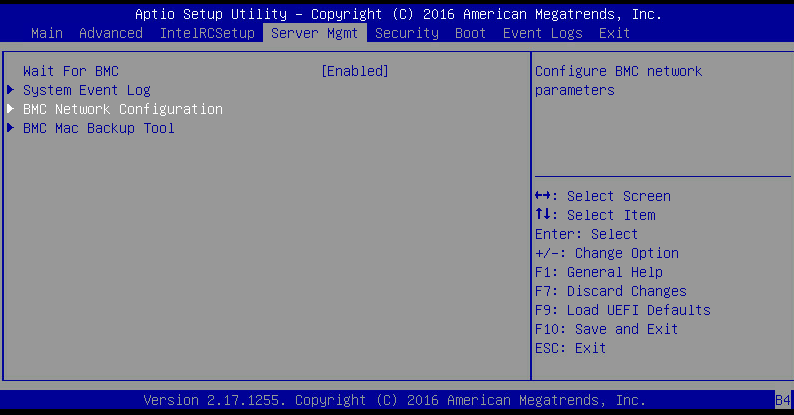
Figure 2: IPMI Configuration screen
- Select Manual setting IPMI LAN, and press Enter. This will give you the ability to change IP settings and toggle Static and DHCP services.
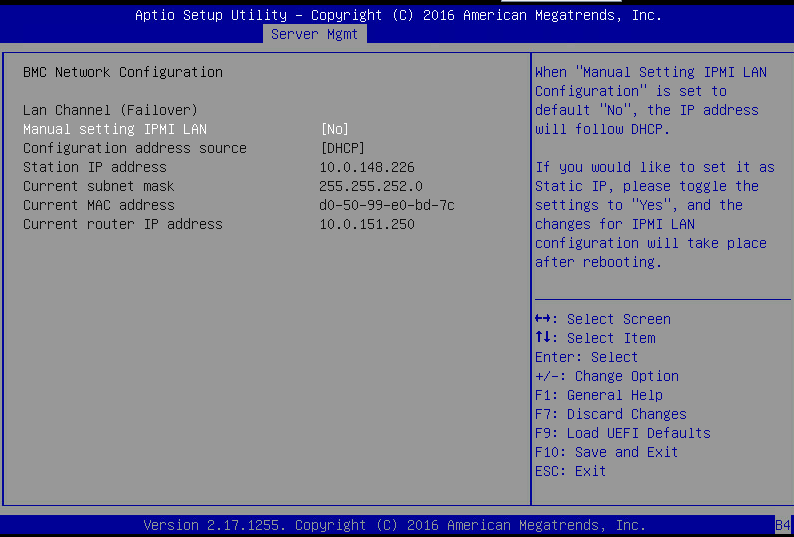
Figure 3: BMC Network Configuration
- Datto recommends that you provide a static, reserved IP address for the management console.
- Click F10 to save and exit.
Login to IPMI
Now that we have an IP address defined for the dedicated IPMI, we can now connect to the IPMI web interface locally to manage your Datto appliance.
- Go to a computer that is connected to the same LAN as the Datto, and open a web browser.
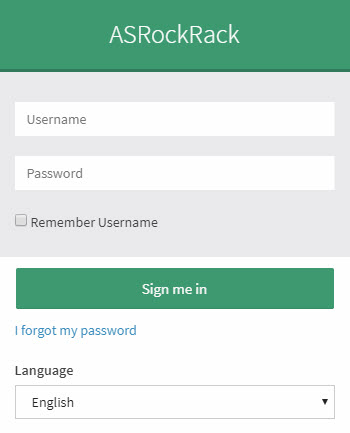
- In the address bar of your web browser, enter the IP address you configured for IPMI.
- When you see the login page, enter your credentials. The Username is admin. Contact Datto Technical Support for the password. The initial password is a temporary one and will be automatically replaced with the first 16 characters of the backup-admin password for your Datto device.
You are now remotely logged into the Datto device's management interface. Here you can control power, monitor system health, and add virtual media such as CD, DVD ROM, floppy disk images.
Launching Remote Control
The IPMI Utility allows you to launch a remote control session into the Datto appliance. To launch a session, follow these steps:
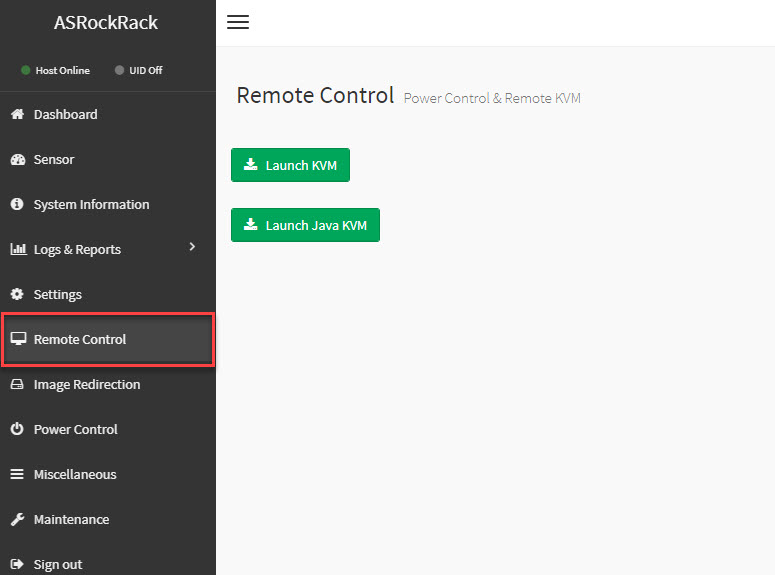
- Click the Remote Control tab. Click Launch KVM or Launch Java KVM. The standard KVM option requires no additional plug-ins. The Java KVM option installs an applet for an enhanced user interface but requires Java to be installed,
- Click the Launch KVM button.
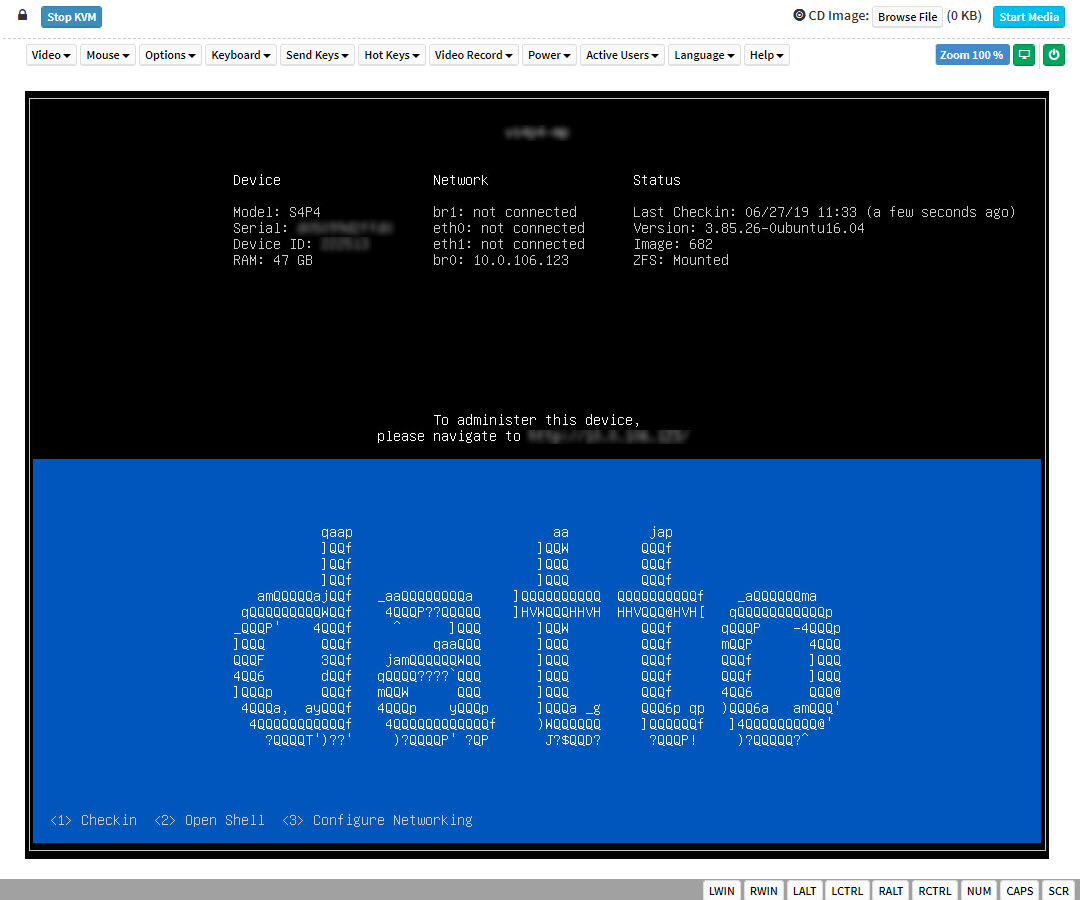
The Remote Control screen will launch. The Menu bar along the top of the screen provides a variety of control options. You can also access the Datto command line interface by pressing 2 on your keyboard and entering your backup-admin username and password. For assistance with the command line interface, please contact Datto Technical Support.
Java KVM
The Launch Java KVM option works much the same as the standard KVM option but uses a Java applet to display an enhanced GUI. This option requires Java to be installed on the computer you are connecting from.
NOTE Troubleshooting tip: the JViewer Console Window is a Java applet. If there are any issues with the following steps, start by troubleshooting your Java installation. You can also use the standard Launch KVM button as an alternative.
Here are the steps to use the Java KVM option.
- Click the Launch Java KVM button.
- You will be prompted with a few warnings about the downloaded file. Click to download and keep the file.

Figure 8: Keep the jviewer file
- Click the jviewer file to launch the console. You will then see the console window.
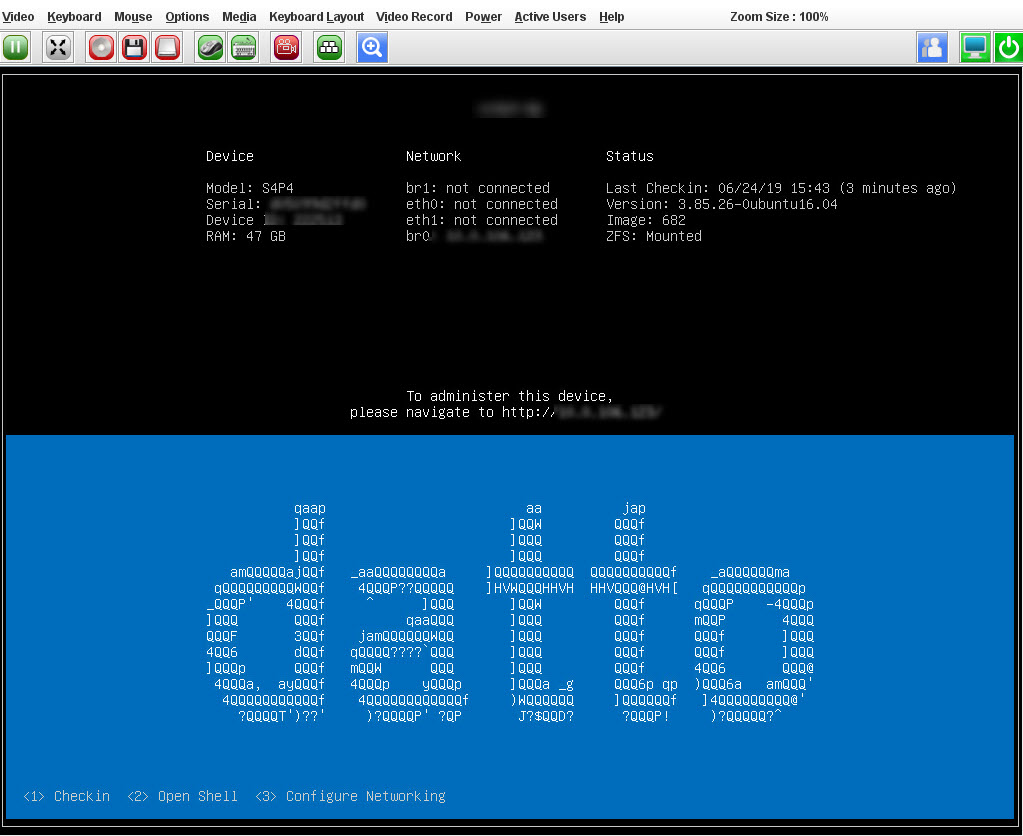
Figure 9: JViewer Console Window
Server Power Control
Another great feature of the Setup Utility, that is available in both KVM and Java KVM, is the ability to control power options, even if the device is fully powered down. To access this feature, click the Power menu, as shown in Figure 10.
The power control options are as follows:
- Reset Server: reboots the server without fully powering down
- Immediate Shutdown: forces an immediate shutdown
- Orderly Shutdown: shuts down the server gracefully
- Power On Server: powers on the server
- Power Cycle Server: powers down the server completely and then powers it back on

