Image Exports
This article explains how to start or manage an Offsite Image Export in the Recovery Launchpad.
Environment 
- Datto Partner Portal
- Recovery Launchpad
Description
The Recovery Launchpad can be used to create an image export from a recovery point located in the Datto Cloud.
NOTE If you are restoring to a backup point created before May 3rd, 2020, you may have to update the agent software on the protected machine after the restore is completed.
Technical Notes 
Image Export for ReFS is currently unsupported. Any ReFS volumes in the selected snapshot get excluded from the restoration. To perform a restore of a ReFS volume, use the Volume Restore feature.
Exported images currently do not include the Microsoft System Reserved (MSR) partition. This may cause issues when creating snapshots in VMware environments. If snapshots are required, perform a Bare Metal Restore (BMR) on the restored virtual machine. This process will also restore the MSR partition, ensuring full system compatibility.
EFI system partitions are not included in the backup, but are recreated during the restore process. If this partition is non-standard, as in the case with the patches release by Microsoft of systems effected by the vulnerability CVE-2023-24932, the partition would be created standardly. In cases like these, please reach out to Microsoft on re-applying the patch if desired.
Images downloaded over SFTP will be thick provisioned by default. SFTP does not support transfer of thin provisioned disks.
(Windows Systems) EFI system partitions are not included in Windows backups, but are recreated during the restore process. If this partition is non-standard, such as systems affected by the Microsoft patch for CVE-2023-24932, the recreated partition will follow standard configuration. In such cases, please contact Microsoft regarding re-applying the patch if necessary.
(Linux Systems - including Ubuntu) For Linux systems, EFI system partitions are included in the backup snapshot. During image export or restore, a new EFI boot configuration may be generated based on detected boot mode. The original EFI partition remains part of the exported image and may be required for certain distributions to boot correctly.
- The original EFI partition is preserved within the exported image. In certain Linux distributions, including specific Red Hat-based systems, the presence of the original EFI partition may still be required for proper boot behavior.
- Boot mode detection (BIOS vs UEFI) is performed automatically during the image export process.
Method 1
In the Datto Partner Portal, click the Status tab, then select BCDR Status from the drop-down menu.

In the section for the target device, click the ellipsis icon on the far right-hand side of the screen, then click Recovery Launchpad from the drop-down menu.

Method 2
Alternatively, from the BCDR Status page, click the name of the Datto device.

On the top right of the Device Details page, click Recovery Launchpad.

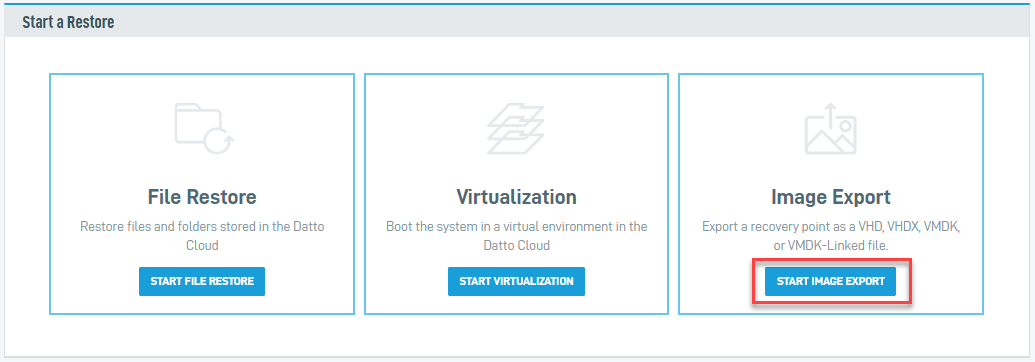
Creating an Offsite Image Export
Click START IMAGE EXPORT.
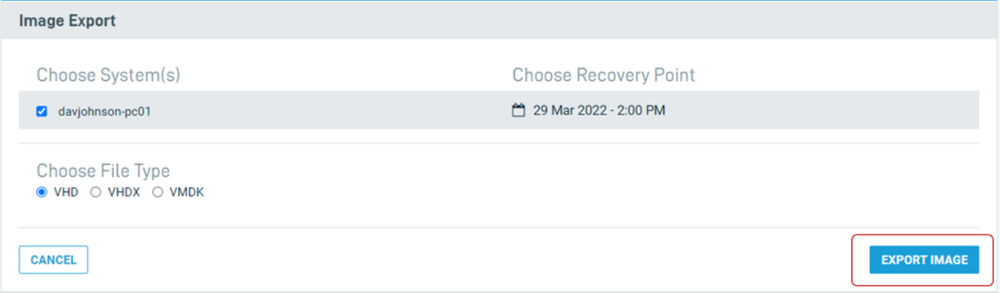
Select the system, export format, and your desired recovery point. Click the date under the Choose Recovery Point column to select a recovery point.
You will only see systems listed that are capable of image export. If a system is not listed, you will need to choose a different restore method. You'll see the latest recovery point displayed by default.
VMDK: VMDK: Compacted complete VMDK image (supports resizing and other advanced VMFS features).
Disk Space Required: VMDK image exports require approximately 200 MB of free disk space on the destination hypervisor.Files produced: A single drive system results in 1 file: C.vmdk. A second file, configuration.vmx, will also be present if you are restoring an agentless VMware-based system. The boot volume will always be the first volume of the image export; when restoring a virtual machine, you must attach this as the first drive in the VM configuration.
For Linux systems using UEFI, boot configuration is automatically generated during export or restore based on detected firmware type. In such cases, additional EFI partitions may be present in the exported image and should remain attached unless otherwise directed by Support.
VHD: Converted raw to VHD.
Files produced: A single drive system results in 2 files; boot.vhd and C.vhd.
VHDx: Compacted complete VHDx image
Files produced: A single drive system results in 1 file; C.vhdx.
RAW: Uncompressed RAW disk image
Files produced: A single drive system results in 1 file; C.raw

Click EXPORT IMAGE.
The Launchpad will automatically remove exports 30 days after the date you created them.
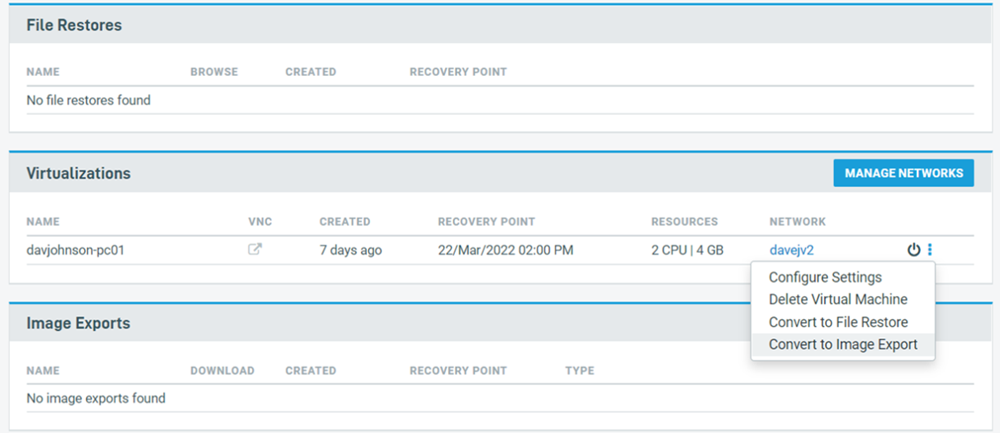
Converting a cloud Virtualization to an Image Export
You can also convert an existing virtualization to an image export or file restore from the Recovery Launchpad.
From the Virtualizations pane select the ellipsis icon for the virtualization that you want to convert.
Click Convert to Image Export.
Select the desired file type and check the box acknowledging that the Convert process will first shutdown the virtualization if you have not done so already.

Select Convert to start the process.
IMPORTANT Once initiated the conversion process will begin and the virtualization will be deleted as part of the conversion.
Downloading an image export
To download the export you've created, click the icon under the DOWNLOAD field.

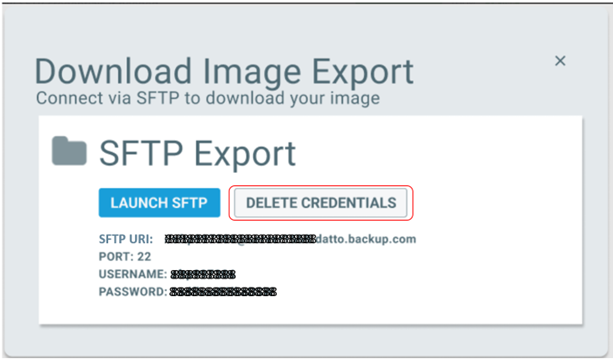
A Download Image Export modal window will appear.

- If SFTP credentials already exist, they will be displayed here and you can click LAUNCH SFTP. This will open the default SFTP client installed on your computer.
- If they don’t exist, you can use the button to Create New Credentials to generate new SFTP credentials.
When no longer needed, you can click the Delete Credentials button, to remove the credentials.
Deleting an image export
Access the Image Exports pane by navigating to the Partner Portal and selecting Status > BCDR Status. Click the name of the device for which you wish to delete an image export, then click RECOVERY LAUNCHPAD at the top right of the page.
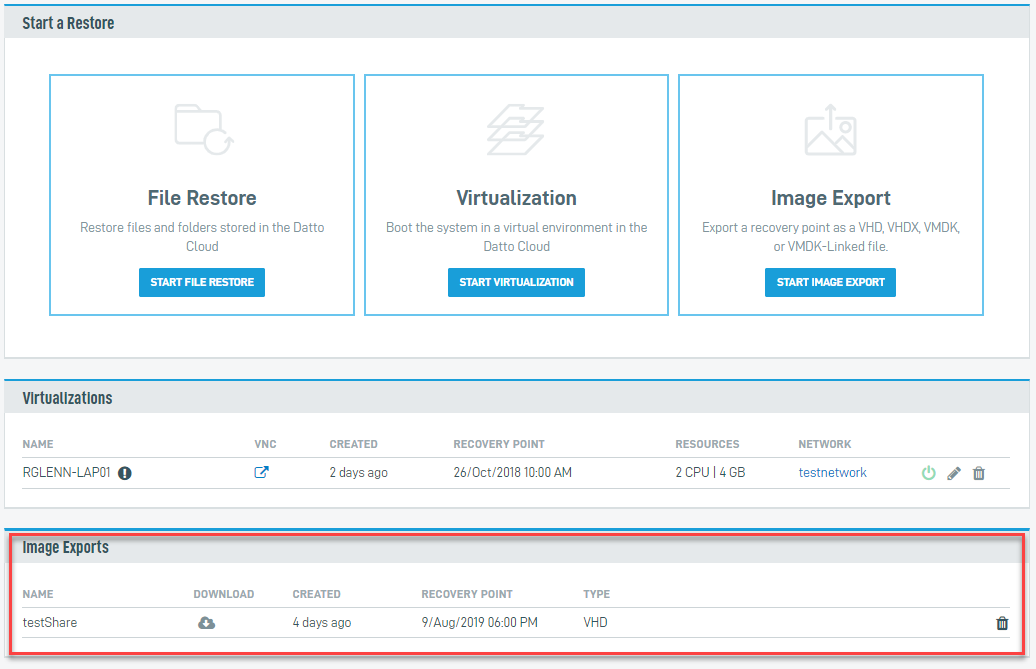
Click the wastebasket icon to the right of the desired export, then click DELETE IMAGE EXPORT in the modal window that follows.

Click Close.


