Port Forwarding
This article discusses how you can add port forwarding to an active virtualization.
Environment 
- Datto Partner Portal
- New Recovery Launchpad
Description
This article assumes you have already created one or more cloud virtualizations and attached them to a created network with internet enabled. If you have not done so already, see the following article: Partner Portal: Performing a Virtualization.
NOTE For port forwards to work properly, the network must be created with internet access enabled.
If there are cloud virtualizations originating from two separate devices, connected to the same network, only agents that are sourced from the Datto device that the network was created for can have port forwarding. Keep this in mind when creating the network and port forwarding rules.
Perform port forwarding 
Navigate to the Datto Partner Portal.
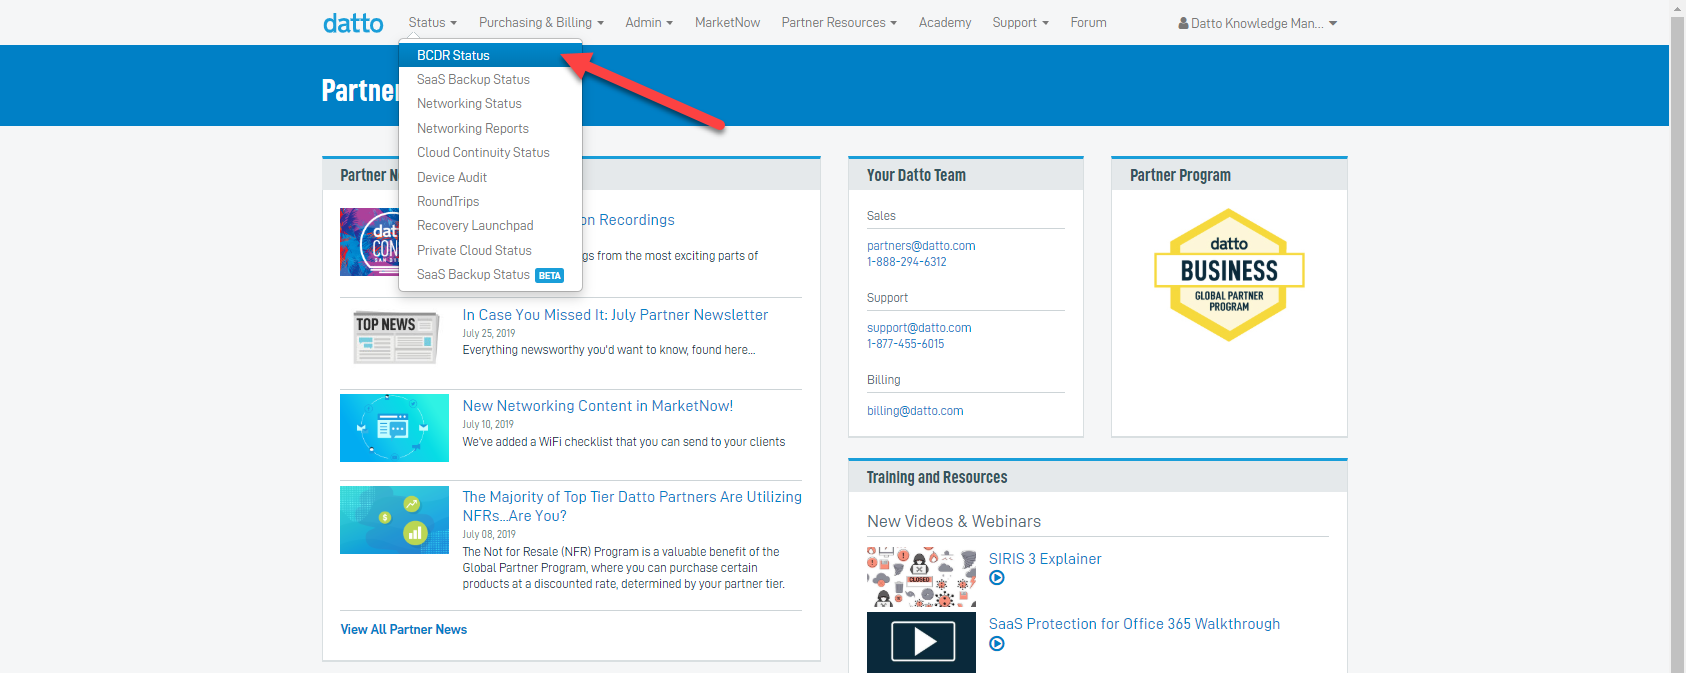
In the Datto Partner Portal, click the Status tab, then select BCDR Status from the drop-down menu.
In the section for the device you are virtualizing, click the ellipsis icon on the far right-hand side of the screen, then click Recovery Launchpad from the drop-down menu.

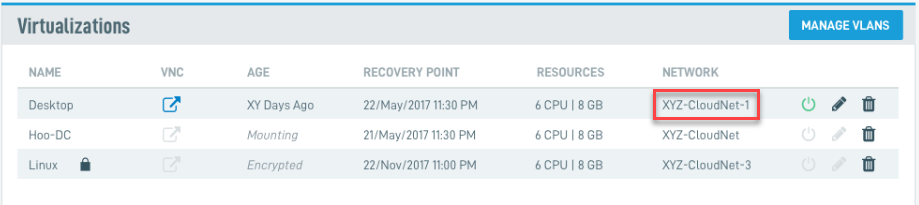
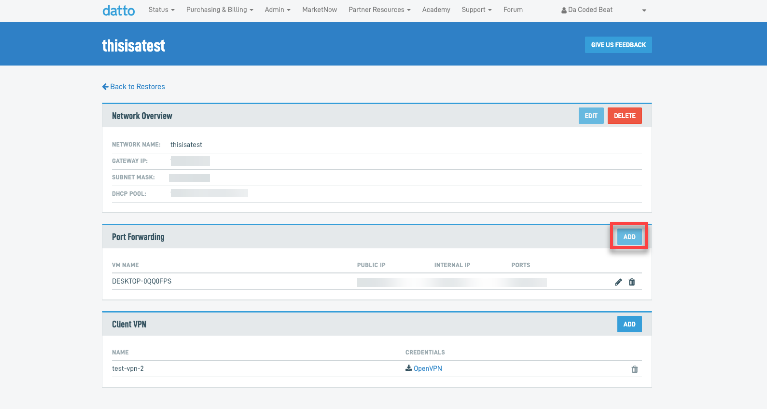
Click the name of the network under the Network field.
Click Add in the Port Forwarding panel. A dialog box will appear.
In the Port Forwarding dialog box, populate the following fields:
Select Virtualization: Select a virtualization you have created.
Internal IP: Enter the internal IP address.
Select Protocol: Select the appropriate protocol.
Port or Port Range: Enter a port number or a range of port numbers.
Click the Add button after you have populated this field.
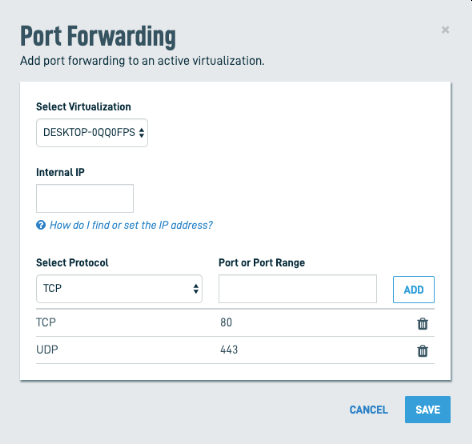
Once you have reviewed your settings, click the Save button to add port forwarding to an active virtualization.


