Performing an offsite File Restore
This article explains how to perform a cloud file restore by using the Recovery Launchpad.
Environment
- Datto Partner Portal
- Recovery Launchpad
Description
Index
- Creating a File Restore
- Converting a cloud virtualization to a File Restore
- Browse your File Restore
- SFTP Export
- Cleaning up
Creating a File Restore
To mount a file restore, follow the steps below.
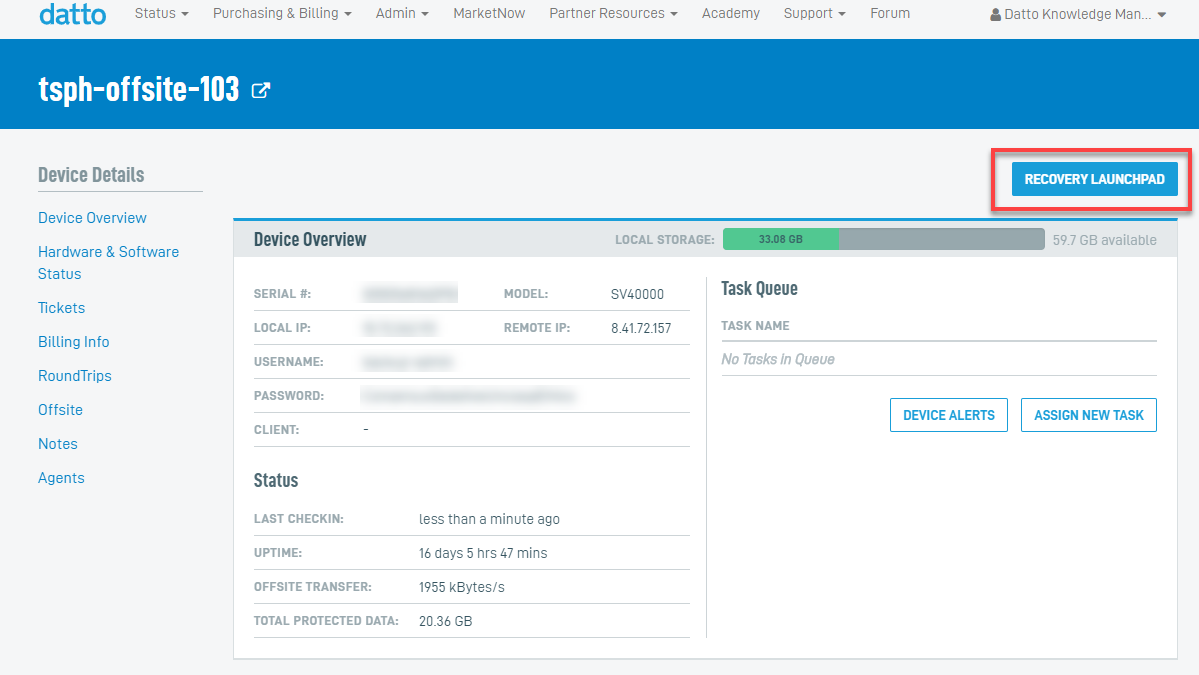
From the Partner Portal, navigate to Status > BCDR Status.
Click the name of the device for which you wish to create an file restore.

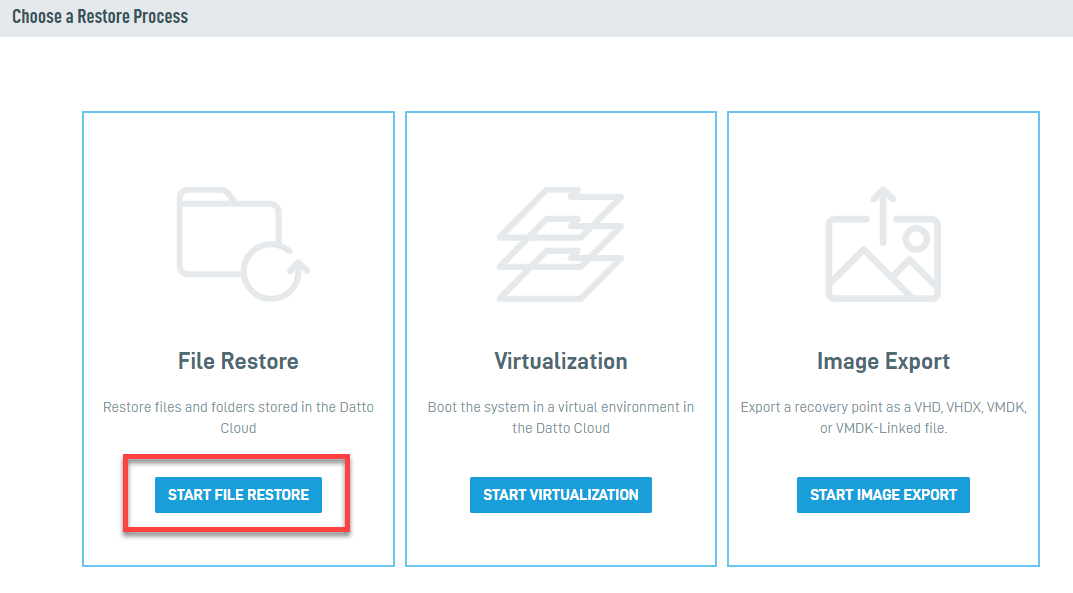
Click the check box next to the system you need to restore.

NOTE Only systems that are capable of performing a file restore will be listed. If a system does not appear, you will need to choose a different restore method. Universal VM backups are not capable of performing file restores.
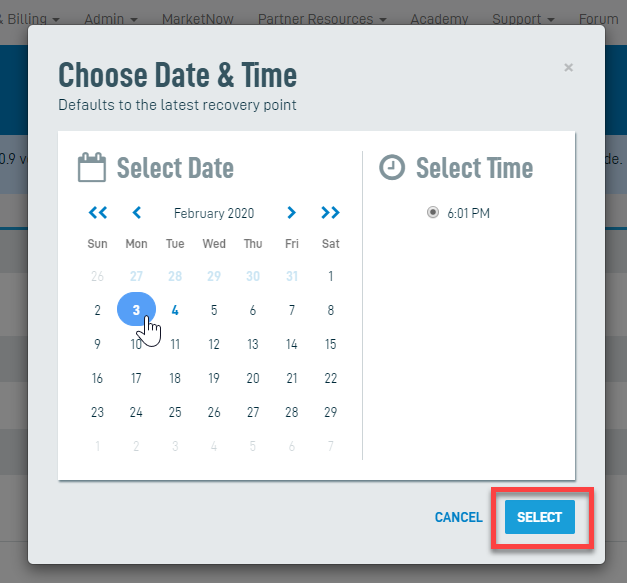
Click the date field under Choose Recovery Point. The Recovery Launchpad displays the latest available backup by default.

Select a date and time from the available restore points, then click SELECT.
The restore will be listed under the File Restores section of the restore page. Click the cloud icon to proceed.

Converting a cloud Virtualization to a File Restore
Existing virtualizations may be converted to a file restore from the Recovery Launchpad.
IMPORTANT Once initiated, the virtualization will be deleted as part of the conversion. This is not a reversible operation.
From the Virtualizations pane select the ellipsis icon for the virtualization that you want to convert.
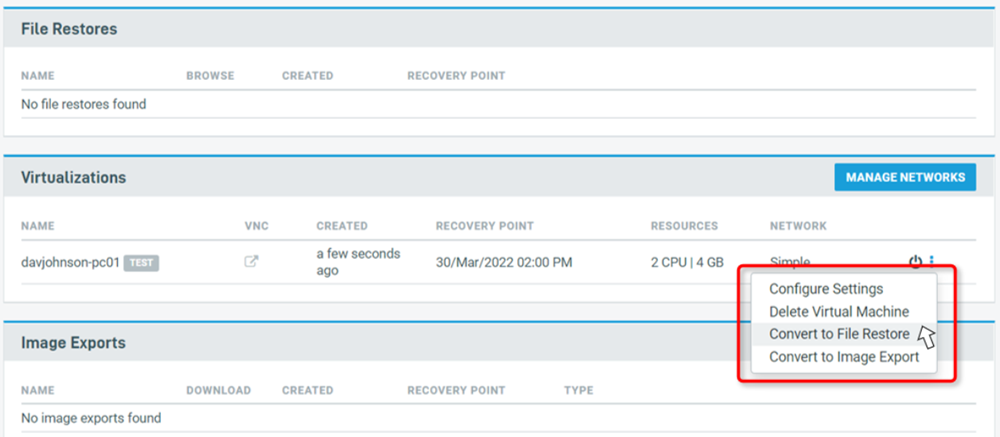
Select the desired file type and check the box acknowledging that the conversion process will first shutdown the virtualization, if not done so already.

Once completed, the converted restore will be listed under File Restores, showing converted status with details about the conversion process. The previous virtualization is deleted and no longer displays as a Virtualization.
Browse your File Restore
You can browse your files via SFTP or weblink. Choose your preferred option to proceed.
NOTE In preparation for FIPS compliance, all non-FIPS approved algorithms and ciphers are being removed from Recovery Launchpad. If you have problems connecting to cloud restores, you should first verify that you are attempting to connect with FIPs compliant algorithms for encryption, hashing, and signing.
SFTP Export
The SFTP export option lets you access your restored files using any SFTP browser such as Cyberduck(external link) or Core FTP(external link). SFTP may be the most convenient option if the data needs to be accessed from multiple machines or by clients who may not have access to the Partner Portal. If SFTP credentials already exist, they will be displayed here and you can click LAUNCH SFTP. Clicking this button will open the default SFTP client installed on your computer.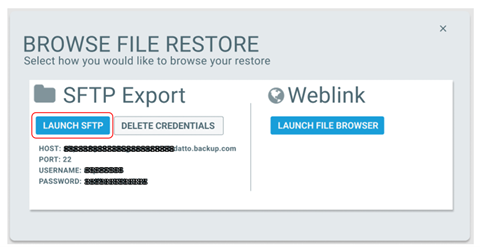
If none exist, the button to Create New Credentials may be used to generate new SFTP credentials.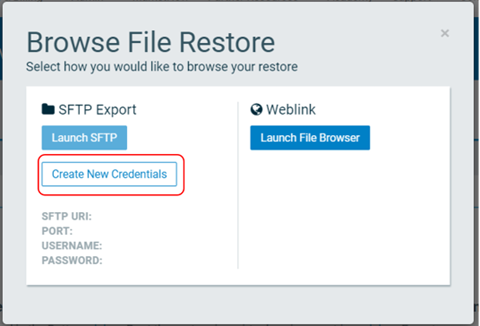
When no longer needed, the Delete Credentials button may be used to remove the credentials.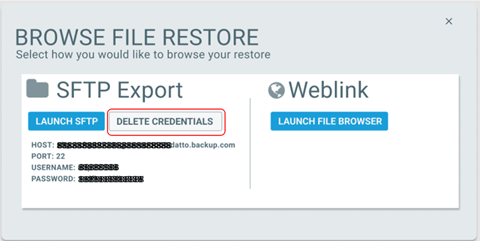
The Weblink option grants access to the restored files in a standard folder hierarchy. A top level folder is created for each restored volume. Click the folder to go deeper into the file structure. Click the download icon is to the right of the folder or file, to download a copy to your local machine. Multiple files and folders can be selected by clicking the checkbox to the left of each folder or file.
To specify ZIP or TAR file format for the download, access the dropdown menu at the top right. Click the Download button to download multiple folders or files to your local machine.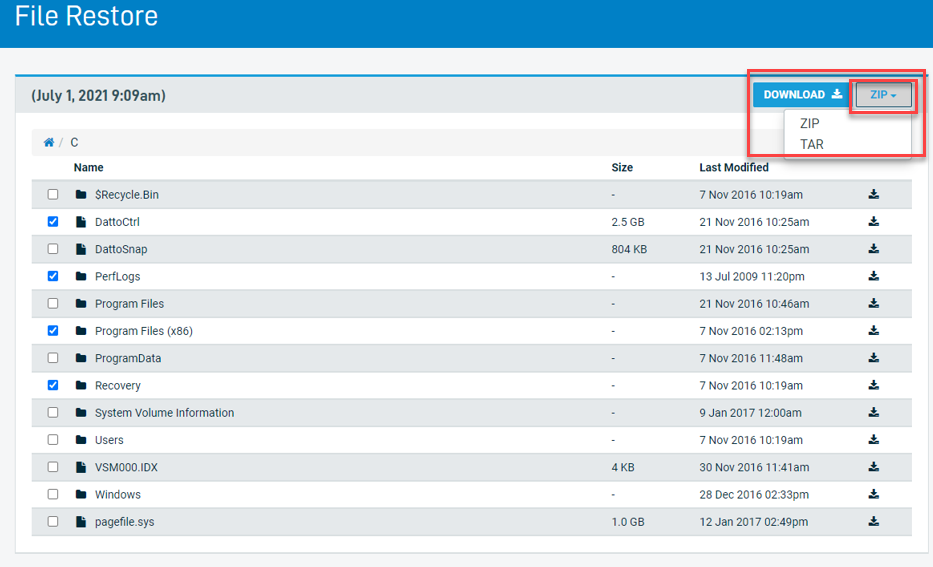
Cleaning up
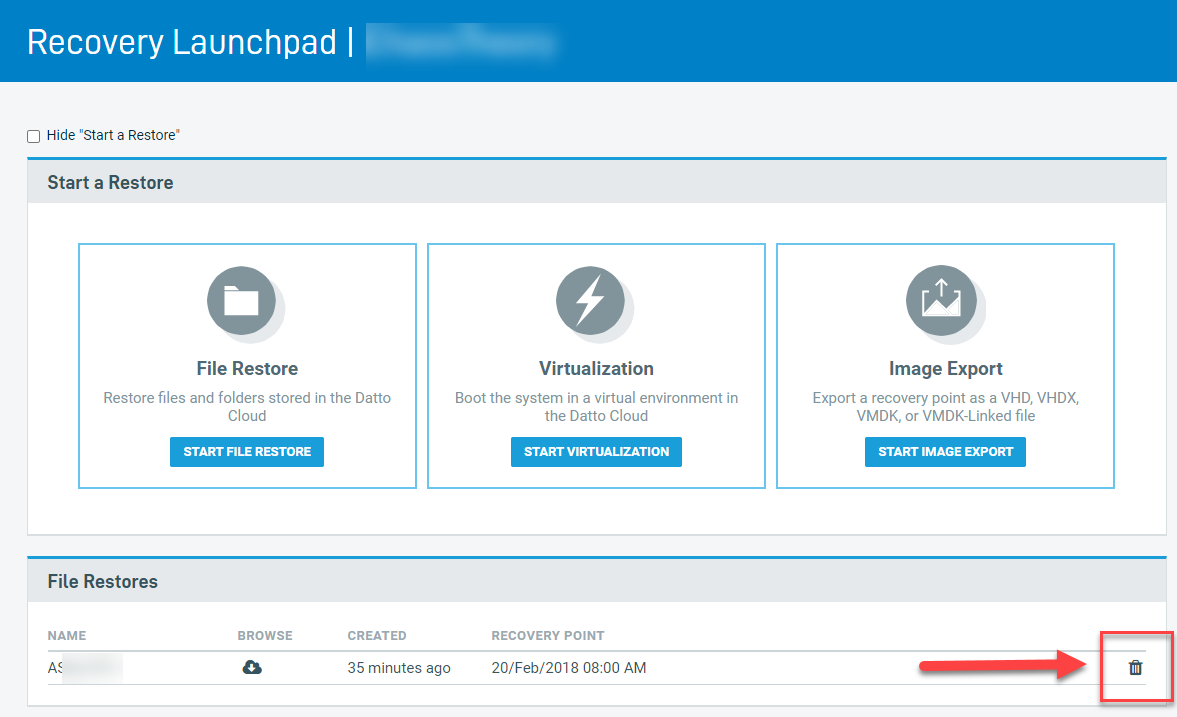
Once finished using the restore, remove the it by clicking the wastebasket icon on the far right side of the file restore listing on the Recovery Launchpad page.