Syncing a NAS RoundTrip drive with a Datto appliance
This article describes the procedure to synchronize a NAS RoundTrip drive to a Datto device. For background on the RoundTrip process, see the article RoundTrip Overview.
For details on synchronizing a USB RoundTrip with a Datto device, click here.
Environment 
- Datto SIRIS
Description
Connecting the NAS RoundTrip drive 
Connect the power for the RoundTrip drive.
Connect the NAS device to the network:

- To connect the RoundTrip NAS to your LAN, use the port on the NAS marked LAN. On this port, the NAS will attempt to obtain a DHCP address.
- If there is no DHCP server available on the local network, use the NIC-to-NIC connection to the Datto device.
- To connect the RoundTrip NAS directly to the Datto device, use the port on the NAS marked NIC-to-NIC, and connect it to the auxiliary NIC port marked eth1 on your Datto appliance.
- When using the NIC to NIC method, you will need to set the IP Mode on the Datto device to Link Local.This can be set via the Network Configuration page in the Datto GUI.
- If you have NIC bonding enabled on your Datto appliance, there may be no free ports available to create a NIC-to-NIC configuration. If so, you can temporarily disable the bond, disconnect one of the bonded Ethernet cables, and connect the RoundTrip NAS.
- To connect the RoundTrip NAS to your LAN, use the port on the NAS marked LAN. On this port, the NAS will attempt to obtain a DHCP address.
Once the transfer is completed, set the IP mode back to its previous setting.
Start the RoundTrip
Log into the Datto device's web interface. Then, click on the Synchronize tab.
NOTE By default, Datto disables local network access to the Datto device UI. You can enable local access under Configuration > Global Device Settings > Local Access Control in the Datto Remote Web UI.
At the top of the page, click Start NAS RoundTrip.
Once the process has started, you will see a welcome screen. Click Next.
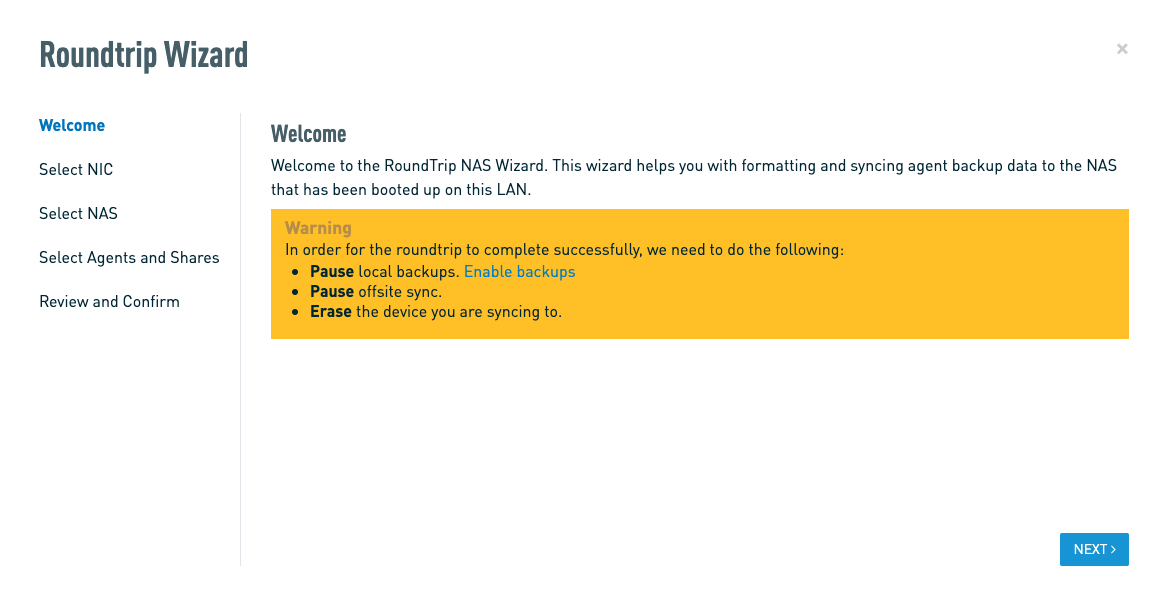
IMPORTANT The Datto device will pause all local and offsite backups until the RoundTrip Synchronization completes, to ensure no snapshots get deleted while in transit. At the end of a backup operation, the Datto device runs Retention according to the settings selected in the Remote Web interface.
The next screen will display the available interfaces to sync the NAS RoundTrip. Here, you will see if the NAS has network connectivity or not. Once selected, click Next.
NOTE If you use eth0 (LAN) as the interface, the data transfer will happen across the network, which can sometimes cause an increase in Network Latency. If this is a problem on your network, use the NIC-to-NIC method instead.
If you use the NIC-to-NIC method, you must use the port marked eth1 on both the Datto appliance and the RoundTrip drive.
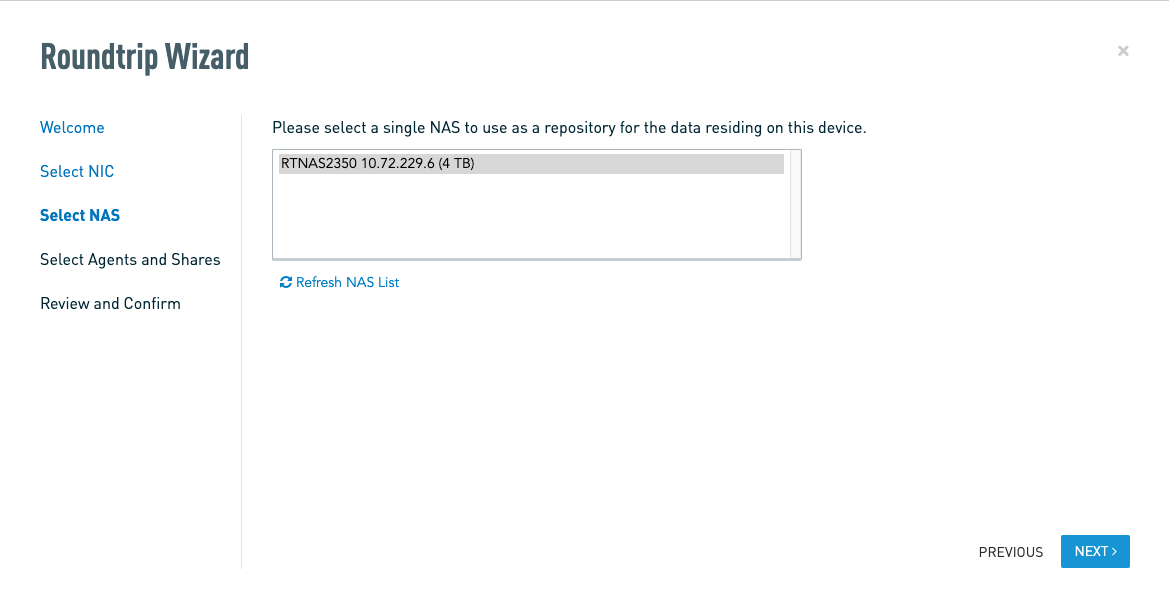
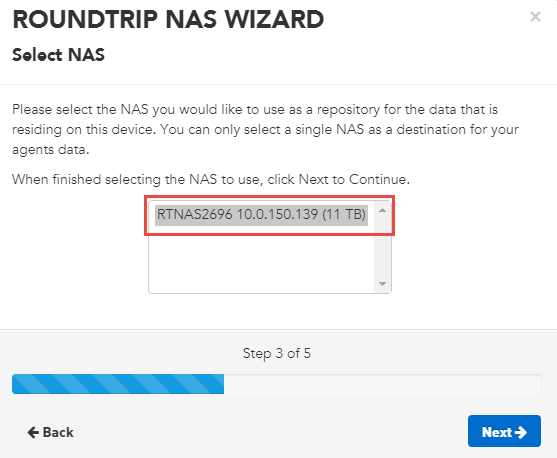
Next, you will see all the NAS RoundTrip devices on the same network. Select the NAS RoundTrip, and click Next.
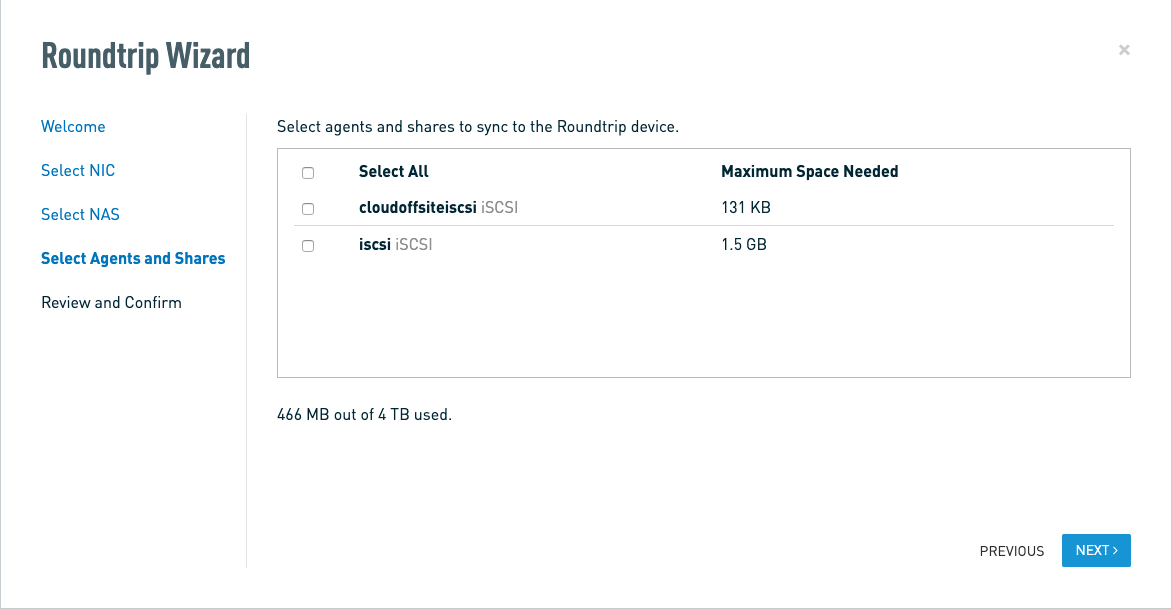
You will see the agents and NAS shares on the Datto device. Select the agents and shares that you wish to synchronize to the NAS RoundTrip. Max Space Needed shows the amount of space that each agent or share will use.
Once you've selected the agents and shares, you will see a final reminder, as well as confirmation that the NAS RoundTrip process is ready to begin.
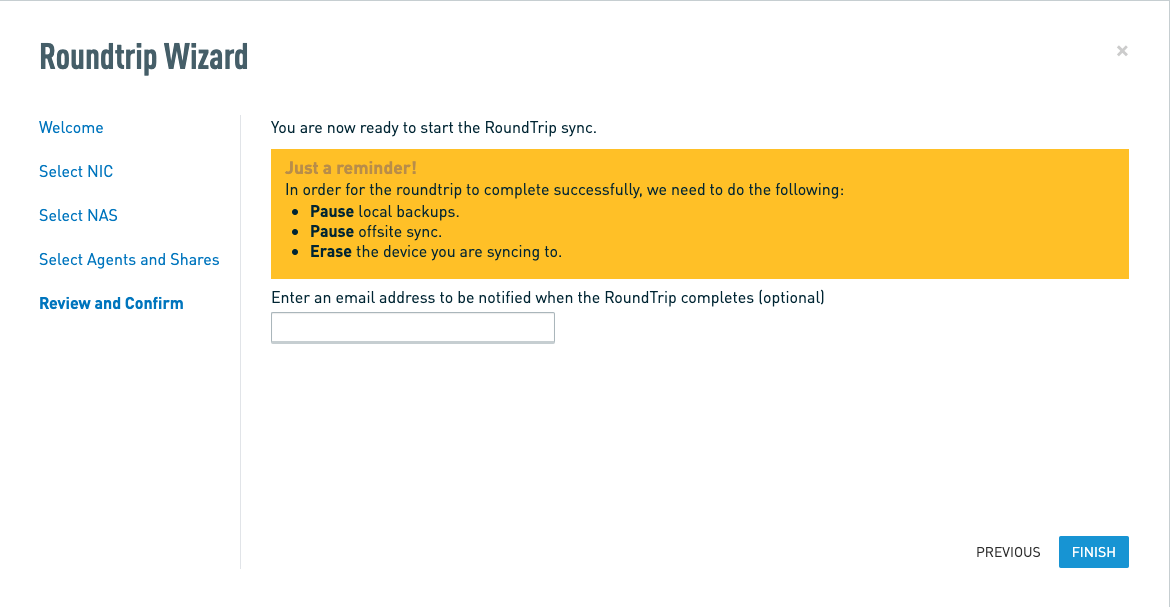
Enter an email address to receive RoundTrip status updates. Datto recommends entering multiple addresses, to ensure receipt of notification if unreachable. Separate multiple email addresses with commas and no spaces. Then, click Start RoundTrip.
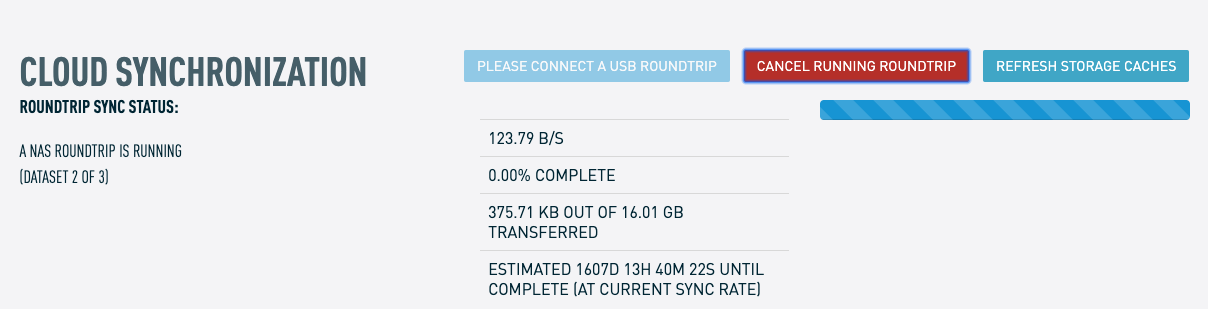
The page will refresh, and a progress bar and a status will populate with updated information. The initial process may take a few minutes.

As the process continues, you will see more details.
Once the synchronization finishes, you will see a confirmation. Local backups and offsite synchronization will automatically resume after the NAS RoundTrip has completed.
Immediately return the NAS RoundTrip to Datto to synchronize it with the Datto Cloud. The return shipping label is in the box the RoundTrip drive came in. The PO # field will match the serial number of the Datto appliance for which you ordered the RoundTrip. If you misplace the label, email rtoperations@datto.com with your device information. Datto will email you a printable PDF return label.


