Performing a local File Restore
This article describes the process to recover multiple files or folders locally from a Datto appliance by using the File Restore option.
Environment 
- Datto SIRIS
- Datto ALTO
- Datto NAS
Description
Technical Notes 
- File Restore for ReFS is currently unsupported. Any ReFS volumes in the selected snapshot will be excluded from the restoration. To perform a file restore of an ReFS volume, use the Volume Restore feature.
- On large file restores, using the search function can result in a 500 error once timeout exceeds 60 seconds. If your search times out, navigate to the absolute path of the needed file instead of using the search bar.
Procedure
To perform a local File Restore, connect to the Remote Web.
Select Restore from the main menu.

From the Restore from a Backup page, select the system that you would like to restore.
Select File Restore, and select the recovery point from which you would like to restore.
Click Start File Restore.

The File Recovery page will display. Click Mount.
The Samba Share and a link to access the file restore in a web browser will appear.
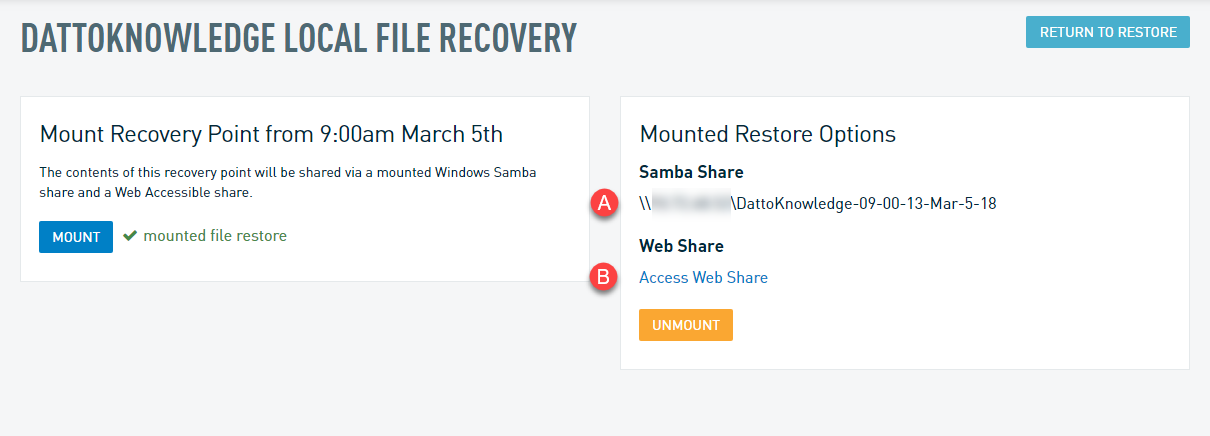
- Samba share path
- Web share link
Paste the share address provided into any Windows Explorer address bar or Run prompt.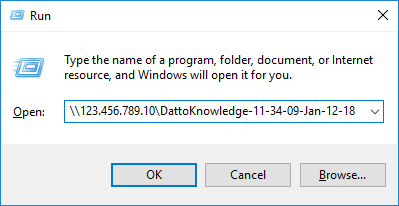
If a credential prompt is shown, enter the username and password of any local user account on the Datto appliance. For Mac platforms, connect as a Guest instead of a Registered User. If the issue persists, unmount the share from the Local File Recovery page and then remount it.

NOTE If there is an error when attempting to access the share path, it may be due to Windows security policy settings for SMB. Review the group policy settings, as shown Guest access in SMB2 and SMB3 disabled by default in Windows (external link).
Click the Web Share link provided on the restore page to access the File Recovery Window.
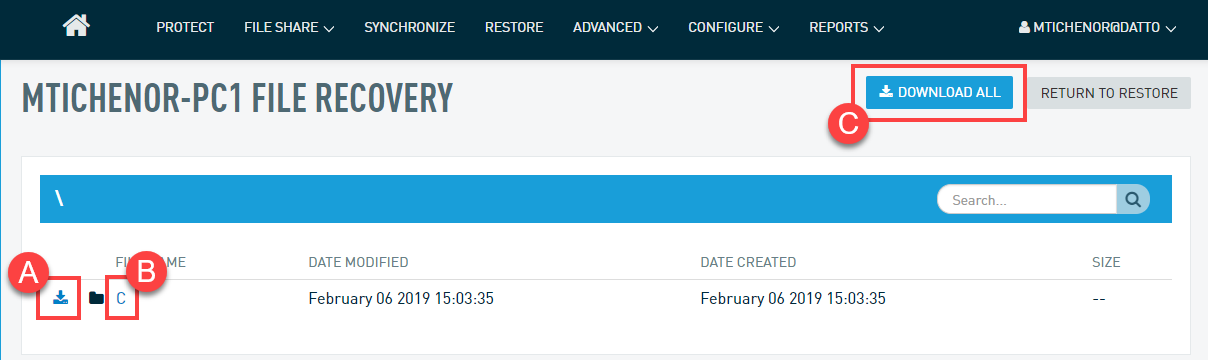
From the File Recovery window:
- To download an entire volume, click the download icon next to the drive letter for the volume you wish to restore.
- To download individual files, click the drive letter link to the right of the folder icon to open its file directory. Then, click the download icon for the items you wish to restore.
- To download the entire recovery point, click the Download All button.
- Download volume
- Download individual files
- Download all
IMPORTANT Downloading the entire recovery point can result in very large download sizes, depending on the amount of data backed up.
Cleaning up the restore
When finished with the file restore, close any active connections to the share. From the Restore tab of the Datto appliance, click Remove Restore.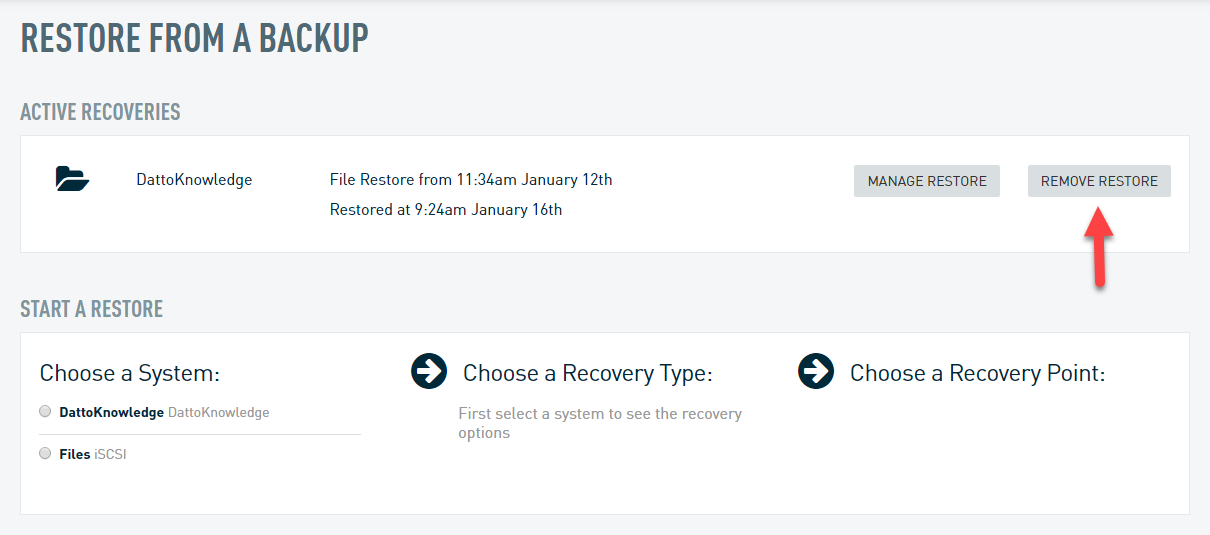
Selecting Secure File Restore
For each agent protected on a Datto appliance, the share can be set so that they are only accessible by those who have access to the Datto device. This setting can be changed on a per-agent basis in the Configure Agent Settings menu for each protected system.
Once enabled, to access a file restore or a VMDK/VHD share for the agent, the user will be prompted to enter the user credentials of an authorized local account.
NOTE Samba signing is disabled by default for non-iSCSI file restores.


