Restoring Thick-Provisioned VHD Exports to Microsoft Hyper-V
This article describes the process for restoring a thick-provisioned VHD export to Hyper-V.
To restore a VHD to Microsoft Hyper-V with thin provisioning, see Restoring Thin-Provisioned VHD Exports to Microsoft Hyper-V.
Environment
- Datto SIRIS
- Datto ALTO
- Microsoft Hyper-V
- Windows Server 2008
- Windows Server 2008 R2
- Windows Server 2012
- Windows Server 2012 R2
- Windows Server 2016
- Windows Server 2019
- Windows Server 2022
- Windows Server 2025
Description
Prerequisites
- If any of the protected host's volumes are greater than 2 TB in size, you must perform a VHDx image export. VHD virtual disks do not support volumes larger than 2 TB.
- Although image files on Datto appliances are dynamic, sparse or thin-provisioned, when a VHD image file is copied from the Datto device using copy-paste (or other tools that do not accommodate dynamic/sparse/thin provisioning), the VHD image file will be duplicated with thick provisioning.
- See Restoring Thin-Provisioned VHD Exports to Microsoft Hyper-V if you need to perform a thin-provisioned restore.
When creating your virtual machine:
- If both boot.vhd and C.vhd are present in the export, select boot.vhd as the first drive, and attach C.vhd as the secondary drive.
- If only C.vhd is present, use C.vhd as the first drive.
- For modern Windows installations, you must copy both the boot.vhd(x) and C.vhd(x) from the export to have a bootable restore.
- For legacy Windows or Linux installations, you only need to copy the C.vhd(x) or sda1.vhd(x) from the export to have a bootable restore.
NOTE You will not see the option to attach multiple disks to a Hyper-V VM in the initial creation wizard. You must complete the wizard and then manually edit the VM settings to add additional disks.
Procedure
Mounting the Export
- Follow the steps in the Export Image article to obtain and copy the machine's recovery point to the hypervisor as a VHD or VHDx file. note the Samba path shown.
- On your Hyper-V enabled machine, open File Explorer and navigate to This PC.
- Right-click any white space and select Add a network location. Click Next at the first Wizard page.
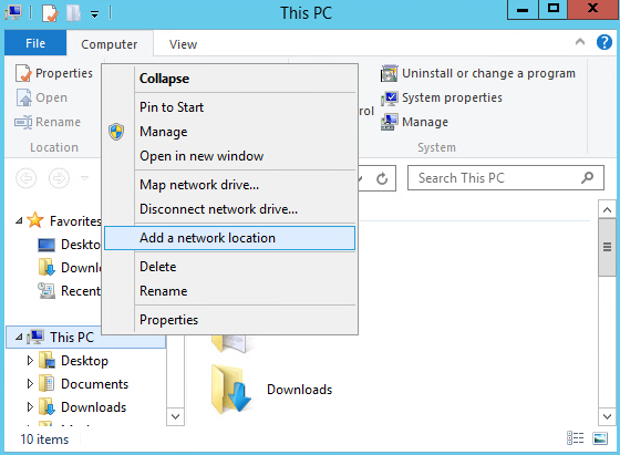
Figure 1: Add a network location
- Select Choose a custom network location, and click Next.
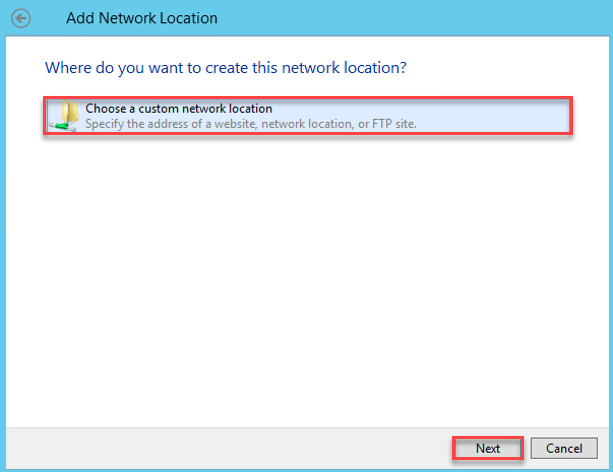
Figure 2: Choose a custom network location
- In the Internet or network address box, paste the Samba path you noted in Step 1, and click Next.
- Enter a name for the share and click Next.
- Click Open this network location and select Finish. Note its address. The next section of this article will use the new network location as the source folder.
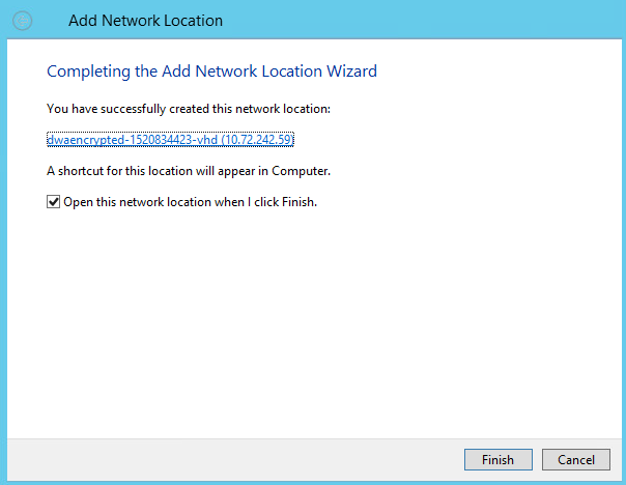
Figure 3: Successful network location creation
NOTE If you recieve an error when attempting to access the share path, it may be due to Windows security policy settings for SMB. You may need to adjust group policy settings. See Guest access in SMB2 and SMB3 disabled by default in Windows (external link)
Transferring the Disks
- Open the Virtual Hard Disks folder associated with your Hyper-V instance in a separate File Explorer instance.
- You can find the folder path under the Actions > Hyper-V Settings menu in your Hyper-V manager environment.
- Create a destination folder to restore your VHD(x) files to.
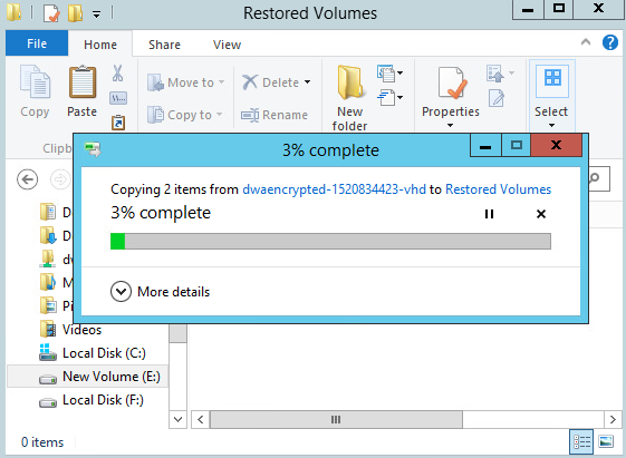
- Drag and drop the VHD(x) files from the source folder to the destination folder. Alternatively, you can right-click each VHD(x), select Copy, and then paste them in the destination folder.
- Once the transfer is complete, delete the network location you created in Mounting the Export.
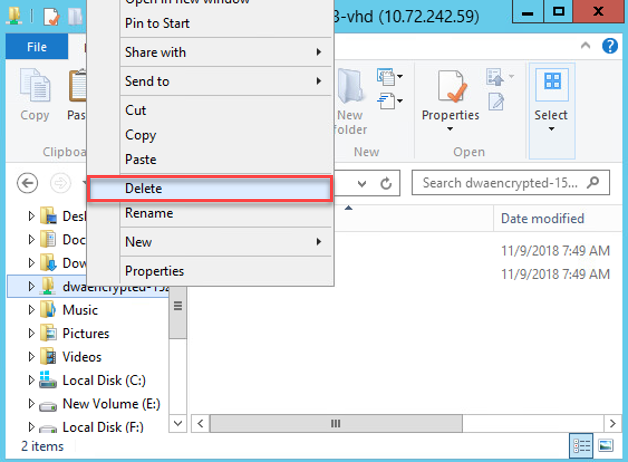
Figure 5: Delete network location
Completing the Restore
Select a platform to continue:
NOTE This article uses screenshots from Windows Server 2008 and 2012. Your user experience may vary slightly by platform.
Hyper-V Manager Server 2008
If the Hyper-V Manager was not previously hosting the VM, you must create a new VM. Otherwise, replace the existing Hyper-V machine's virtual disks with the VHD(x) files copied from the image export by performing the following steps:
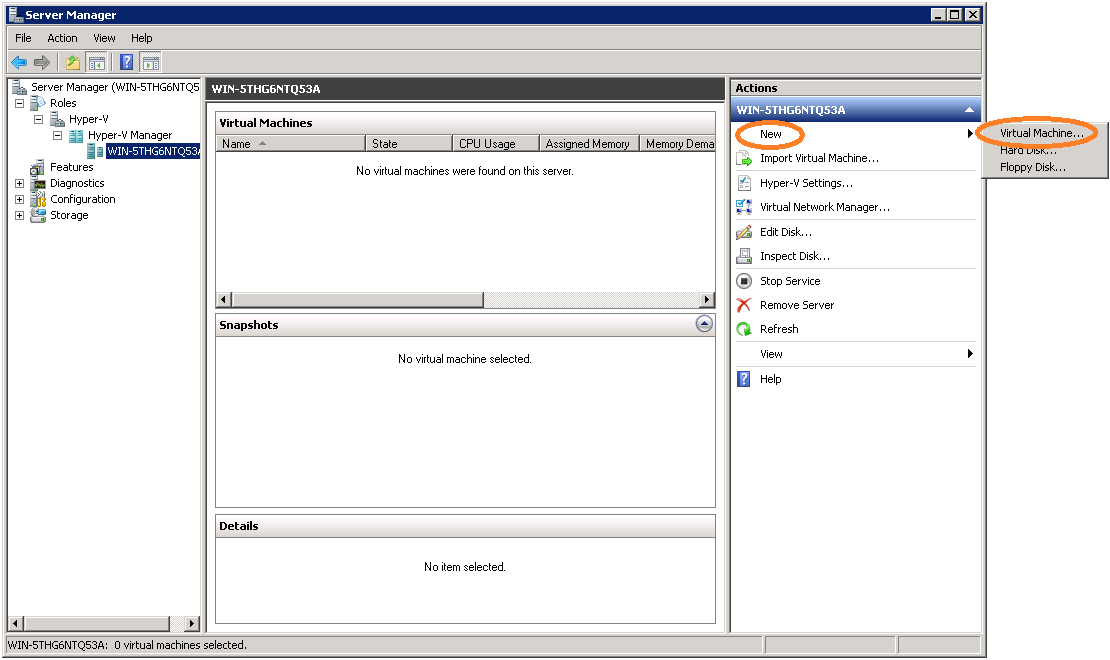
- From the Hyper-V Manager click New > Virtual Machine. When the New Virtual Machine Wizard launches, click Next.
- At the Before You Begin page, click Next.
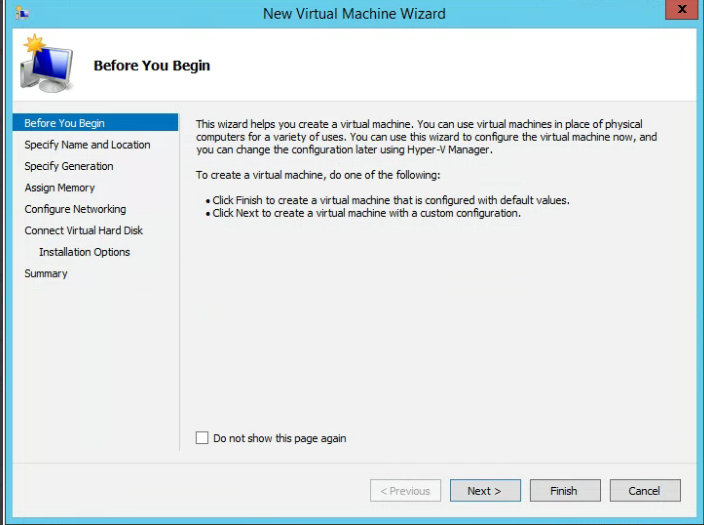
Figure 7: New Virtual Machine Wizard
- Provide a name and location for the virtual machine, and then click Next.
- Provide the amount of RAM to allocate the virtual machine. Click Next.
- In the drop-down menu, select which NIC to use in the virtual machine. The default is not connected.
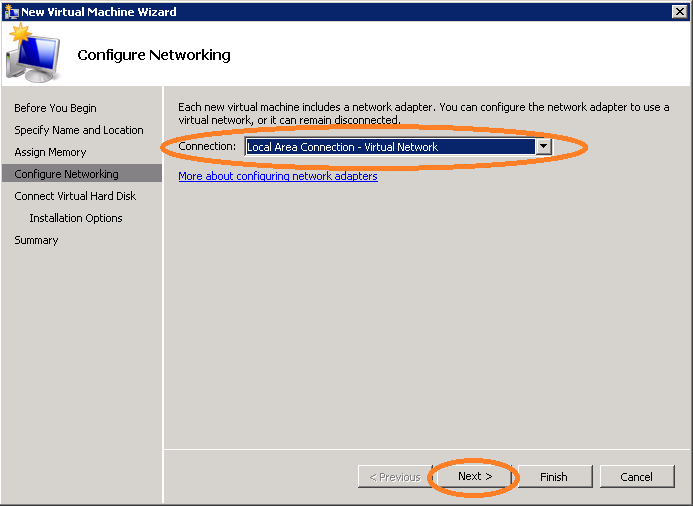
Figure 8: Configure networking
- On the Connect Virtual Hard Disk page, select Use an existing virtual hard disk. Provide the path to the datastore where you copied the VHD file. Click Next.
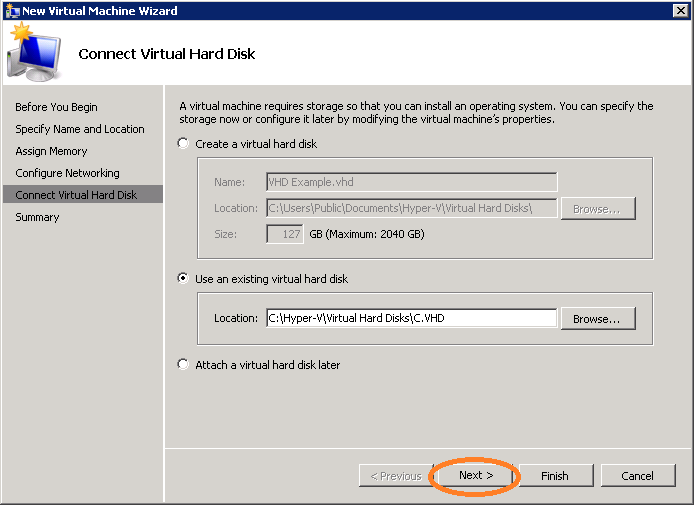
Figure 9: Connect virtual hard disk
- On the Summary page, confirm that all configuration settings are correct and click Finish.
- Click Start.
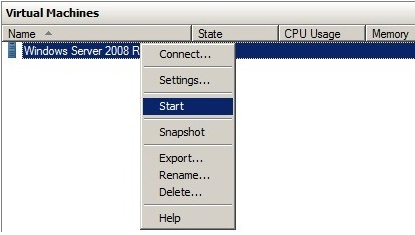
Figure 5: Start the virtual machine
Hyper-V Manager Server 2012 and Server 2016
If the Hyper-V Manager was not previously hosting the VM, you must create a new VM. Otherwise, replace the existing Hyper-V machine's virtual disks with the VHD files copied from the image export by performing the following steps:
- From the Hyper-V Manager click New > Virtual Machine. When the New Virtual Machine Wizard launches, click Next.
- Provide a name & location for the virtual machine, and then click Next.
- Provide the amount of RAM to allocate the virtual machine. Click Next.
- Specify the VM Generation.
- Generation 1: Provides the same virtual hardware to the virtual machine as previous versions of Hyper-V. Any virtual machine over 2.2 TB must use a Generation 2 (UEFI) template.
- Generation 2: Provides support for features such as Secure Boot, SCSI boot, and PXE boot using a standard network adapter. Can only use UEFI; BIOS is unsupported. Guest operating systems must be running at least Windows Server 2012 or 64-bit versions of Windows 8.
NOTE Once you create a virtual machine, you cannot change its generation. If you are unsure whether you should create a VHD or VHDX Image Export, refer to this Microsoft Article (external link) for OS compatibility.
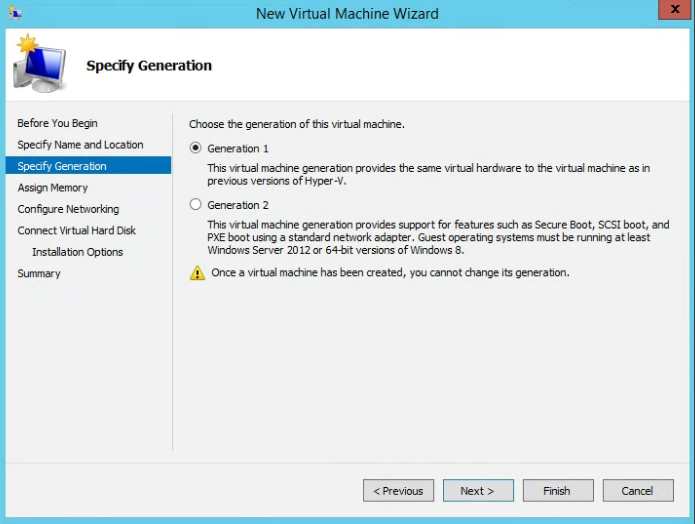
Figure 11: New Virtual Machine Wizard, Server 2012/2016
- In the drop-down menu, select which NIC to use in the virtual machine. The default is none.
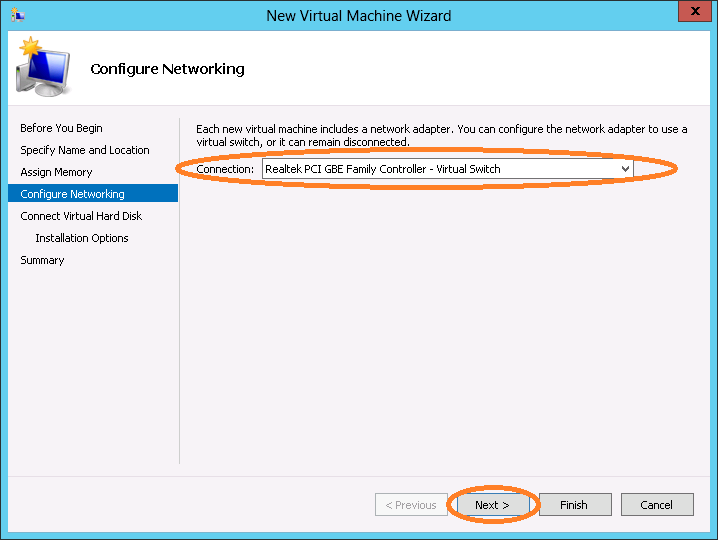
Figure 12: Server 2012/2016, configure networking
- On the Connect Virtual Hard Disk page, select Use an existing virtual hard disk. Provide the path to the datastore where you copied the VHD file was copied in the previous section, then click Next.
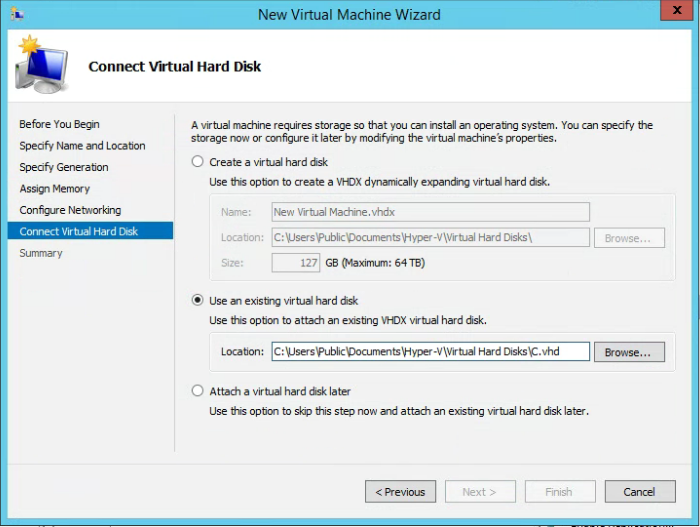
Figure 13: Connect Virtual Hard Disk, Server 2012/2016
- On the Summary page, confirm all configuration settings are correct and click Finish.
- Click Start to launch the virtual machine.
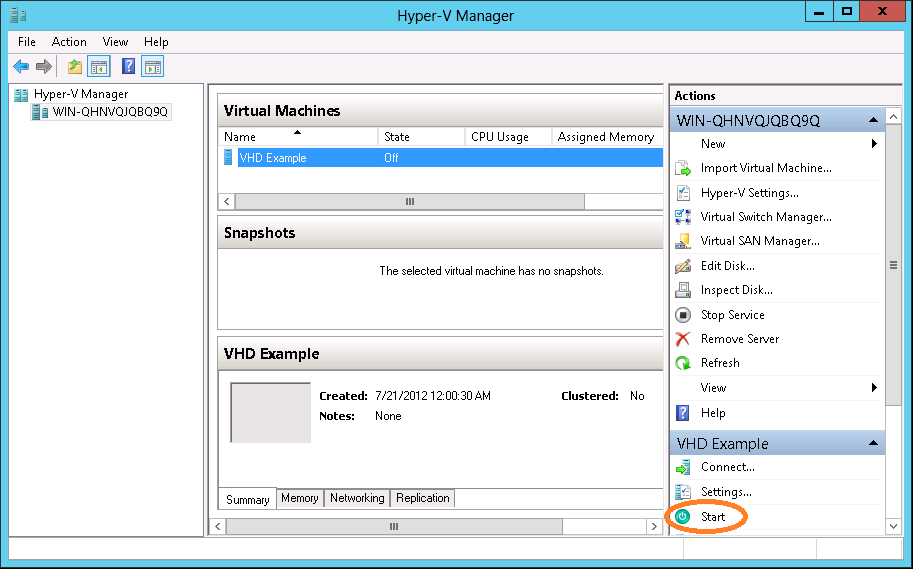
Figure 14: Launch a virtual machine, Server 2012/2016
Troubleshooting
Index
- Logon failure: the user has not been granted the requested logon type at this computer.
- Thin Provisioning Unavailable
- Mouse and networking do not work in the VM after restore
Logon failure: the user has not been granted the requested logon type at this computer.
You may encounter this error message when importing a VM into Hyper-V, as shown below:
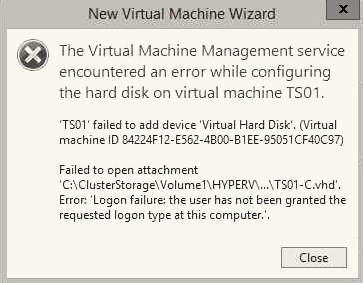
Figure 15: Failed to add virtual hard disk
This Windows error can occur if the VM's special identity is missing the Log on as a Service permission on the Hyper-V host (possibly as a result of a failed group policy refresh). To resolve this issue, follow the troubleshooting steps provided by Microsoft in Starting or Live Migrating Hyper-V virtual machines may fail with error 0x80070569 on Windows Server 2012-based computers.
Thin Provisioning Unavailable
Microsoft does not currently provide tools to transfer VHD files to Hyper-V with sparse/thin/dynamic provisioning. See Restoring Thin-Provisioned VHD Exports to Microsoft Hyper-V.
Mouse and networking do not work in the VM after restore
This can happen when the virtual machine is unable to reach the Hyper-V Integration Services on the Hyper-V host. To resolve the issue:
- Make sure you have enabled Hyper-V Integration Services on the host.
Log into the affected VM and use the keyboard to access the Windows Device Manager - Press the Windows key + R to invoke the Run dialog box, type devmgmt.msc and press Enter.
- In the Device Manager window, scroll down to System.
Find the Microsoft Hyper-V Virtual Machine Bus device. There may be a yellow exclamation mark next to it. - Press Enter to open the Device Information window, then press Tab until you see an outline on one of the tabs across the top of the window.
- Use the keyboard arrows to select the Driver tab.
- Press Tab until the Update Driver button is highlighted. Press Space to click the button.
- Press Tab until the option for Browse my computer for driver software is highlighted, then press Space to select it.
- Press Tab until the Let me pick from a list of device drivers on my computer option is highlighted. Press Space to select it.
- The Select the device driver you want to install for this hardware screen will appear. Make sure that the Show compatible hardware checkbox is selected. You should see Microsoft Hyper-V Virtual Machine Bus listed in the Model box.
- Press Tab until you have highlighted the Microsoft Hyper-V Virtual Machine Bus driver, and then press Enter.
- The software will install. The screen may flicker during mouse and networking driver installation.
- After the software installs, the mouse should be functional. Check Hyper-V Manager to confirm that the network adapter is connected. Enter the IP address of the VM if it is set to static.
- Check the Services control panel to make sure that the Hyper-V Integration Services are running.
Additional Resources
- Disaster Recovery: INACCESSIBLE BOOT DEVICE or 0x0000007B STOP Error after Image Export
- Disaster Recovery: Starting a local virtualization on a Datto appliance
- Restore: Local Virtualization Options
- Microsoft Docs: Hyper-V Integration Services(external link)
- Should I Create a Generation 1 or 2 Virtual Machine in Hyper-V? (external link)
