Local Virtualization Options
This article describes the Local Virtualization options available on SIRIS appliances. For ALTO devices, see Performing Cloud and Hybrid virtualizations.
Environment 
- Datto SIRIS
Overview
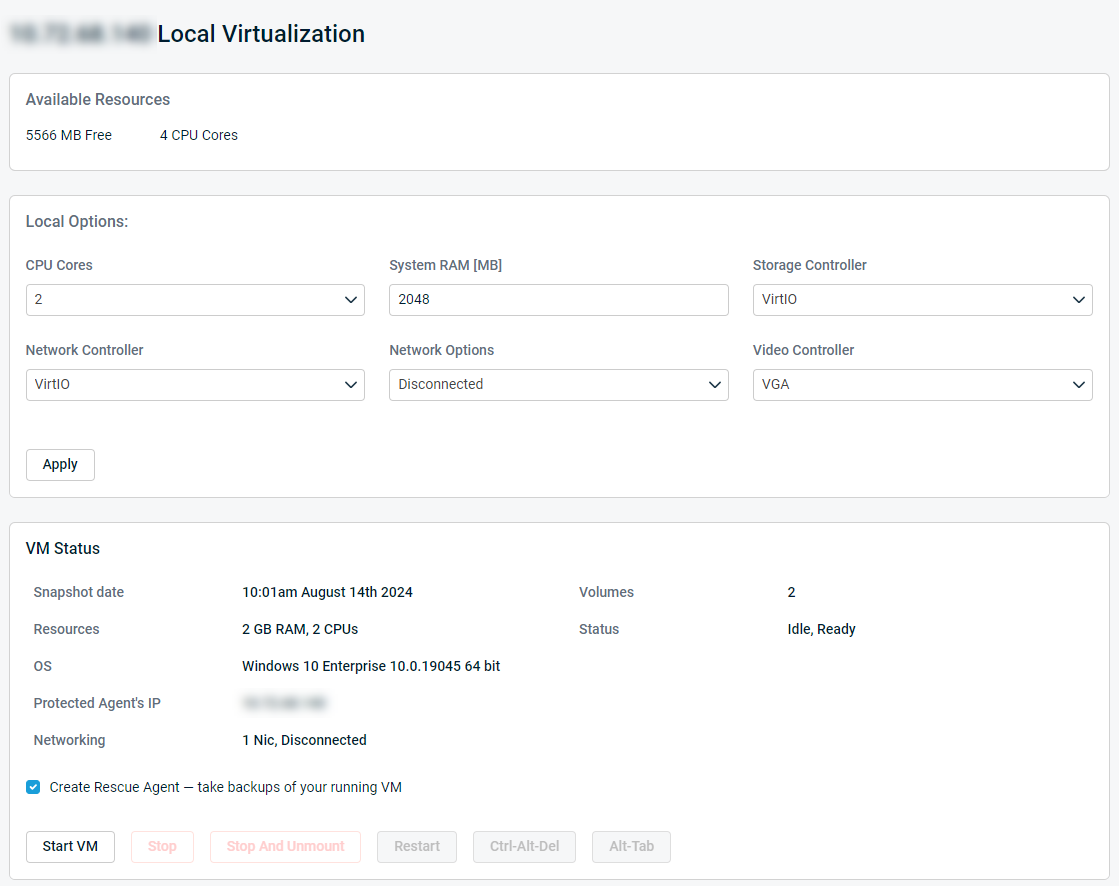
The Local Virtualization options page becomes available after you start a Local Virtualization. You can return to the page at any time by clicking the Recovery tab in the GUI, then clicking the Manage Restore button. From this location, you can customize the following virtualization settings:
- CPU Cores
- System RAM [MB]
- Storage Controller
- Network Controller
- Network Options
- Video Controller
- Create Rescue Agent
If the VM is running, it must be powered off before the Local Options can be changed. Click Apply, after making any changes, before restarting the virtualization. To change the default fields for an agent, see Configure Agent / System Settings Page.
CPU Cores 
Select the number of CPU cores provided to the virtualization. This number cannot exceed the number of CPU cores that the Datto appliance has available to it. The Available Resources pane displays the number of physical CPU cores available to your appliance.
System RAM [MB]
For best results, set the RAM in increments of gigabytes (1024, 2048, 3072, 4096, etc). Do not set a RAM value that is equal to or greater than the amount of RAM shown in the Available Resources pane. Leave at at least 3072 MB free to allow the screenshot process to work for other agents on the device.
You will receive a warning message if you allocate more RAM than is available and will need to lower the amount of RAM requested accordingly. If you cannot leave 3072 MB or greater free, you can disable screenshots while you are running the VM.
NOTE See the Local Virtualizations - Best Practices article for more information about allocating CPU cores and system RAM.
Storage Controller
The storage controller value should match the configuration used on the production machine. The default option is what is used for screenshots of this agent. If the screenshots have been booting successfully, it should not need to be changed. Available storage controllers include:
- IDE
- SATA
- SCSI
- VirtIO
Network Controller
This option selects the type of virtual network adapter to provide the virtualization, if a Network Option is selected that does provide a NIC. The available options are:
- VirtIO
- e1000
- rtl8139
If the virtualization should have a NIC according to the Network Option selected, but it is not available when booted, then another Network Controller may need to be used. VirtIO should be compatible with modern Windows systems, but e1000 is more commonly supported on older systems. The appropriate controller may depend on the individual machine, updates applied, and drivers available on the protected machine's snapshot.
Network Options
By default, the VMs have Disconnected as the network setting to avoid accidental network conflicts with the production instance of the machine on the local network. However, if the production machine is down and you want the VM to take its place, you have the following network options:
- Bridged to the Primary NIC
When using this option, do not give it the same IP address as the SIRIS, as it will cause a network conflict. - Bridged to eth1
Uses the secondary NIC on the Datto appliance to create a network connection. When using this option, do not give it the same IP address as the primary NIC on the SIRIS, as it will cause a network conflict. With bridged networking, the SIRIS uses a device driver that filters data from its physical network adapter. This device driver effectively creates a new software network interface that makes the VM appear as if it is physically connected to the interface via a network cable. - Firewalled on a private subnet
This option configures the Virtual Machine for NAT (Network Address Translation) mode which creates an isolated virtual network with internet access for the VM on the SIRIS. This will allow the VM to have outbound access without conflicting with the production systems. The IP address will be within the 172.16.182.192/27 range. - Firewalled on a private subnet, with no internet access
This option configures the Virtual Machine for NAT (Network Address Translation) mode which creates an isolated virtual network without internet access for the VM on the Datto SIRIS. The VM will boot up with a 169 address by default as it will not be able to reach any DHCP server. Statically assign an IP address and subnet to configure two or more VMs hosted on the SIRIS to communicate with each other.
Video Controller
The Video Controller Options menu allows you to choose between VGA and Cirrus controllers. By default, VGA is selected. The Cirrus option is primarily intended for compatibility with legacy systems.
Create Rescue Agent
When creating a new local virtualization, the Create Rescue Agent option will be selected. If left checked when the virtualization is started, a rescue dataset of the virtualization will be created on the Protect page of the Datto appliance GUI. The Datto device will use this to take crash-consistent backups of the virtual machine. If backups are not required of the virtualization, this can be deselected. See the Rescue Agent article for additional information.
Connecting to the Virtualization
After you configure the VM's networking options and start it, you will need to connect to the running virtualization and configure it with a static IP before it will be visible on your network. You can connect to the virtualization by using any VNC viewer capable of reaching the VNC address displayed.


