Virtualize via Hypervisor for VMware environments
This article describes the process of connecting a SIRIS to an VMware ESXi host and running a virtualization via hypervisor offload. These instructions apply to virtual and physical SIRIS appliances.
For Hyper-V instructions, see Virtualize via Hypervisor for Hyper-V environments.
NOTE Datto appliances are designed for short-term business continuity use during disaster recovery. They are not intended as a long-term hypervisor or data store solution. Minimizing downtime on the production machine will help to ensure that recovery is successful.
Environment 
- Datto SIRIS
- VMware vSphere
Description
Prerequisites 
This process assumes that an active hypervisor connection exists between the Datto device and the target host. If it does not, first do so using the steps described here: Connecting a SIRIS to a VMware Hypervisor.
Procedure
To start the ESXi virtualization, connect to the Datto Device's UI.
Select Restore from the main menu.

Choose the system to restore from the drop-down menu.
Select the Virtualize via Hypervisor option for the Recovery Type.
Select the Recovery Point and the Hypervisor connection for the restore, then click Restore.
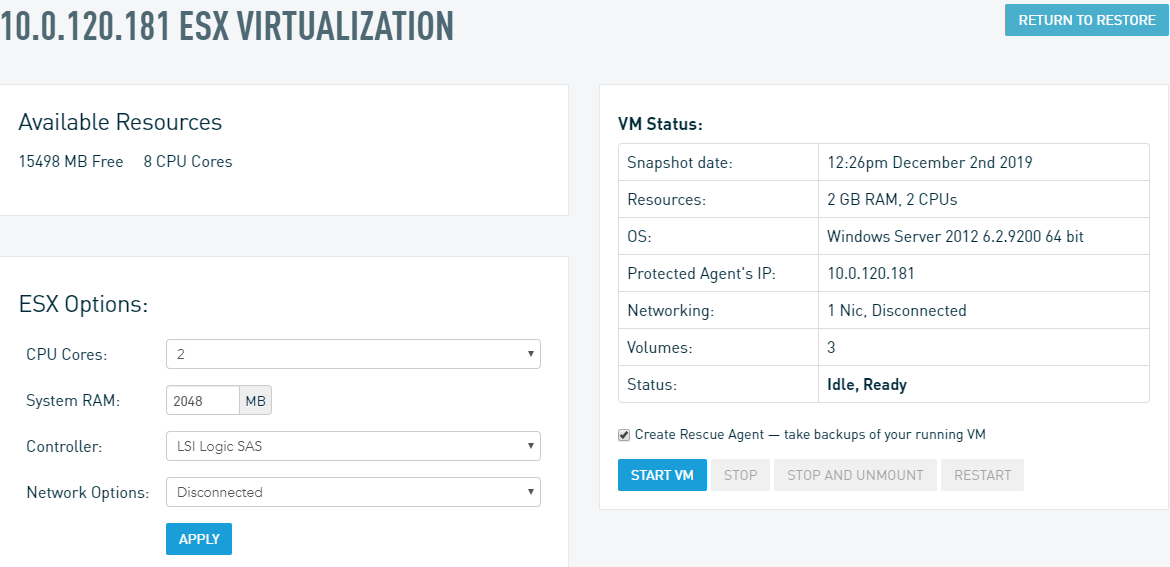
The ESX Virtualization page will open and display the following options:
- CPU Cores
- System RAM
- Storage Controller
- Network Controller
- Network Options
- Create Rescue Agent
For detailed information on each of these options, see our Local virtualization options article.
If you are virtualizing from an agentless system, you can choose to use the original virtual machine configuration. You can also download the VMX file if you wish to review the original configuration settings.
Once you have made your selections, click Start.
When finished using the restore, return to the SIRIS Restore tab and select Stop and Unmount.
IMPORTANT This will destroy the virtualization, along with all changes made to it since the VM was first booted. If the virtual machine was used in production, make sure the changes are backed up or restored from, before unmounting it.
Do not destroy the Virtual Machine directly from the host. Doing this will result in a hung restore on your SIRIS, which will require assistance from Datto Technical Support to resolve.
The virtualization process
NOTE vSphere is a third party software and is updated frequently. Your screens may look different than the ones pictured below.
After you start the virtual machine from the device GUI, you can see the tasks in vSphere under Recent Tasks.
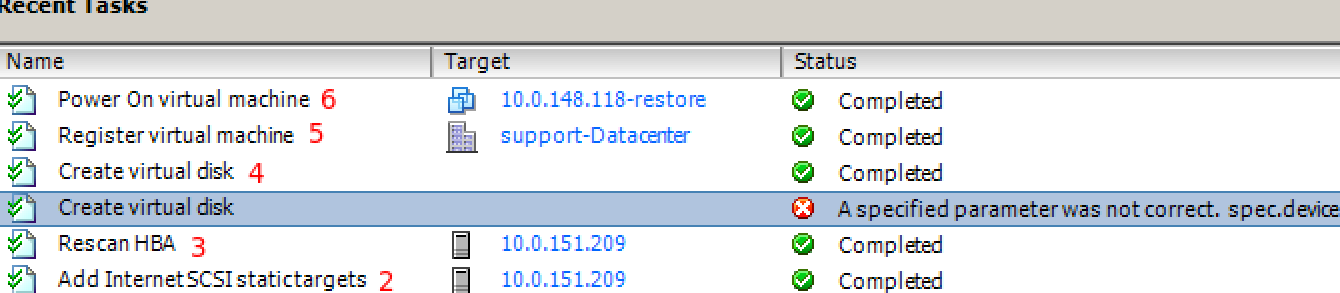
The SIRIS creates iSCSI targets to the .datto file. The targets then connect to the host via the ESXi iSCSI adapter.
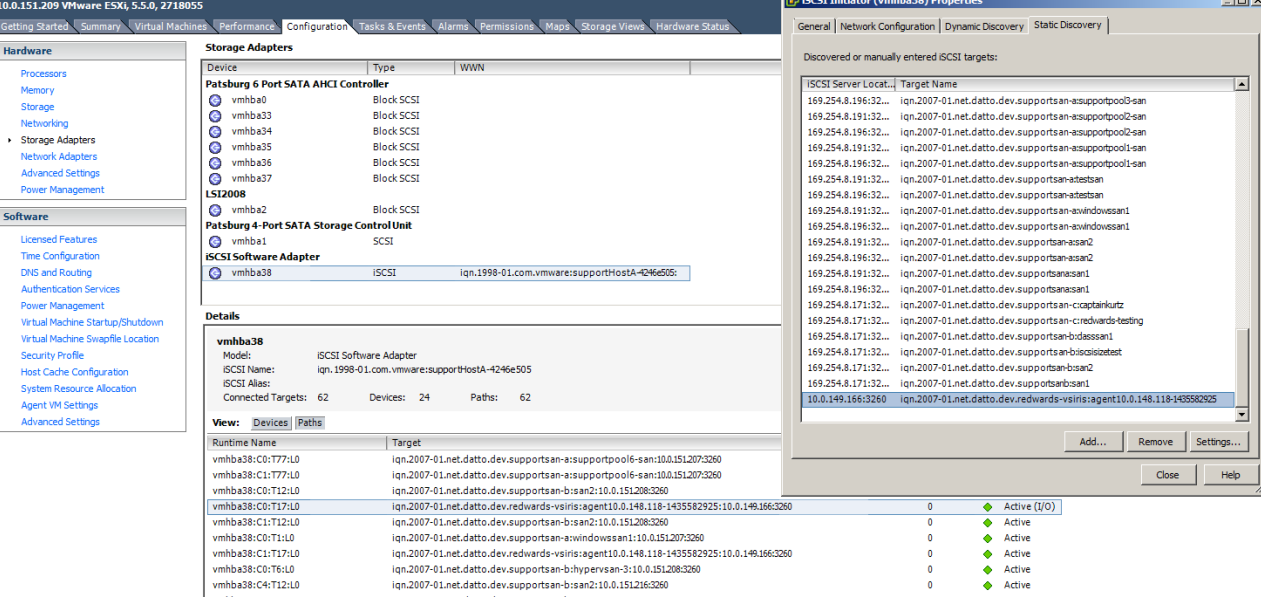
vSphere rescans the HBA to get information on the new devices available through the iSCSI adapter.
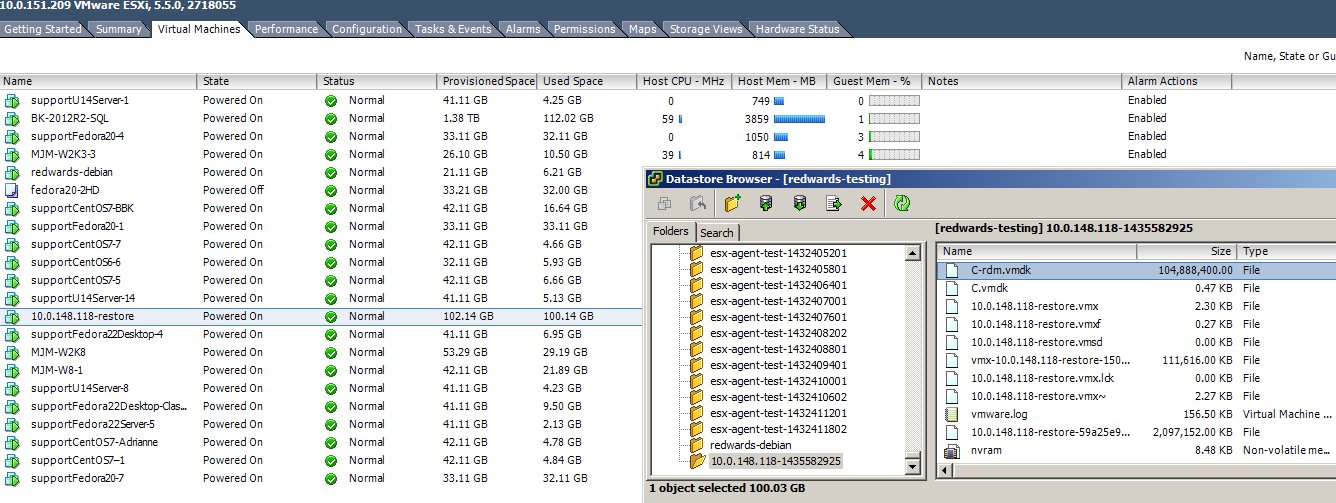
A virtual disk is created through RDM to the .datto file through the iSCSI target on the SIRIS. This procedure attaches the .datto file to the virtual machine created on the ESXi host. If there is more than one disk in the backup, RDM creates a virtual disk for each
The RDM creation can sometimes fail. This failure will typically produce the status "A specified parameter is not correct. spec.device" under the Create virtual disk task. It will retry up to 3 times for each virtual disk attached to the virtual machine.
If vSphere cannot access backup images on the SIRIS through iSCSI for ESXi virtualization, then it will attempt access through NFS as a failover.
vSphere registers the virtual machine with the <agent>-restore naming convention.
vSphere powers on the virtual machine.
The screenshot verification process works the same way except for Step 1, which involves manually starting up the virtual machine from the web interface. The naming convention for the virtual machine may also be slightly different.
Out of date VirtIO drivers on your guest VM can cause slow performance. See Installing VirtIO driver on an existing Windows virtual machine (external link) for information on updating the VirtIO driver.
NOTE We recommend disabling snapshotting on VMs in vmware, that are created using the virtualization via hypervisor feature. Enabling snapshotting on the VM host will cause production data to be written to vmware host, not the datto device. This will not effect the virtual machine functions, but can cause missing data when attempting to restore from the Rescue Agent snapshots.


