Syncing a USB RoundTrip drive with a Datto appliance
This article describes the procedure to synchronize a USB RoundTrip drive with a Datto device. For background on the RoundTrip process, see the RoundTrip Overview article.
For details on synchronizing a NAS RoundTrip with a Datto device, see Syncing a NAS RoundTrip drive with a Datto appliance.
For information on creating a Local Archive, using the roundtrip wizard, please refer to: Creating a local data archive.
Environment 
- Datto RoundTrip
Description 
If you are syncing the USB RoundTrip with a physical Datto appliance, skip to the Perform the RoundTrip sync section of this article. If you are syncing the RoundTrip with a virtual Datto appliance, proceed to the Configuration prerequisites for virtual appliances section of this article.

NOTE USB RoundTrips are not currently compatible with Microsoft Hyper-V environments. You can use a NAS RoundTrip device with a Hyper-V machine.
Ensure that you have enabled USB passthrough (external link) on the VMware environment that hosts your Virtual SIRIS.
Connect the USB RoundTrip to the server hosting the Virtual SIRIS.
Access the VMware management environment and select the Virtual SIRIS host.
From the inventory screen, right-click the Virtual SIRIS, and select Edit Settings.
On the Virtual Hardware tab, select USB Host Controller from the New device drop-down menu and click Add. The new USB controller will appear at the bottom of the Virtual Hardware device list.
Click OK.
Proceed to the Perform the RoundTrip sync section of this article.
NOTE If the VMware host does not detect the USB RoundTrip, reconnect the drive to either the upper left corner blade USB port on the server or to a known good USB port, such as one assigned to a mouse or keyboard. If the issue persists, ensure that your server meets the environment requirements described in USB Configuration from an ESXi Host to a Virtual Machine(external link) or contact VMware support to troubleshoot the controller.

Connect the Datto RoundTrip drive's USB cable into an available USB port on the Datto device.
Log into your Datto device's GUI and click the Synchronize tab.
If your appliance detected the USB drive, you will see a green Perform RoundTrip Sync button. If drive detection failed, the button will read, "Please attach a RoundTrip Drive."
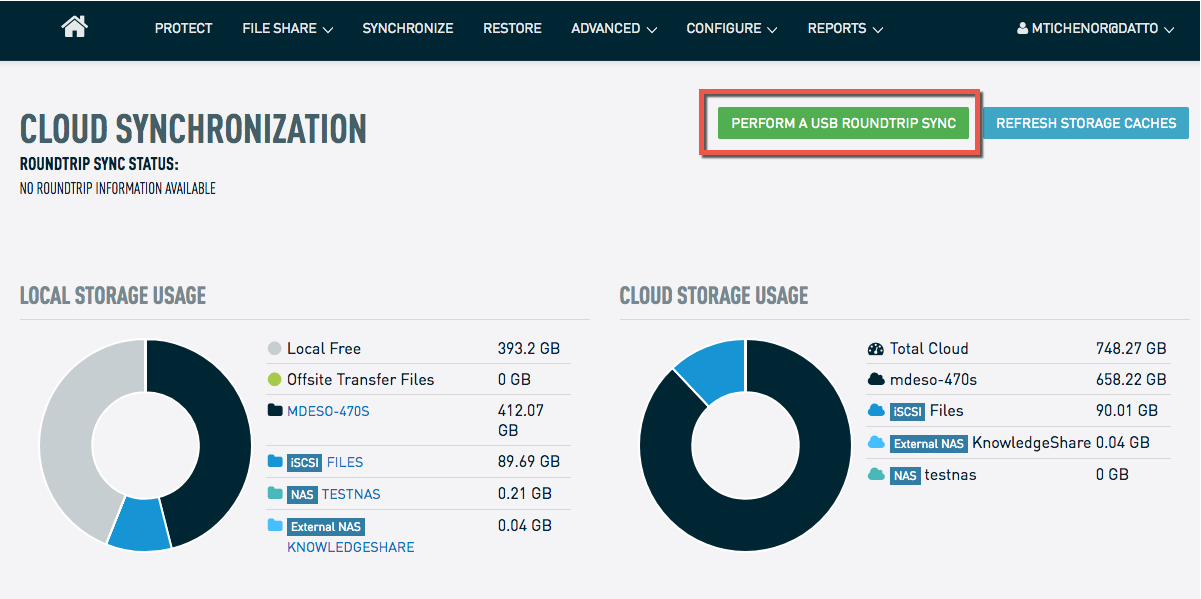
Click Perform a USB RoundTrip Sync. You will see the RoundTrip Wizard welcome screen. Click Next to continue.
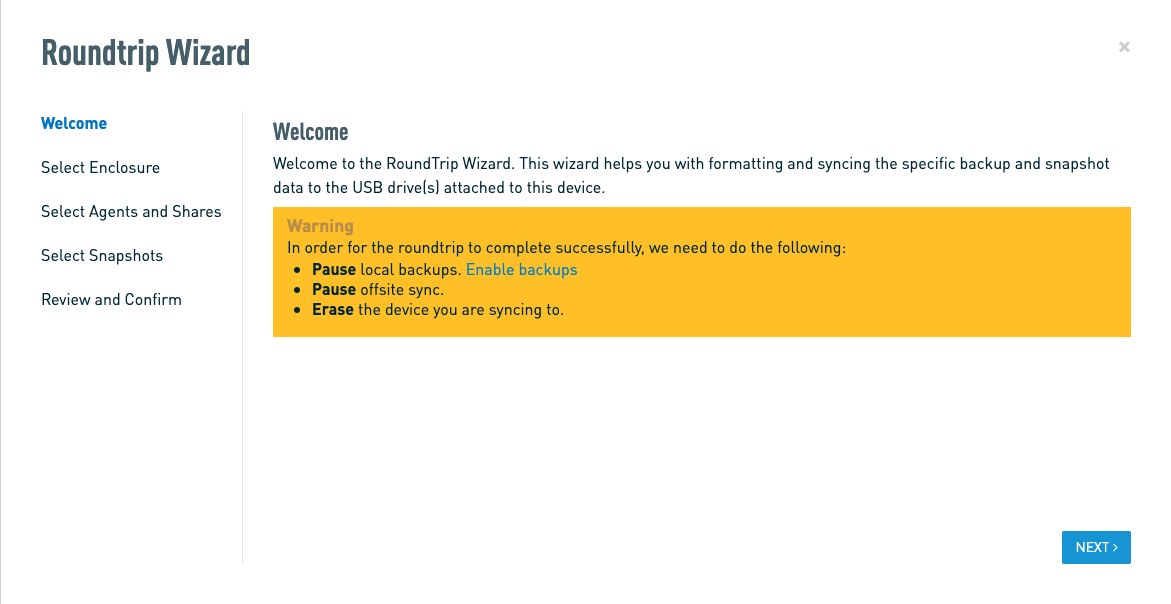
By default, the RoundTrip Wizard pauses all local backups for the duration of the sync. While you can override this setting, the sync may take longer to complete as a result. With backups paused, the average sync transfer speed is 15 MBps / 120 Mbps.
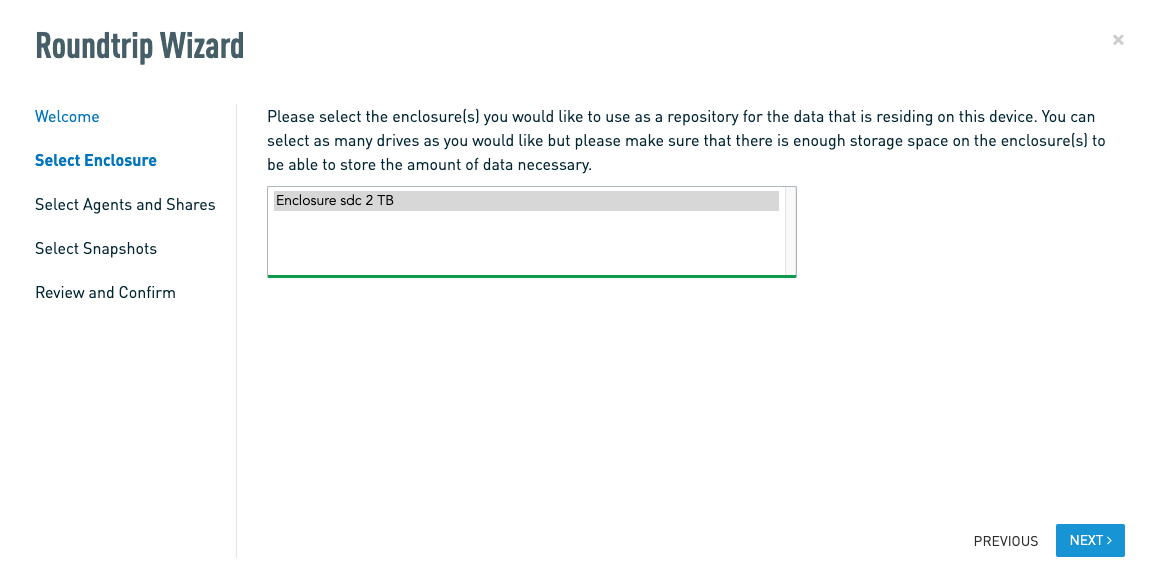
Select the enclosures (USB drives) you will use for the RoundTrip. To select multiple drives for a RAID 0, hold down CTRL and click the drives. Click Next to continue.
You will see the Select Agents window. Select the agents and NAS shares that you want to sync to the RoundTrip.
Define custom passphrase: This option allows you to set a custom passphrase for the drive encryption, which allows you to decrypt the drive, with support assistance, from any Datto device. This is recommended for a local archive or moving data to a SIRIS Private device. This option is not compatible with syncing to the Datto cloud. Selecting this option will expand with an entry window for the custom passphrase and a second entry to confirm. Do not lose this passphrase as support will be unable to recover it.
Roundtrip is for Cloud Sync: Unchecking this option stops the recovery points within this RoundTrip from syncing offsite. Do not uncheck this if you are syncing these points offsite.
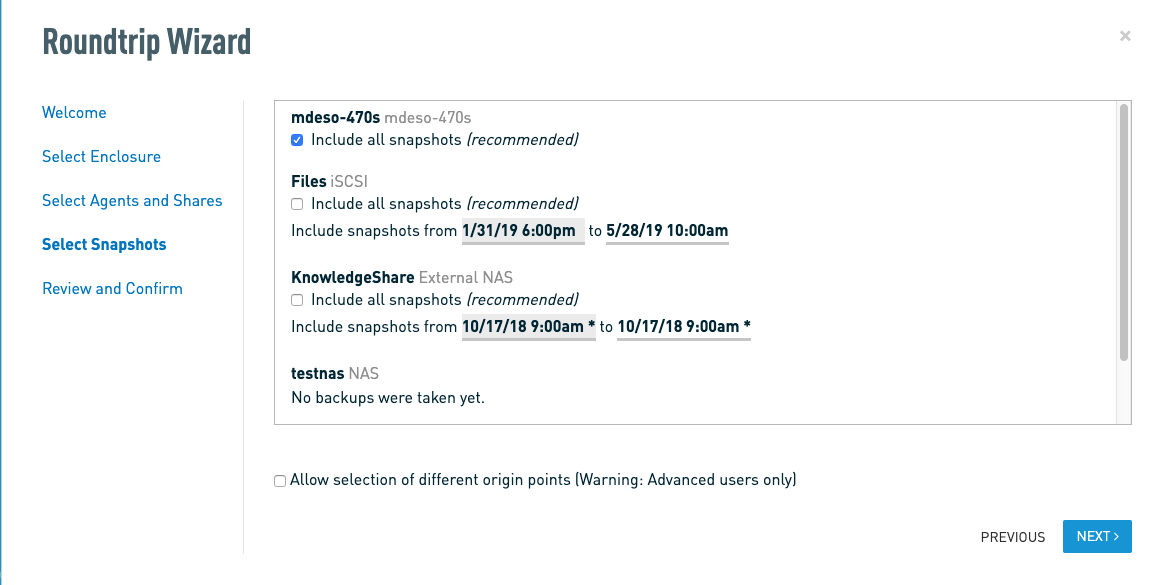
Select all snapshots: This option includes all snapshots for the selected agent(s) and is enabled by default. Uncheck this if you would like to manually select the snapshots to be included.
When ready, Click Next to continue.
If you unchecked Select all snapshots in the previous step, click the Agent or NAS (on the left) to select snapshots to sync to the RoundTrip (on the right). Click Next to continue.
Click Start RoundTrip to have the Datto device sync the specified information to the RoundTrip drive.
IMPORTANT Clicking Start RoundTrip will delete all data on the drives you selected for the RoundTrip process. It will also stop offsite synchronization, screenshots, and local backups (if not initially set) for the duration of the syncing process. If you restart the RoundTrip process with a drive containing existing RoundTrip data attached, all information previously synchronized to the USB drive will be deleted.
You will see the confirmation window Click the Start Roundtrip button to continue.
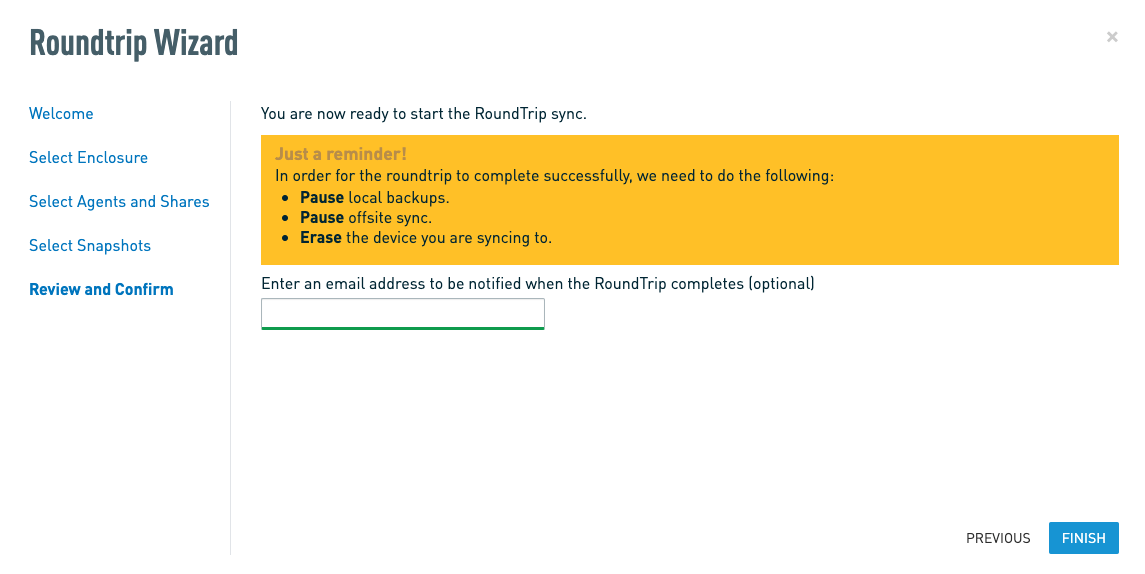
NOTE Entering an email address will send you a notification when the synchronization completes. To add multiple email addresses, separate each email address with a comma and no spaces.
Click the Close Wizard button. The device's GUI will update with "RoundTrip is running" and indicate the step it is on.
When the RoundTrip sync finishes, the left panel will update the Last RoundTrip timestamp, and you will see the Start RoundTrip button.
To check the status of the RoundTrip while it is running, access the appliance GUI and click the Synchronize tab. Your Datto device will report the RoundTrip's sync status.

When the RoundTrip Sync finishes, send the RoundTrip drive back to Datto to have the data synchronized to the Datto Cloud. You can find the return shipping label in the box the RoundTrip drive came in. The PO# field will match the serial number of the Datto appliance for which you ordered the RoundTrip.
If you misplace the label, email rtoperations@datto.com with your device information, Datto will email you a printable PDF return label.


