Configure Agent / System Settings Page
This article discusses the functions of the Configure Agent Settings tab of the Datto appliance GUI.
For systems protected by the agentless backup solution, this page will be named Configure System Settings. Its functionality is the same.
Environment
- Datto SIRIS
- Datto ALTO
Description
To configure the settings for an agent after pairing it with the device, access the Datto appliance GUI, click the Protect tab, choose the protected machine that you want to configure, and click the Configure Agent Settings or Configure System Settings link.
Basic
Pause Backups allows administrators to pause local backups. This option is useful if you are reconfiguring settings and do not want a backup to begin.
NOTE Pausing backups for an agent or share will not suspend its billing. To modify your billing plan, contact your Datto Sales Executive.
NOTE Default retention operations will continue to run on paused backups unless retention settings are modified by an administrator.
If you attempt to enable backups that have been paused by a Rescue Agent, you will see the following warning: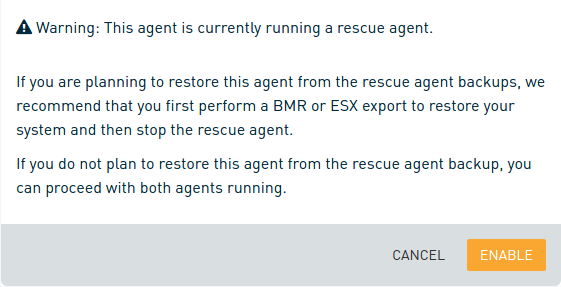
From this card, you can pause and resume offsite synchronization of locally-stored backups to the cloud. If you have subscribed to a SIRIS Private service plan, you will see a Pause Replication card here instead.
NOTE Cloud management options are not available on appliances with local-only billing plans.
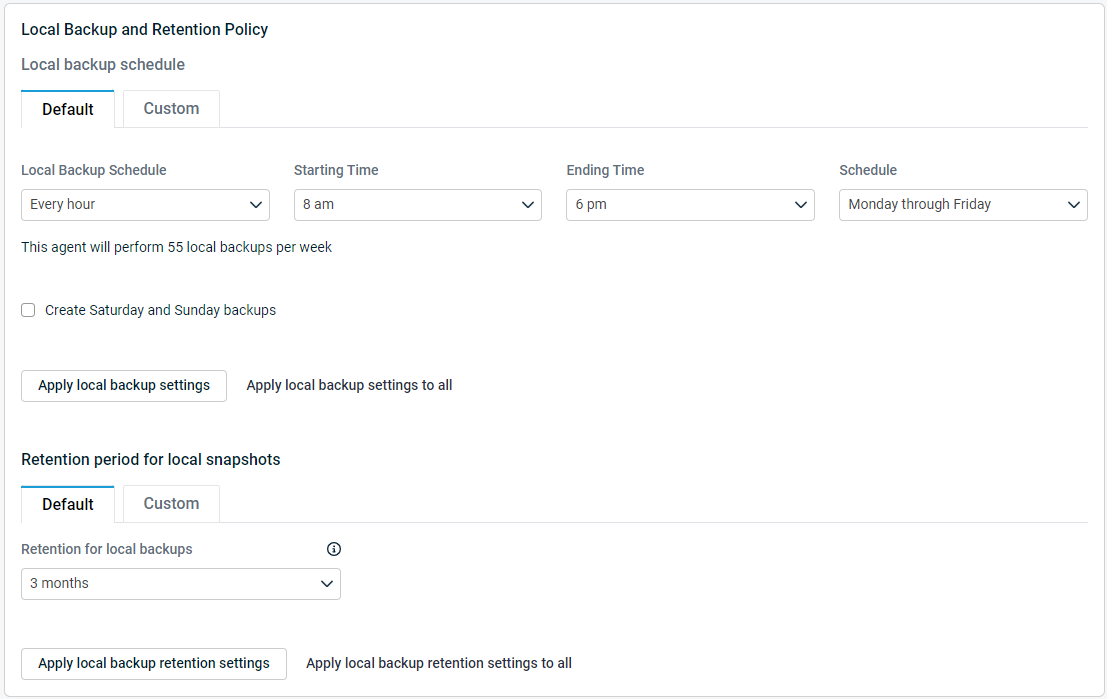
In this section, you set the interval and schedule for local backups. The default is to run hourly backups from 9 A.M. to 6 P.M. Monday through Friday, which results in 55 backups per week.
You can change any underlined settings in the Remote Web. Click an option to launch a drop-down menu.
- If you want to keep the same schedule on the weekends, click Monday through Friday, and change it to every day.
- If you would like a different schedule on the weekends, check the box that says: "In addition, Saturday and Sunday backups should be performed at." You will see available times for Saturday and Sunday backups.
- You must click Apply or Apply to All to save your changes. Apply to All will change the settings for all protected machines.
For a customized schedule, click the Custom settings link. In the custom schedule, you can select a custom schedule and interval for your backups. To save your changes, click Apply or Apply to All.
The default retention keeps local backups on the device for three months. You can change this by clicking the underlined option.
When retention runs, the default action for a protected system with no changes to its offsite sync or retention policies is to preserve consistent daily points for the last backup of the day, both locally and in the cloud.
NOTE Default retention operations will continue to run on paused backups unless retention settings are modified by an administrator.
By default, intra-daily backups are retained by the Datto solution for seven days. After seven days, your appliance keeps daily backups for one week. After one week, it holds weekly backups for one month. After that, monthly backups will remain for three months.
To set custom retention settings, click the Custom settings link.
You cannot set custom retention settings that exceed your overall retention policy. For instance, you cannot set retention to "Forever" if you are on a time-based policy.
To learn more about how retention works, see the article Understanding The Retention Process.
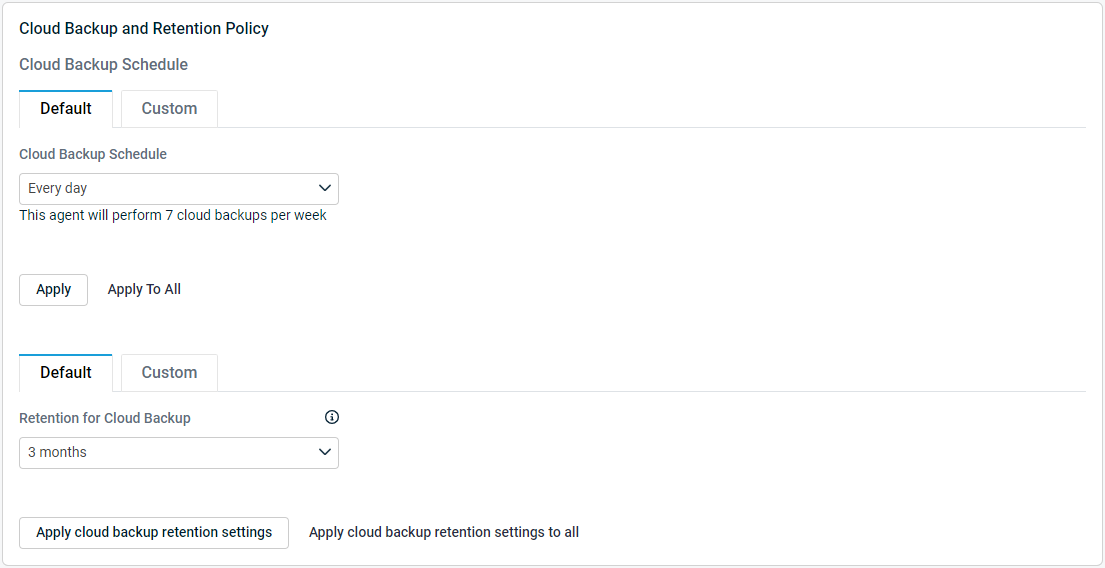
From this card, you can configure replication and retention schedules for snapshots replicated to the Datto Cloud. If you have subscribed to a SIRIS Private service plan, you will see a Replication and Retention Policy card here instead.
NOTE Cloud management options are not available on appliances with local-only billing plans.
By default, Datto appliances send the last point of the day offsite for protected systems with once-daily replication schedules. This schedule ensures that as retention runs, consistent points are retained by your appliance and by the Datto Cloud or, for SIRIS Private plans, your target SIRIS. Since it is the default schedule for screenshot verification, using the "Last point of the day" configuration delivers enhanced visibility about the integrity of the replicated snapshot.
If the last backup of the day fails for a protected system set to a "daily" offsite replication schedule, the appliance will send the latest successful snapshot of the day offsite. If there are no successful backups for the day, your device will not replicate anything to the cloud for that period.
To change the protected system's replication schedule, click the Custom settings link. Remember that offsite replication consumes bandwidth. You can set a sync priority for the agent to determine which agent's backups get sent to the Cloud or the target SIRIS first.
NOTE Remember to click Apply or Apply to All to save your changes.
Depending on the service plan of the device, you can change the default setting for Datto Cloud Retention (or in the case of SIRIS Private, retention on the target device) by clicking the highlighted dropdown. If additional settings are available, they will be under Custom Settings.
By default, cloud retention is controlled by the service plan the device is on. If the service plan of the device does not dictate cloud retention then the device will default as follows:
- Intra-daily backups are kept for seven days.
- After that, daily backups are kept for one week.
- After that, weekly backups are kept for one month.
- Finally, the monthly backups are deleted after 6 months.
For more details about the retention process, see the article Understanding the Retention Process.
Application Aware VSS with DBD fallback
This option allows you to pick which backup engine the agent will use for backups. The Datto device will attempt first to do a Microsoft Shadow Copy Provider or Datto Windows Agent VSS backup. If that backup attempt fails, then it will attempt a crash-consistent state backup using the Datto Backup Driver (DBD) VSS Provider. The Datto Windows Agent-protected devices, the Application Aware VSS option will fall back to DBD
Application Aware VSS & DBD Backup Engine
The Application Aware VSS setting refers to the use of the VSS provider, which interacts with supported applications to provide backups as the applications are running. Unlike the Microsoft Shadow Copy Provider, the backup provided by the DBD Backup Engine is not application-aware as it only provides a backup equal to that of a crash-consistent state. A crash-consistent state backup is comparable to the state that the system will be following after a hard reboot, such that data in processing may not save correctly. To learn more about VSS writers, see this article.
This option allows you to exclude backups on a volume-by-volume basis for the agent.
IMPORTANT By choosing to exclude volumes that contain system or boot information from your regular backups, you may inadvertently disable the ability to perform screenshot verification on all snapshots. If you decide to re-include the volume, the Datto appliance will be forced to take another full backup of it.
Verification
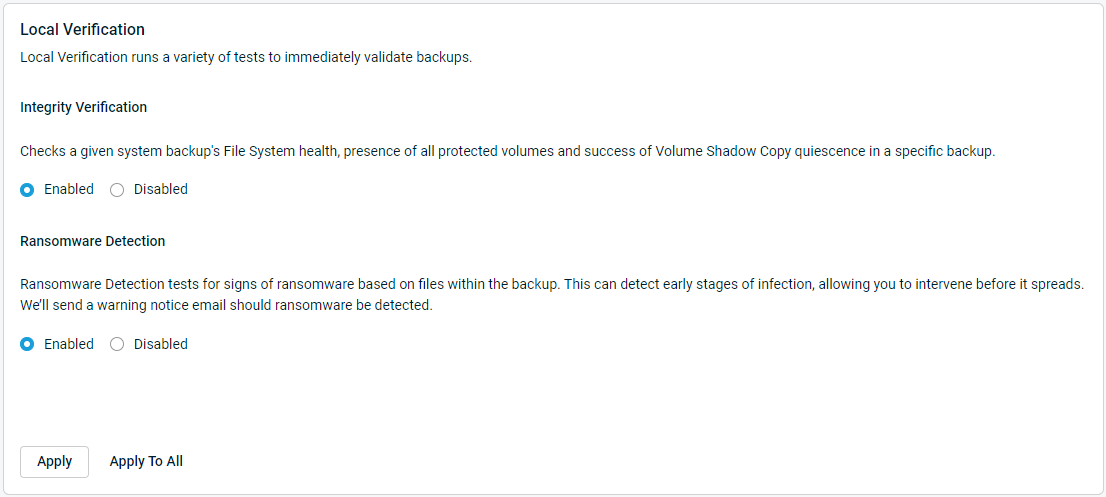
These options allow you to enable or disable the Integrity Verification and Ransomware Detection features.
The Integrity Verification feature checks the filesystem health of the protected system's backups, verifies the presence of all protected volumes, and reports the success of VSS quiescence for the snapshot.
Ransomware Detection tests your backups for signs of ransomware. Enabling this option can help you detect the early stages of a ransomware infection and allow intervention before it spreads. If potential ransomware is present, your Datto appliance will send a warning email, so ensure that you monitor your alerts closely. To learn more about ransomware detection, see this article.
This feature boots and takes a screenshot of specific recovery points created for the protected system. Screenshot verification is your peace of mind that the selected backup will boot successfully in a restore. By default, your Datto appliance will take a screenshot for any point scheduled to be sent offsite. Do not use this option if your Datto appliance does not replicate offsite.
You can also customize this feature to perform screenshots for the first recovery point of the day, the last recovery point of the day, or to follow a custom schedule.
During the screenshot process, your Datto appliance will create a locally-hosted screenshot verification VM. It will then attempt to take a screenshot when it detects that the virtualization has booted to the operating system's login screen. If the login screen is not showing in screenshots, increasing the Additional wait time value can allow the system more time to boot fully. To learn more about configuring screenshot verification, see this article.
Application Verification works in conjunction with Screenshot Verification to analyze the application integrity of a selected snapshot by detecting that specified applications have started correctly.
If enabled, Application Verification will run during the protected system's screenshot verification process. It will wait until the screenshot VM enters a ready state, and then check the virtualization to ensure that the applications you select here are started and in a ready state. The results of this check will report on the Manage Recovery Points page. To learn more about Application Verification, see this article.
The Service Verification feature works in conjunction with Screenshot Verification to analyze the service integrity of a selected snapshot by detecting that specified services have started correctly.
From the Service Verification configuration panel, you can choose one or more services that the Datto appliance detects on the production machine for testing during the screenshot verification process. Your Datto appliance will wait until the screenshot VM enters a ready state, and then check the virtualization to ensure that the services you selected here are started and in a ready state. The results of this check will appear on the Manage Recovery Points page.
To learn more about Service Verification, see this article.
This feature allows you to use scripts to perform advanced verification of the quality of your backup. For example, a script could open a SQL Server database and validate that a particular table existed. At the schedule defined, the system will execute your scripts in the order they are uploaded below and return positive or negative results. If a script returns a negative result, this will trigger a warning notice.
To learn more about configuring backup verification scripts, see this article.
Reporting & Alerting
This feature allows you to configure email alerting for your Datto appliance. You can subscribe to notifications for screenshot verification testing, weekly backup reports and warnings, critical errors, and log digests on an individual basis.
To learn more about configuring Alert, Warning, and Log Digest emails, see this article.
This reporting feature will send you a notification error email if screenshot verification does not occur for the selected system within a designated number of hours. Setting a threshold of '0' will disable the alert.
To learn more about configuring Alert, Warning, and Log Digest emails, see this article.
Advanced
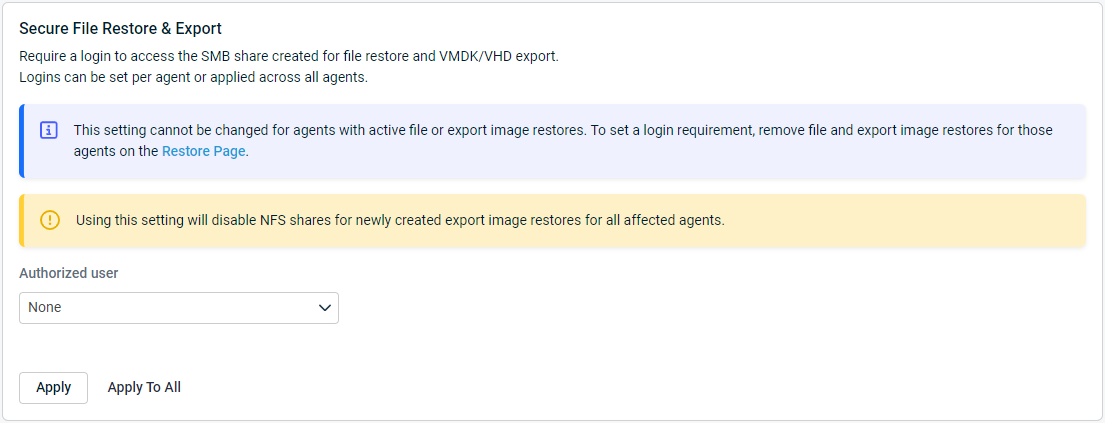
Ensures that file restores and VMDK/VHD exports mounted on the Datto appliance are not accessible to anyone else on the local network. The drop-down box lists available users that can be given access to the appliance's SMB shares to access its restore data. You can add users through the Local Users page of the appliance UI.
NOTE By default, this option is disabled, which means that the restores will be shared on the network, but will not be browsable if someone browses to the Datto appliance on the network by hostname.
If the selected system uses backup encryption, enabling temporary troubleshooting access will unseal the dataset for a period of six hours, allowing a technician to perform operations on the Datto appliance such as restores and reboots without the need to know the encryption passphrase or to have an authorized keyholder enter it for each restore or reboot operation.
For security purposes, the Temporary Troubleshooting Access option will only appear when accessing the Datto appliance's GUI through the Partner Portal; the option will not appear when logging into the device locally.
To learn more about this feature, see our Temporary Troubleshooting Access article.
The VMX configuration file of VMware-hosted virtual machines is automatically backed up on agentless systems. This feature allows you to also back up the VMX file on virtual machines that are using the Datto Windows Agent.
The VM Configuration Backup feature has the following requirements.
- There must be a valid hypervisor connection to the host on which the DWA-protected VM is running.
- The VM must have a unique BIOS UUID.
- The DWA Agent version must be 2.1 or newer.
To enable this option, check the Backup VM configuration file box. You'll only see this option for virtual machines protected by the Datto Windows Agent.
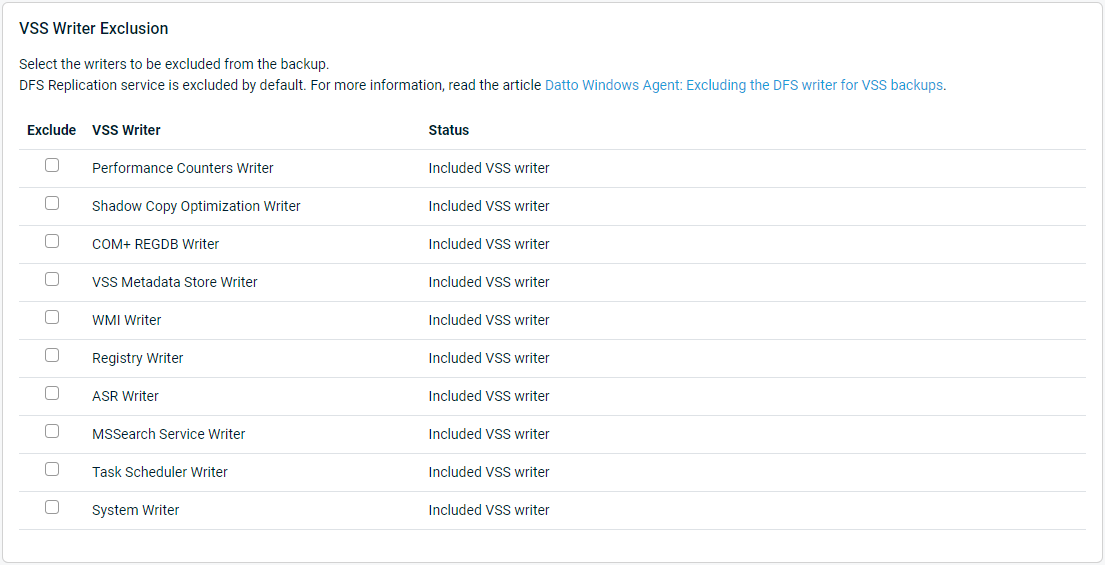
This feature allows you to exclude specific VSS writers from being used by the Datto appliance during the agent's backup. See this article for more information about excluding VSS writers.
This setting changes the storage controller to use when virtualizing the protected system in VirtualBox, KVM, or ESXi. AHCI SATA is the default setting because the Datto device injects this SATA Controller driver into the boot configuration of the backup.
See this article for more information regarding configuring virtualization options.
This option selects the type of NIC driver to use in the virtual environment. Useful during disaster recovery situations, you can also leverage this feature to test the network functionality of a backup VM. Options are available for VirtualBox, KVM, and ESXi virtualization.
See this article for more information regarding configuring virtualization options.
This option allows you to choose between the default VGA driver and the legacy Cirrus video driver on Ubuntu 16.04 devices running the KVM virtualization platform.
See this article for more information regarding configuring virtualization options.
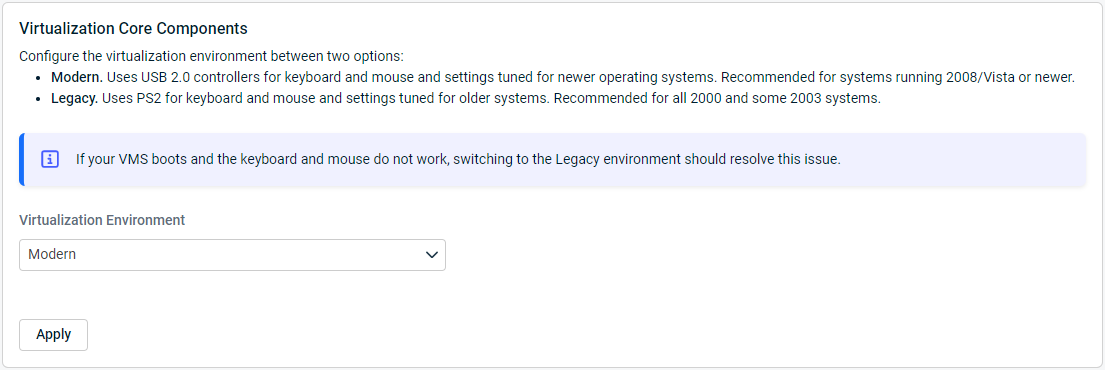
This option helps to determine the use of USB or PS/2 drivers for the mouse and keyboard in the virtual environment.
The default is Modern Virtualization Environment, which uses drivers for the virtual USB mouse and keyboard. The Legacy Virtualization Environment uses drivers for the virtual PS/2 mouse and keyboard.
If a virtual machine experiences trouble with control of the keyboard or mouse, stop the VM and switch to the Legacy Virtualization Environment.
See this article for more information regarding configuring virtualization options.
The snapshot timeout option determines the time allotted to the Volume Shadow Copy service before it times out. The default setting is 15 minutes. If an agent requires more than 15 minutes for VSS to return information, then there is usually an issue with communications between one or more of the agent services on the protected machine and the appliance. There may also be an issue with the backup agent software installation or a problem with the protected system. You can learn more about this feature here.
Forcing a differential merge forces a re-association of backup increments. With this option selected, the agent's next backup traverses all protected volumes, and only create a backup consisting of the changes since the last backup. It will take the time of a full backup, but it will not take the space of a full backup. See this article for additional information about forcing a differential merge.
Clicking the Force Retention button immediately applies the device's retention policies for the agent to its local backups. Learn more here.
Clicking the Repair Agent Communications button instructs the Datto appliance to attempt to recreate the secure key pair between the agent and the device. Doing so can fix common agent communication errors. You can find more information about this feature here.
The Rename Agent feature allows an operator to change the IP address or FQDN that a Datto appliance uses to connect to a protected system. This option is useful in situations where a protected system has a new IP address or hostname. Learn more here.
If an agentless system has migrated to a new host, you will need to update the connection information that the Datto appliance uses to reach the protected system if you wish to continue its backups. Clicking Reassign System will cause your Datto appliance to audit all of its configured hypervisor connections for available virtual machines, and allow you to select the new host from a list of the systems it detects. Learn more here.
The Archive Agent feature lets you convert an agent's backup chain to a read-only archive, stopping future backups and lets you (optionally) re-protect the agent with the Datto appliance to start a new backup chain. Use the archive agent feature when you no longer wish to continue writing backups to a specific dataset, but you would like to preserve the agent's data locally for future use.
- Archived agents count against the device's total agent limit. See the Archived Agent article for more information.
- Any offsite data for archived agents will count against your appliance's total offsite data quota. Any device on per-agent billing will continue to be billed for the archived dataset until you delete the agent locally and offsite.
You can control the display of archived agents on the Protect tab of the Datto appliance GUI by using the Hide / Show Archived toggle. Learn more here.
IMPORTANT Archiving an agent is irreversible. Only use this option if you do not need to add additional snapshots or screenshots to the backup chain. You will be unable to re-pair the archived dataset with the protected machine in the future. An archived agent will retain all of the restore functionality that it had when it was an active dataset.
The Agent Templates feature has been disabled and is no longer available by default. If you need to re-enable it, please contact our support team.
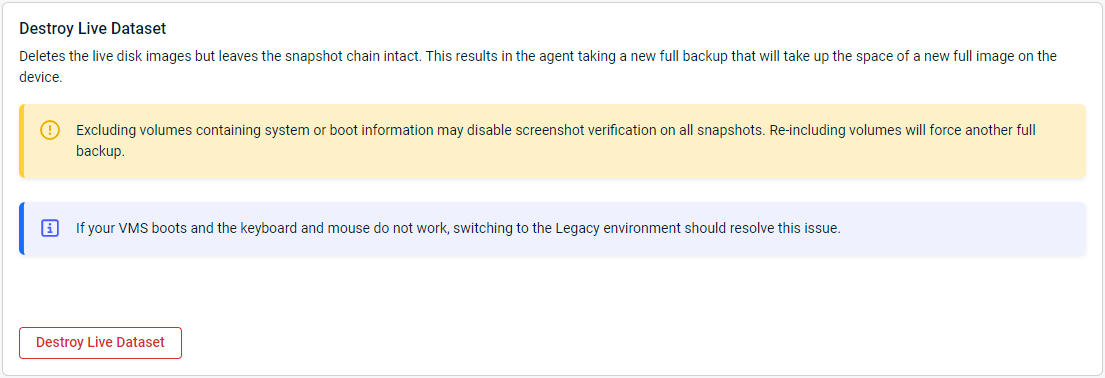
This function immediately destroys a backup agent's live dataset from your Datto appliance. It will stop any backups in progress, and delete the agent's live disk images, but it will leave the snapshot chain intact.
Using this feature will result in the agent taking a new full backup, which will take up the space of a new full image on the device. Only use this option if this protected machine's disks have been re-sized, or the protected machine's disk image is irreparably corrupt. Review Destroy Live Dataset before using the Destroy Live Dataset feature.


