Device Auxiliary / Secondary NIC settings
This article describes the uses and configurations of auxiliary NICs on the datto device.
Environment
- Datto SIRIS
Description
This article shows you how and why to use the auxiliary NICs of a Datto device. Full networking requirements and a breakdown of the settings in the Network Configurations page are covered in the Additional Resources section.
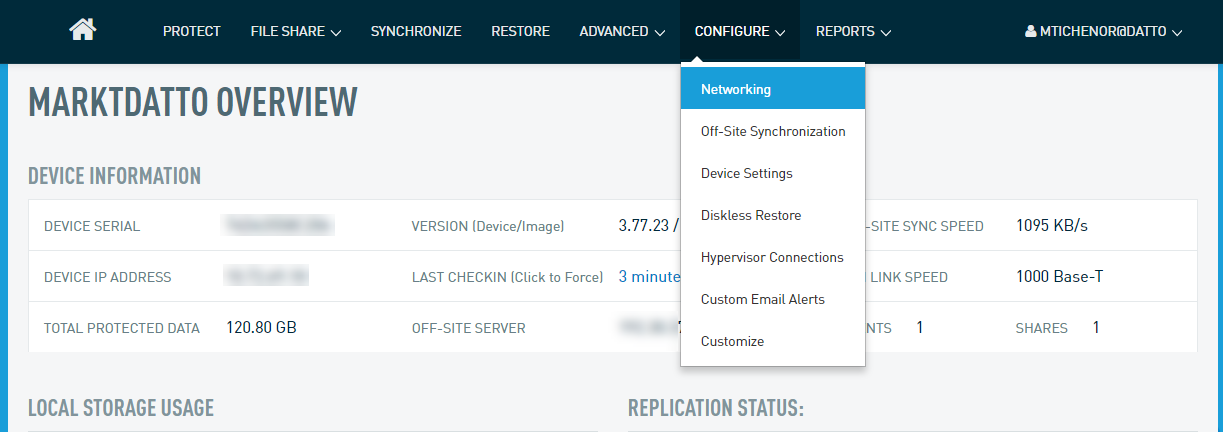
To configure a Datto device's networking, click on the Configure tab in the device GUI, Then, select Networking from the drop-down menu.
Use Cases
Auxiliary NICs are used for the following operations:
- NIC bonding
- Protecting of machines on a separate subnet from the primary connection with no route in place
- Separate NIC for a virtual machine hosted on the Datto appliance
- Connecting to other Datto devices directly for a NAS Roundtrip or a device migration.
Best practices for auxiliary NICs on Datto SIRIS devices:
- Connect only the NICs intended for active use.
- Do not enable NICs without a network connected; enabling and configuring unconnected auxiliary NICs may cause networking issues.
NOTE Hyper-V virtualizations cannot use the auxiliary NIC for their offload method; they must use the primary NIC.
Network Interface Card (NIC) Bonding is the ability to increase bandwidth or reliability by combining two NICs so they appear to be the same physical device and share the same MAC address.
While it's technically possible to configure a bond remotely, it is not recommended as the device can lose connectivity. Datto also recommends that you configure IPMI before configuring NIC bonding if your appliance supports it.
NOTE If the device loses connectivity due to any changes made when configuring a Bond, those changes will be automatically rolled back after a few (3-5) minutes.
Requirements
- Two available ports on a Layer 3 managed switch that supports link aggregation.
- A partner technician must be onsite during the configuration.
- If possible, the Datto should have IPMI configured so if the bond configuration has any issues, the device can still be accessed.
Bond Mode
A bond mode is a policy that you can set to control how the two network interfaces are used during network transmission. You can choose one of three Bond Mode options via the Networking Configuration page for your Datto device.
Round-robin (balance-rr) - Default Policy
Round-robin policy. Transmits packets in sequential order from the first available slave through the last. This mode provides load balancing and fault tolerance. Round-robin is the default mode unless another is specifically selected.
Active-backup
Only one slave in the bond is active. A different slave becomes active only if the active slave fails. The bond's MAC address is externally visible on only one port (network adapter) to avoid confusing the switch.
IEEE 802.ad Dynamic link aggregation (802.3ad)
Creates aggregation groups that share the same speed and duplex settings. Utilizes all slaves in the active aggregator according to the 802.3ad specification(external link).
When creating NIC Bonds, Datto recommends using the IEEE 802.ad Dynamic link aggregation (802.3ad) mode to avoid potential issues with connecting to virtualizations in disaster recovery scenarios.
NIC bonding will only increase the total throughput of the device when using the link aggregation mode and a switch that supports it. All methods can be beneficial for reliability/redundancy, in the event that something happens to one or more NICs, network cables, or switches
Configuring a Bonded interface
In the Datto appliance GUI, navigate to the Configure > Networking tab.
On the Network Configuration page, scroll down to the Bonded Interfaces section.
Select the Bond Mode you want to use from the dropdown menu.
Select the interfaces to be bonded together, and click Create Bond.

Once the Bond settings for the NICs has been applied, refresh the page by clicking the Network tab. The new bond will be configured by default for DHCP. Datto recommends only configuring a Bond on a network with an active DHCP server.
Confirm the new settings for bond0 are correct and reboot the device. Leave the secondary NIC disconnected until the device is back online.
Once the device is up and checking in again, plug the second cable in from the auxiliary NIC to the switch.
NOTE When disabling a NIC bond, you will need to reboot the Datto appliance after saving your settings for the new changes to take effect.
It is not recommended to keep multiple NICs active on the same LAN when not using the bonding feature, doing so can cause an issue known as arpflux that may have adverse effects on the network connection.
While Datto devices can bond all NICs identifiable by the operating system, it is recommend to leave at least one NIC free for auxiliary tasks involving NIC-to-NIC transfers, such as device migrations and NAS RoundTrips.
If a Datto device needs to communicate across multiple subnets to protect various machines, you can configure it to do so with the use of the auxiliary NICs. The subnet of the systems you are backing need to be same the subnet as the NIC of the datto device.
The NIC to NIC connection refers to connecting the device through an auto-negotiated secondary network interface card. You can use this procedure during the NAS RoundTrip process and when doing Device Migrations, to achieve faster speeds than a standard LAN connection.
For more information on the two scenarios, refer to the following:
Process
- Source Device: the device that you're transferring data from.
- Target Device: the device that you're transferring data to.
Power on both the Source and Target Devices.
Connect both Source and Target devices to the LAN through their primary NICs to get outbound connectivity to Datto's monitoring servers.
Connect the Source Device physically with an Ethernet cable, directly into the Target Device through each auxiliary NIC.
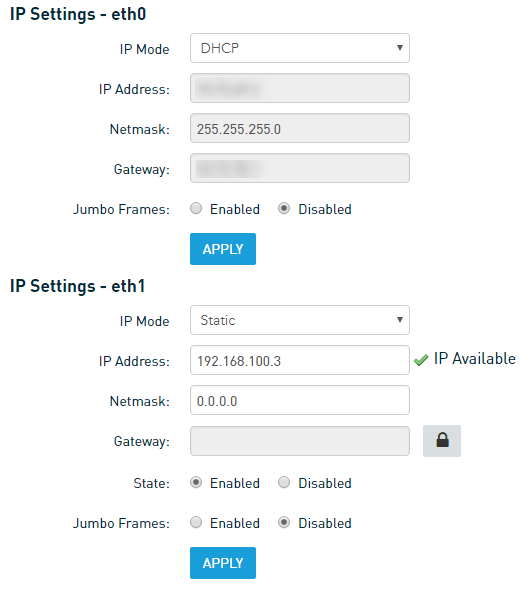
Configure the connected NICs to a IP scheme not used by any other connected LAN through the UI of the Datto Devices.
Once enabled, if DHCP is chosen it should default to a 169.254.0.0/16 address.
Alternatively a static IP address can be chosen.
The RoundTrip NAS can now be then done through the UI of the device or the migration can be started by technical support.


