Protect a System
This article describes the Protect a System wizard.
Environment 
- Datto SIRIS
- Datto ALTO
Description
The Protect a System wizard allows you to pair one or more production systems with your Datto appliance for backup and disaster recovery protection. You can access the wizard from your Datto device's GUI.
NOTE The workflows described in this article do not apply to the protection of external NAS shares. To back up a NAS share, see our Getting Started With NAS Guard article.
Prerequisites 
Before pairing a new system, you will need to configure it for communication with the Datto appliance.
- For agent-based endpoints, follow the article that matches your protected machine's operating system:
- If you would like to learn how to back up a virtual machine without installing agent software, see our Getting started with agentless backups article.
- If you wish to protect a virtual machine that is running an operating system that you cannot back up using Datto's standard agent-based or agentless methods, follow the Universal VM Backup article.
Procedure
From the Remote Web for your Datto appliance, open the Protect tab.
Select + Add a New Agent in the top right of the page. If this is the first agent on the device, it will open the Protect a System wizard directly.
NOTE If your device has reached its agent limit, you will not see the Add a New Agent button. For further information, see Agent limits on BCDR devices
You will see the Protect a System window. If you are adding an agent-based system, click Protect agent-based system.
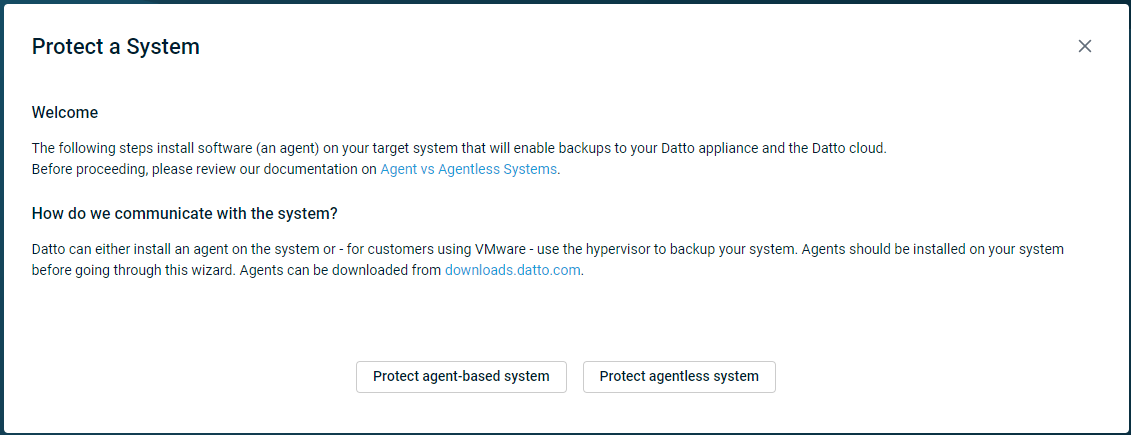
To pair a system agentlessly (or with Universal Backup ), see the Pairing a Target System for Agentless Backups article.
The Select System(s) screen will appear, and the wizard will prompt you for the following information:
Hostname or IP Address: Enter the address of the machine that you would like to protect. You can protect multiple systems by entering each IP address or hostname, separated by commas. Alternatively, you can use the Import multiple systems to back up option to import a list of IP addresses or hostnames from a file. The file must be in the Comma-separated values (CSV) format.
Agent Settings: This option allows you to use the backup settings from another system already paired with your Datto appliance. If you do not wish to copy settings, select Use new settings. You will be prompted to enter settings in the Agent Creation stage of the process.
Encryption This option allows you to encrypt the backups for the new agent. If you choose the Encryption Backup option, you will be prompted to create a decryption passphrase for the agent. See Getting Started with Backup Encryption for important information about encrypting backups on a Datto appliance.
- Encrypted agent backups are not compressed and so may take up more space.
- Restores of encrypted agents can take longer than non-encrypted agents.
NOTE If you are protecting multiple systems, the settings you choose in this stage and during the Agent Creation stage will apply to all agents you have selected.
FIPS mode This option is available for encrypted agent based pairings when the Datto devices is in FIPS mode. It provides increased security and compliance measures. For more information on FIPS mode and the requirements, please refer to Federal Information Processing Standards (FIPS) .
When you finish configuring settings, click Next. The Datto appliance will pair itself with the protected systems you selected.
When the Local Backup screen appears, use the dropdowns in the Set the interval and schedule for local backups fields to configure backup schedules for all machines protected by your Datto appliance.

If you would like your protected systems to back up on weekends, check the box next to the Create Saturday and Sunday backups field, and select a weekend backup schedule for the agents.
Use the Set the retention for local backups option to configure the retention policy for this agent. See Understanding the Retention Process for an overview of how retention works on a Datto appliance.
When you finish configuring settings, click Next to continue.
Next, you'll have the opportunity to configure the frequency with which your Datto appliance replicates backups to the Datto Cloud or another SIRIS device. The following steps depend on the type of service plan that you purchased for your appliance. Select a service plan type to continue:
 Devices on Cloud Replication Plans
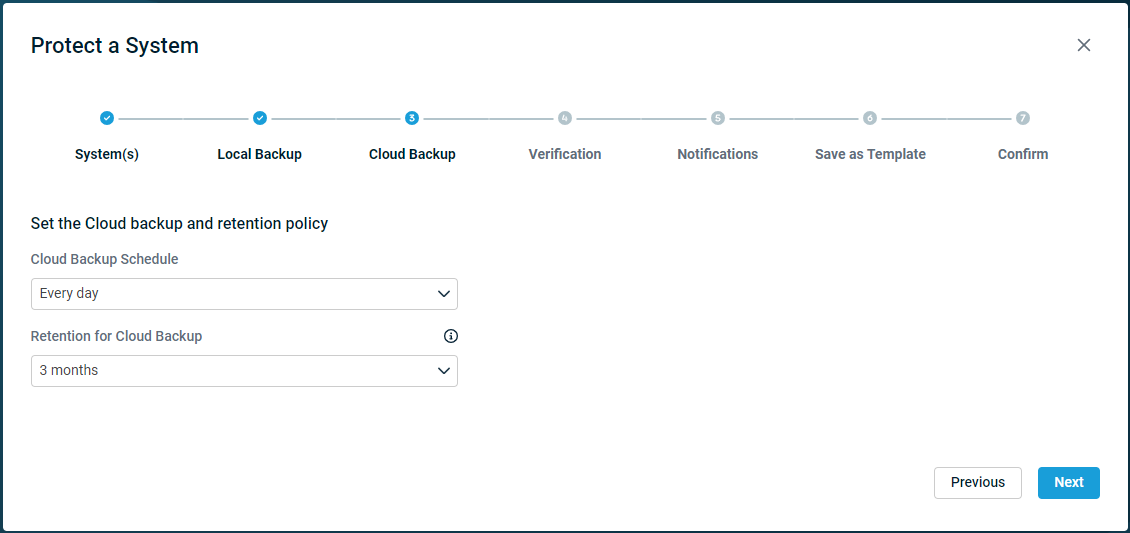
Configure the Cloud Backup and Retention Policy options. Then, click Next.
Devices on SIRIS Private Plans
Configure the Replication Location options, to your desired settings.
Selecting No Replication will disable snapshot replication for the new system(s).
Selecting Target SIRIS will allow you to specify the authorized Datto appliance on your LAN or VLAN to which you'd like your SIRIS to replicate backup snapshots of the new system(s). You must have at least one authorized target SIRIS in your environment for the Select Authorized Target SIRIS dropdown to populate.
Set the Interval and Schedule for Replication and configure your Retention for Replication preferences. Then, click Next.
Configure the screenshot verification schedule, and click Next.
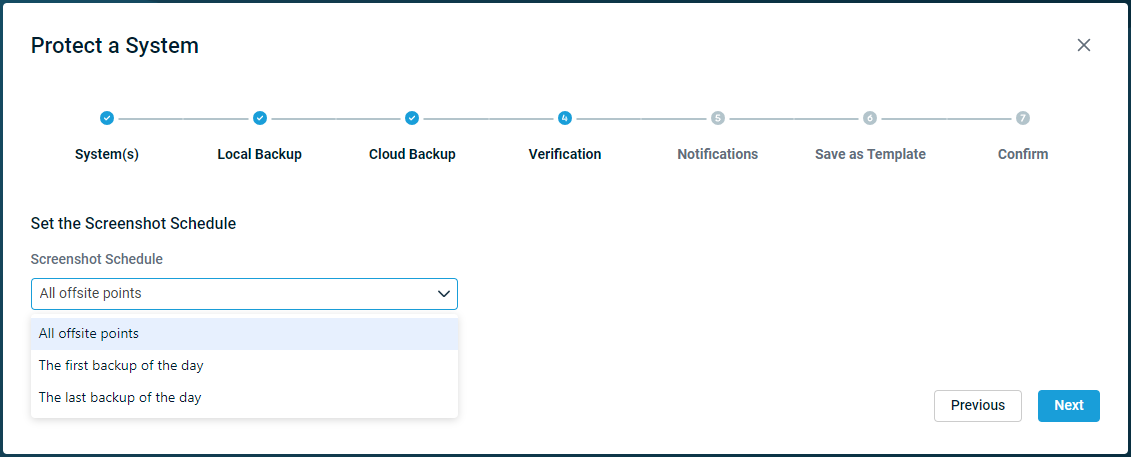
NOTE The default screenshot schedule setting is All Offsite Points; do not use this option if your Datto appliance does not replicate to a Datto Cloud server or a target SIRIS.
NOTE Screenshot verification is not available for Universal VM Backup.
Configure your email notification preferences for the protected system(s). See Configuring Alert, Warning, And Log Digest Emails On A Datto Appliance for more information about this feature.

Your Datto appliance will display a summary of the configurations you requested. Click Finish to commit the changes.
You will be redirected to the pairing status page. As the wizard pairs each system, it will report the outcome of the pairing attempt in the Status field. Once pairing completes, you can select Return to Agent Overview to return to the Protect tab of your Datto appliance's GUI, where you will see entries for the newly-added agents, or you can select Pair Additional Systems to protect additional production machines with your Datto appliance.
Troubleshooting
During the agent pairing process, you may see one or more of the following alerts. Follow the steps provided to resolve any notifications you may receive.
Your Datto appliance sees an existing backup chain for the protected host, but it cannot pair with it because a different agent type created it.
This error message indicates that pairing with the protected system was successful, but the production machine must be rebooted to finalize its agent software install before backups can begin.
You may encounter this error state if the Datto appliance cannot reach the protected system by its hostname or IP address. This error can also occur if you have not installed the Datto Windows Agent or the Datto Linux Agent on the production machine and rebooted it before attempting to pair the protected system.
If you see an "Agent Add Fail" error, the issue may be transient. You can force a retry by clicking theFinishbutton again. If you continue to experience pairing errors, make sure that the configuration of the target machine meets the Datto Networking Requirements, and attempt to pair the agent again.
If you have tried all of the above steps, and are still unable to pair the agent, contact Datto Technical Support.


