Re-purposing or decommissioning a Datto BCDR device
This article covers the recommended process and best practices when re-purposing or decommissioning a Datto BCDR device.
Environment 
- Datto SIRIS
- Datto ALTO
- Datto NAS

NOTE Ensure the Datto appliance is still checking in before performing the following steps. Click here to troubleshoot any check-in errors before continuing.
Change the device hostname to something generic and non-customer-specific. Typically, Datto appliances ship with the name backupDevice. This can be done from the Configure > Networking tab of the Remote Web.
Remove any restores, including file restores, image exports, and virtualizations, from the Recovery Launchpad in the Partner Portal.
Remove all restores, including file restores, image exports, and virtualizations, from the Restore tab in the appliance's Remote Web. You will not see the removal option if there are no active restores; in this case, move on to the next step.
Remove all agents from the device. Performing this step will irreversibly delete all local and offsite data for the agents.
Delete all NAS shares from the File Share tab in the Remote Web. If there are no NAS shares, move on to the next step.
From the device's Remote Web, run the Dataset Cleanup feature to remove any remaining data not deleted by the other steps.
In the Partner Portal, click Manage Organizations, then delete the organizations from the device. If there are no organizations, move on to the next step.
Run an Offsite Audit to ensure no cloud data exists on the offsite servers associated with the device. For information on how to run the audit and understanding the results, refer to Datto Partner Portal: Offsite Audit Report.
Replace all Local Users with a single administrator account.
Change the network settings back to DHCP to prepare for redeployment. You can do this from the Configure > Networking tab of the Remote Web.
To associate the Datto device with a new organization, see Manage company and organization users.
Use this process if you intend to cancel service and stop using an appliance entirely with no intention of re-deploying it. Resetting the device to factory settings does not cancel recurring service, and does not decommission it.
Remove all restores, including file restores, image exports, and virtualizations, from the Recovery Launchpad in the Partner Portal.
Remove all restores, including file restores, image exports, and virtualizations, from the Restore tab in the appliance's Remote Web.
Remove all agents from the device. Performing this step will irreversibly delete all local and offsite data for the agents.
Delete all NAS shares from the File Share tab in the Remote Web.
From the Remote Web of the Datto device, run the Dataset Cleanup feature. Doing so will remove any remaining data not deleted by the other steps.
Run an Offsite Audit to ensure no cloud data exists on the offsite servers associated with the device. For information on how to run the audit and understanding the results, refer to Datto Partner Portal: Offsite Audit Report.
You can cancel service from the Kaseya Store. For information on this please refer to: Subscription Management FAQs.
Canceled devices are automatically hidden from the BCDR Portal status page. For information about management and data retention after service is canceled, refer to: Service cancellation.
To stop a device from reporting:
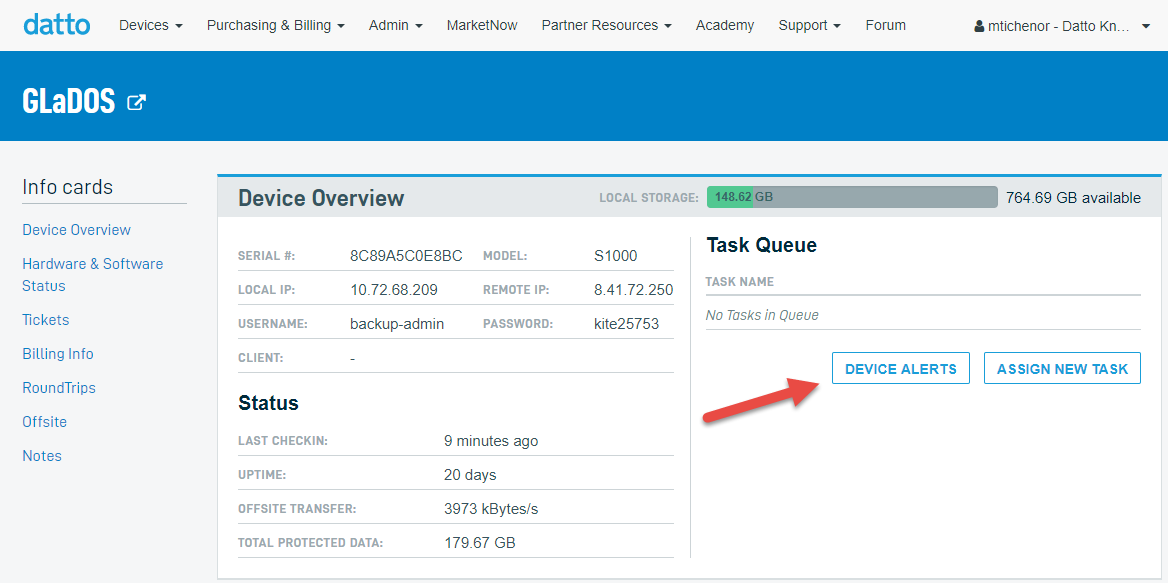
Log in to the Partner Portal.
Choose the Devices drop-down menu and select BCDR Status.
Select the device from the list.
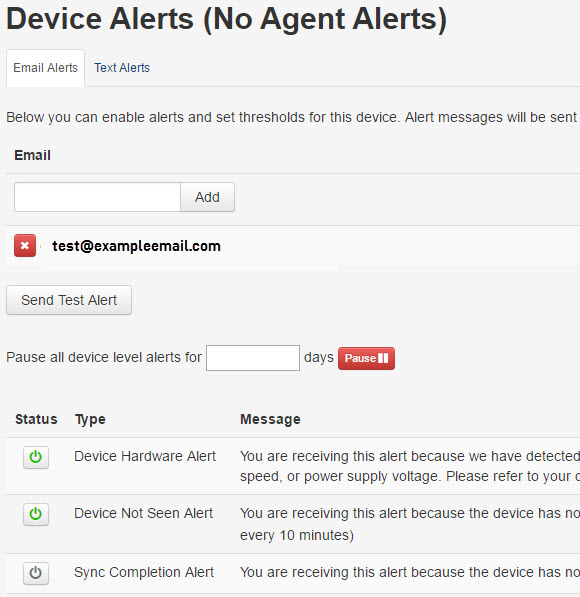
Under Task Queue, click the Device Alerts button.
There, alerts can be toggled on and off, as well as an option to pause all of them for a specified amount of time.